Avent SCD630/26 Kasutusjuhend

Kategooria
Beebitelefonid
Tüüp
Kasutusjuhend

See käsiraamat sobib ka

SCD841
SCD843
SCD845
SCD630
English 6
Čeština 35
Eesti 64
Hrvatski 92
Magyar 121
Български 151
Русский 182
Українська 213
Қазақша
243
English
Introduction
Congratulations on your purchase and welcome to Philips Avent! To fully
benefit from the support that Philips Avent offers, register your product at
www.philips.com/welcome.
The Philips Avent video babymonitor provides you with round-the-clock
support and it allows you to see your baby day and night from anywhere in
the house. The latest digital technology guarantees clear sound and the
clearest image of your baby. This gives you an additional sense of security
without entering your baby’s room and disturbing its sleep.
General description
1 Parent unit
2 Sound level lights
3 Display
4 ECO light
5 Battery status light
6 Link light
7 Speaker
8 Control button (menu navigation/volume/brightness)
9 Menu button
10 Lullaby button
11 Talk-back button
12 Microphone
13 Socket for power adapter
14 Mode button
15 On/off button
16 Antenna
17 Belt clip
18 Baby unit
19 Camera
20 Power on light
21 Lullaby on/off button
22 Nightlight
23 Microphone
24 Nightlight on/off button
25 On/off slide
26 Antenna
27 Speaker
28 Socket for small plug
29 Screws
30 Temperature sensor
31 Wall mounting holes
32 Adapter(2x)
Important safety information
Read this important information carefully before you use the appliance and
save it for future reference.
6
English
IMPORTANT
This baby monitor is intended as an aid. It is not a substitute for
responsible and proper adult supervision and should not be used as such.
Never leave your baby alone in your home. Always make sure there is
someone present to look after the baby and take care of its needs.
Disclaimer
Please note that you use this baby monitor at your own risk. Koninklijke
Philips N.V. and its subsidiary companies are not responsible for the
operation of this baby monitor or your use of it and therefore do not accept
any liability in connection with your use of this baby monitor.
Danger
-
Never immerse any part of the baby monitor in water or any other liquid.
Do not place the appliance where water or any other liquid can drip or
splash onto it. Never use the baby monitor in moist places or close to
water.
-
Never put any object on top of the baby monitor and do not cover it. Do
not block any ventilation openings. Install according to the
manufacturer’s instructions.
-
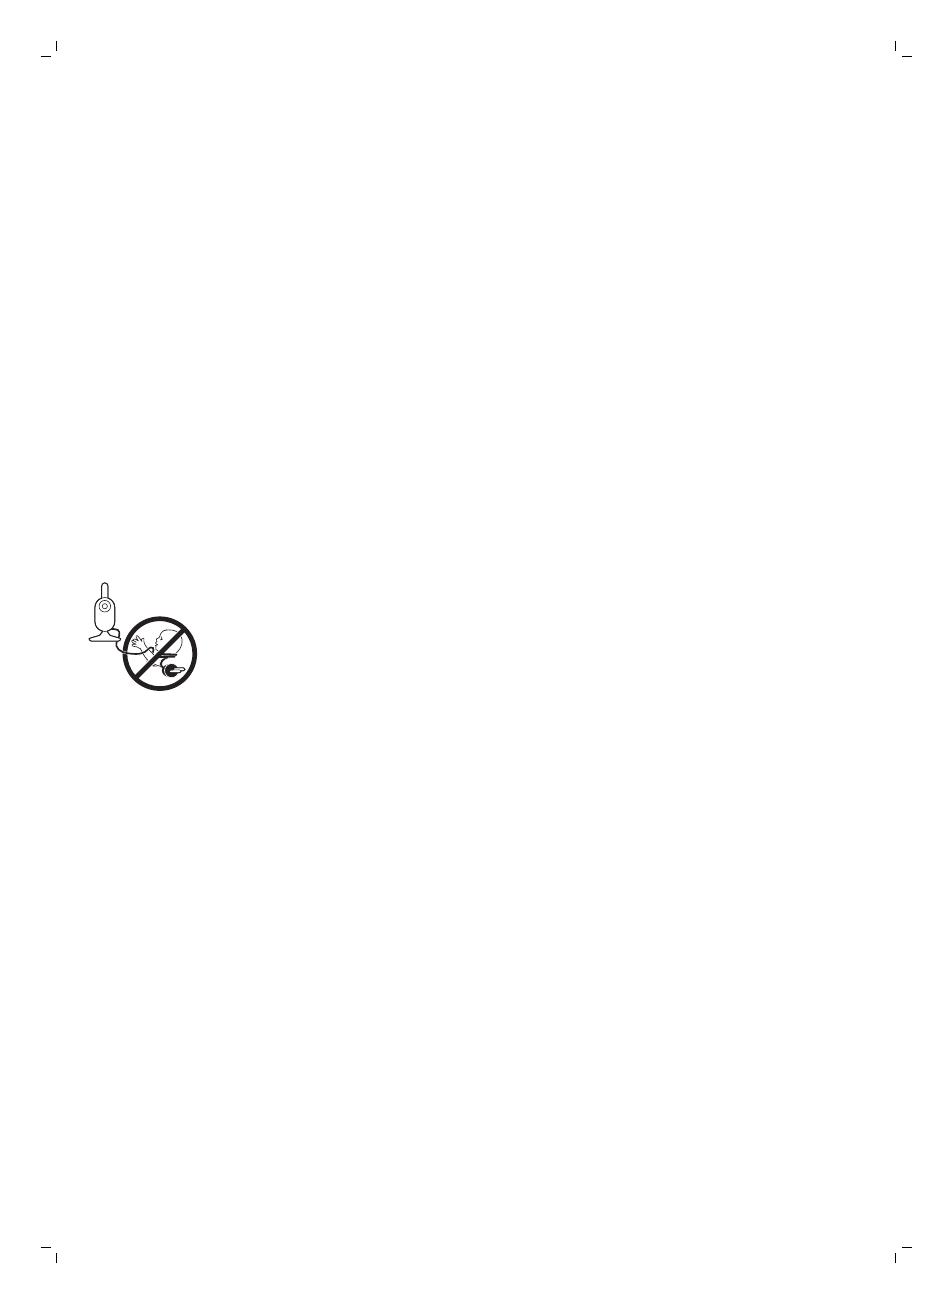
Cords present a potential strangulation hazard. Keep cords out of the
reach of children (more than 1 meter/3.5 feet away). Never place the baby
monitor inside the baby’s bed or playpen.
Warning
-
Check if the voltage indicated on the adapter corresponds to the local
mains voltage before you connect the appliance.
-
Do not modify or cut off any part of the adapter and its cord, as this
causes a hazardous situation.
-
Only use the adapter supplied.
-
If the adapter is damaged, always have it replaced with one of the
original type in order to avoid a hazard.
-
This appliance can be used by children aged from 8 years and above and
persons with reduced physical, sensory or mental capabilities or lack of
experience and knowledge if they have been given supervision or
instruction concerning use of the appliance in a safe way and understand
the hazards involved. Children shall not play with the appliance. Cleaning
and user maintenance shall not be made by children without supervision.
-
Protect the mains cord from being walked on or pinched particularly at
plugs, convenience receptacles, and the point where they exit from the
appliance.
7
English
-
Make sure that you place the baby monitor in such a way that its cord
does not obstruct a doorway or passage. If you place the baby monitor
on a table or low cabinet, do not let the mains cord hang over the edge
of the table or cabinet. Make sure the cord does not lie on the floor
where it presents a tripping hazard.
-
Keep the packaging materials (plastic bags, cardboard buffers, etc.) out of
the reach of children, as they are not a toy.
-
To prevent electric shock, do not open the housing of the baby unit or
parent unit.
Caution
-
Use the appliance at a temperature between 0°C (32°F) and 40°C (104°F).
-
Do not install the appliance near any heat sources such as radiators, heat
registers, stoves or other apparatus (including amplifiers) that produce
heat.
-
Make sure that your hands are dry when you handle adapters, plugs and
the mains cord.
-
All required markings on the baby unit, parent unitand power adapter
are located on the bottom of the baby unit, parent unit and power
adapter.
Compliance with standards
-
This product complies with the radio interference requirements of the
European Community.
-
Philips Consumer Lifestyle hereby declares that this baby monitor is in
compliance with the essential requirements and other relevant provisions
of Directive 2014/53/EU (FHSS: frequency band 2.4GHz, maximum radio-
frequency power: 100 mW EIRP). A copy of the EC Declaration of
Conformity (DoC) is available online at www.philips.com/support.
Electromagnetic fields (EMF)
This Philips appliance complies with all applicable standards and
regulations regarding exposure to electromagnetic fields.
8
English
Preparing for use
Baby unit
Put the power adapter in the baby unit and the adapter in the wall socket.
Parent unit
The parent unit runs ona built-in rechargeable Li-ion battery.
Follow the below steps to charge the parent unit:
1 Put the power adapter in the parent unit and put the adapter in the wall
socket.
-
The battery status light turns orange to indicate that the appliance is
charging.
20°CEco
1
-
When the battery is fully charged, the battery status light turns green
continuously.
10 hrs=3 hrs
-
When you charge the parent unit for 3 hours, it can be used cordlessly for
approx. 10 hours.
-
If the parent unit is switched on during charging, charging takes
approximately twice as long.
9
English
20°CEco
1
-
When the rechargeable battery of the parent unit is almost empty, the
battery status light turnsred and the parent unit beeps.
-
If the battery is completely empty and the parent unit it not connected to
the mains, the parent unit automatically switches off and loses contact
with the baby unit.
Note: The built in rechargeable battery cannot be removed from the
product.
Note: The battery gradually and very slowly discharges, even when the
parent unit is switched off.
Tip: To save battery, switch off the parent unit when you do not use it.
Note: We advise you to keep the parent unit connected to the mains during
the whole night. If the battery of the parent unit runs low during the night,
the parent unit beeps and this may wake you up.
Using the baby monitor
Linking parent unit and baby unit
1 Push the on/off slide on the baby unit upwards to the ON position.
2 When the baby unit is on, the power-on light on the baby unit lights up
green.
Note: The power-on light on the baby unit always lights up green, even
when there is no connection with the parent unit.
10
English
>2.5m/8.2ft
3 Make sure that the parent unit and the baby unit are at least 2.5 meters/
8.2 feet away from each otherto avoid acoustic feedback.
4 Press the on/off button on the parent unit to switch on the parent unit.
20°CEco
1
-
The display goes on, the linking image appears on the display and the
link light lights up red. The parent unit starts to search for the baby unit.
20°CEco
1
-
When the parent unit and baby unit are linked, the link light lights up
green on the parent unit and one or more bars appear on the display.
20°CEco
1
Note: It takes less than 10 seconds to establish the link between the
parent unit and the baby unit.
-
When thebaby unit is turned off, the parent unit will show the out of
range image. Make sure that the baby unit is switched on.
-
If no connection has been established, the link light turns red, the parent
unit beeps three short beeps every 20 seconds and the out-of-range
image appears on the display.
11
English
Positioning the baby monitor
Warning: The cord of the baby unit presents a potential
strangulation hazard. Make sure that the baby unit and its cord
are at least 1 meter / 3.5 feet away from your baby. Never place
the baby monitor inside the baby’s bed or playpen.
>
1-1.5m/3.5-5ft
1 For optimal sound detection, make sure that the baby unit is no further
than 1.5 meter/ 5 feet away from the baby. Make sure that the baby unit
is at least 1 meter/ 3.5 feet away from the baby because of potential
strangulation hazard.
>2.5m/8.2ft
2 Place the parent unit within the operating range of the baby unit. Make
sure it is at least 2.5 meters / 8.2 feet away from the baby unit to avoid
acoustic feedback.
Note: If you use a cordless phone, wireless video, Wi-Fi network,
microwave oven or Bluetooth on 2.4GHz and you experience interference
on either the parent unit or baby unit, move the parent unit until there is
no more interference.
3 There are two ways to position the baby unit:
a Place the baby unit on a stable, level and horizontal surface.
b Mount the baby unit to the wall with the screws supplied.
Tip: The wall mount template (see 'Wall mount') to mount the baby unit
to the wall can be found at the end of this user manual.
Tip: Use the provided template to mark the exact location of the screw
holes on the wall.
Tip: Position the baby unit at a higher level to get a good overview of the
baby’s bed or playpen.
12
English
Adjust the baby unit in a way that ensures the best visibility of your baby.
The baby unit can be rotated to position it in the desired way.
Operating range
<50m/165ft
<300m/985ft
The operating range is up to 50 meters/ 165 feet indoors and 300
meters/985 feet outdoors. The operating range of the baby monitor varies
depending on the surroundings and factors that cause interference. Wet
and moist materials cause so much interference that the range loss is up to
100%.
Dry materials
Material thickness Loss of range
Wood, plaster, cardboard, glass (without metal,
wires or lead)
< 30cm (12in) 0-10%
Brick, plywood < 30cm (12in) 5-35%
Reinforced concrete < 30cm (12in) 30-100%
Metal grilles or bars < 1cm (0.4in) 90-100%
Metal or aluminium sheets < 1cm (0.4in) 100%
Features and settings
Volume
You can adjust the speaker volume of the parent unit to the level you prefer.
1 Press the top or bottom part of the control button to adjust the volume.
13
English
20°C
1
Tip: Make sure that the volume is adapted to the current conditions.
Under noisy conditions, the vibration alert can be turned on as well.
The volume bar appears on the display to show the selected volume.
Note: If the volume is set to a high level, the parent unit consumes more
power.
Note: When the volume bar is at its minimum, the volume is muted. The
parent unit shows a mute icon in the status bar and you will only receive
alerts and video from the parent unit.
Brightness
You can adjust the display brightness of the parent unit to the level you
prefer.
1 Press the left or right part of the control button to adjust the brightness
of the display of the parent unit.
20°C
1
The brightness bar appears on the display to show the selected display
brightness.
Note: If the brightness is set to a high level, the parent unit consumes more
power.
Sound level lights
The parent unit continuously monitors the sound level in your baby’s room,
and the sound level lights on the parent unit let you know if there is any
sound picked up in the baby room.
20°C
1
VIDEO
As long as no sound is detected, the sound level lights are out.
14
English
20°C
1
VIDEO
When the baby unit picks up a sound, one or more sound level lights on the
parent unit light up green. The number of lights that go on depends on the
loudness of the sound picked up by the baby unit. The louder your baby
cries, more sound level lights light up green.
Modes
This baby monitor has four different modes that allows you to choose how
you want to look after your baby: VIDEO, AUDIO, VOX and ECO.
With the baby monitor on, you can switch between these 4 different modes
by pressing the mode button on the side of the parent unit.
The display shows the selected mode. The selected mode is also indicated
in the status bar. When turning on the device, the mode that was last used
will be active.
VIDEO mode
VID
EO
VIDEO
Press the mode button on the side of the parent unit to select theVIDEO
mode.
20°C
1
VIDEO
When the VIDEO mode is activated, the screen is always on, so you can see
your baby. All sounds are directly transmitted to the parent unit.
Note: Set the sensitivity level to 'very high' to have continuous sound on the
parent unit. Please see the Sensitivity level chapter for more information.
15
English
20°C
1
VOX
If your baby cries, the sound level lights light up green. As long as no sound
is detected, the sound level lights are off.
AUDIO mode
AUDI
O
AUDIO
1 Press the mode button on the side of the parent unit to switch to AUDIO
mode.
VOXAUDIO
When the AUDIO mode is activated, the display of the parent unit switches
off. After 3 seconds the display will completely turn off and the status bar
will disappear.
Note: The status bar is not visible when the display is off.
20°C
1
AUDIO
Note: The link light shows that the parent unit is still on and connected to
the baby unit.
Note: When sensitivity level is not set to 'very high', low sounds will be
muted.
Note: Set the sensitivity level to 'very high' to have continuous sound on the
parent unit. Please see the Sensitivity level chapter for more information.
All sounds are constantly transmitted to the parent unit. If your baby cries,
the display of the parent unit is still off, but the sound level lights light up
green and the sounds detected by thebaby unitare transmitted to the
parent unit. As long as no sound is detected, the sound level lights are off.
16
English
VOX mode
VOX
VOX
1 Press the mode button on the side of the parent unit to switch to VOX
mode.
Note: When the display is on, the selected mode is shown in the status bar.
The status baris not visible when the display is off.
VOX
VOX
VOX
20°C
1
VOX
When the VOX mode is activated, the display and sound of the parent unit
switch off, if there is no sound detected for 20 seconds.
20°C
1
VOX
Whensound is picked up by the baby unit, the displayand sound of the
parent unit switch on immediately.The sounds are transmitted to the parent
unit and the sound level lights light up green. As long as no sound is
detected, the sound level lights are off.
Note: The minimum sound level to activate sound and display is defined by
the sensitivity setting.
ECO mode
ECO
ECO
1 Press the mode button on the side of the parent unit to switch to ECO
mode.
Note: When the display is on, the selected mode will be visible in the
status bar. The status bar is not visible when the display is off.
ECO
When the ECO mode is activated the display and sound of the parent unit
switch off when no sound is detected for 20 seconds. TheECO light lights up
green to indicate that the ECO mode is activated. During ECO mode the
display and sound transmissions are turned off.
17
English
20°C
1
ECO
Whensound is picked up by the baby unit, the displayand sound of the
parent unit switch on immediately.The sounds are transmitted to the parent
unit and the sound level lights light up green. As long as no sound is
detected, the sound level lights are off.
Note: The minimum sound level to activate sound and display is defined by
the sensitivity setting.
Nightlight
1 Press the nightlight on/off button on the baby unit to switch on the
nightlight feature.
The nightlight of the baby unit goes on.
Note: It is not possible to control the nightlight from the parent unit. You
can only switch the nightlight on or off on the baby unit.
2 Press the nightlight on/off button again to switch off the nightlight.
Lullabies
You can activate the lullaby feature either from the parent unit or from the
baby unit.
To activate the lullaby feature from the parent unit, follow the instructions
below:
18
English
Lullaby selection
1 Press the lullaby button on the parent unit to open the menu for
lullabies.
Note: Pressing the lullaby button while the lullaby menu is already open,
will close the menu.
2 Press the right part of the control button to enter the list of lullabies
20°CVIDEO
1
Lullaby Songs
1 Rock-a-Bye Baby
2 Twinkle, Twinkle
3 Hush, Little Baby
4 Brahm’s Lullaby
5 Golden Slumbers
3 Press the top or bottom part of the control button to scroll through the
list of lullabies.
20°CVIDEO
1
Lullaby Songs
1 Rock-a-Bye Baby
2 Twinkle, Twinkle
3 Hush, Little Baby
4 Brahm’s Lullaby
5 Golden Slumbers
4 Press the right part of the control button to play a specific lullaby.
If you want to pause the lullaby, press the right side of the control button
again.
5 The status barof the parent unit shows the number of lullabies thatare
being played and repeated.
15 min
The lullaby starts to play on the baby unit and it is repeated continuously
for approximately 15 minutes.
Tip: To repeat all songs that are available, select the last option in the list.
19
English
20°C
1
Lullaby Songs
1 Rock-a-Bye Baby
2 Twinkle, Twinkle
3 Hush, Little Baby
4 Brahm’s Lullaby
5 Golden Slumbers
VIDEO
6 To select another lullaby, scroll up or down with thecontrol button to
select another song from the list.Press the right part of the control
button to start the selected song.
7 To stop the lullaby, press the lullaby button on the parent unit and pause
the song that is currently playing by pressing the right part of the control
button one more time.
Lullaby volume
20°C
1
Lullaby Volume
VIDEO
1 Press the lullaby button and then press the bottom of the control button
to select the volume options of thelullaby menu. Press the right part of
the control button to access the lullaby volume levels.
20°C
1
Lullaby Volume
VIDEO
2 Press the top or bottom part of the control button to adjust the volume.
To activate the lullaby feature from the baby unit, press the lullaby on/off
button on the baby unit.
15 min
The latest lullaby selected on the parent unit starts to play on the baby unit
and is repeated continuously for approximately 15 minutes.
To stop the lullaby on the baby unit, press the lullaby on/off button on the
baby unit.
20
English
  • Page 1 1
  • Page 2 2
  • Page 3 3
  • Page 4 4
  • Page 5 5
  • Page 6 6
  • Page 7 7
  • Page 8 8
  • Page 9 9
  • Page 10 10
  • Page 11 11
  • Page 12 12
  • Page 13 13
  • Page 14 14
  • Page 15 15
  • Page 16 16
  • Page 17 17
  • Page 18 18
  • Page 19 19
  • Page 20 20
  • Page 21 21
  • Page 22 22
  • Page 23 23
  • Page 24 24
  • Page 25 25
  • Page 26 26
  • Page 27 27
  • Page 28 28
  • Page 29 29
  • Page 30 30
  • Page 31 31
  • Page 32 32
  • Page 33 33
  • Page 34 34
  • Page 35 35
  • Page 36 36
  • Page 37 37
  • Page 38 38
  • Page 39 39
  • Page 40 40
  • Page 41 41
  • Page 42 42
  • Page 43 43
  • Page 44 44
  • Page 45 45
  • Page 46 46
  • Page 47 47
  • Page 48 48
  • Page 49 49
  • Page 50 50
  • Page 51 51
  • Page 52 52
  • Page 53 53
  • Page 54 54
  • Page 55 55
  • Page 56 56
  • Page 57 57
  • Page 58 58
  • Page 59 59
  • Page 60 60
  • Page 61 61
  • Page 62 62
  • Page 63 63
  • Page 64 64
  • Page 65 65
  • Page 66 66
  • Page 67 67
  • Page 68 68
  • Page 69 69
  • Page 70 70
  • Page 71 71
  • Page 72 72
  • Page 73 73
  • Page 74 74
  • Page 75 75
  • Page 76 76
  • Page 77 77
  • Page 78 78
  • Page 79 79
  • Page 80 80
  • Page 81 81
  • Page 82 82
  • Page 83 83
  • Page 84 84
  • Page 85 85
  • Page 86 86
  • Page 87 87
  • Page 88 88
  • Page 89 89
  • Page 90 90
  • Page 91 91
  • Page 92 92
  • Page 93 93
  • Page 94 94
  • Page 95 95
  • Page 96 96
  • Page 97 97
  • Page 98 98
  • Page 99 99
  • Page 100 100
  • Page 101 101
  • Page 102 102
  • Page 103 103
  • Page 104 104
  • Page 105 105
  • Page 106 106
  • Page 107 107
  • Page 108 108
  • Page 109 109
  • Page 110 110
  • Page 111 111
  • Page 112 112
  • Page 113 113
  • Page 114 114
  • Page 115 115
  • Page 116 116
  • Page 117 117
  • Page 118 118
  • Page 119 119
  • Page 120 120
  • Page 121 121
  • Page 122 122
  • Page 123 123
  • Page 124 124
  • Page 125 125
  • Page 126 126
  • Page 127 127
  • Page 128 128
  • Page 129 129
  • Page 130 130
  • Page 131 131
  • Page 132 132
  • Page 133 133
  • Page 134 134
  • Page 135 135
  • Page 136 136
  • Page 137 137
  • Page 138 138
  • Page 139 139
  • Page 140 140
  • Page 141 141
  • Page 142 142
  • Page 143 143
  • Page 144 144
  • Page 145 145
  • Page 146 146
  • Page 147 147
  • Page 148 148
  • Page 149 149
  • Page 150 150
  • Page 151 151
  • Page 152 152
  • Page 153 153
  • Page 154 154
  • Page 155 155
  • Page 156 156
  • Page 157 157
  • Page 158 158
  • Page 159 159
  • Page 160 160
  • Page 161 161
  • Page 162 162
  • Page 163 163
  • Page 164 164
  • Page 165 165
  • Page 166 166
  • Page 167 167
  • Page 168 168
  • Page 169 169
  • Page 170 170
  • Page 171 171
  • Page 172 172
  • Page 173 173
  • Page 174 174
  • Page 175 175
  • Page 176 176
  • Page 177 177
  • Page 178 178
  • Page 179 179
  • Page 180 180
  • Page 181 181
  • Page 182 182
  • Page 183 183
  • Page 184 184
  • Page 185 185
  • Page 186 186
  • Page 187 187
  • Page 188 188
  • Page 189 189
  • Page 190 190
  • Page 191 191
  • Page 192 192
  • Page 193 193
  • Page 194 194
  • Page 195 195
  • Page 196 196
  • Page 197 197
  • Page 198 198
  • Page 199 199
  • Page 200 200
  • Page 201 201
  • Page 202 202
  • Page 203 203
  • Page 204 204
  • Page 205 205
  • Page 206 206
  • Page 207 207
  • Page 208 208
  • Page 209 209
  • Page 210 210
  • Page 211 211
  • Page 212 212
  • Page 213 213
  • Page 214 214
  • Page 215 215
  • Page 216 216
  • Page 217 217
  • Page 218 218
  • Page 219 219
  • Page 220 220
  • Page 221 221
  • Page 222 222
  • Page 223 223
  • Page 224 224
  • Page 225 225
  • Page 226 226
  • Page 227 227
  • Page 228 228
  • Page 229 229
  • Page 230 230
  • Page 231 231
  • Page 232 232
  • Page 233 233
  • Page 234 234
  • Page 235 235
  • Page 236 236
  • Page 237 237
  • Page 238 238
  • Page 239 239
  • Page 240 240
  • Page 241 241
  • Page 242 242
  • Page 243 243
  • Page 244 244
  • Page 245 245
  • Page 246 246
  • Page 247 247
  • Page 248 248
  • Page 249 249
  • Page 250 250
  • Page 251 251
  • Page 252 252
  • Page 253 253
  • Page 254 254
  • Page 255 255
  • Page 256 256
  • Page 257 257
  • Page 258 258
  • Page 259 259
  • Page 260 260
  • Page 261 261
  • Page 262 262
  • Page 263 263
  • Page 264 264
  • Page 265 265
  • Page 266 266
  • Page 267 267
  • Page 268 268
  • Page 269 269
  • Page 270 270
  • Page 271 271
  • Page 272 272
  • Page 273 273
  • Page 274 274

Avent SCD630/26 Kasutusjuhend

Kategooria
Beebitelefonid
Tüüp
Kasutusjuhend
See käsiraamat sobib ka

teistes keeltes