VC-WM14 Installation Guide www.MyLumens.com
Copyright ©2021 Lumens Digital Optics Inc. All rights reserved.
5100453-50 DEC. 2021
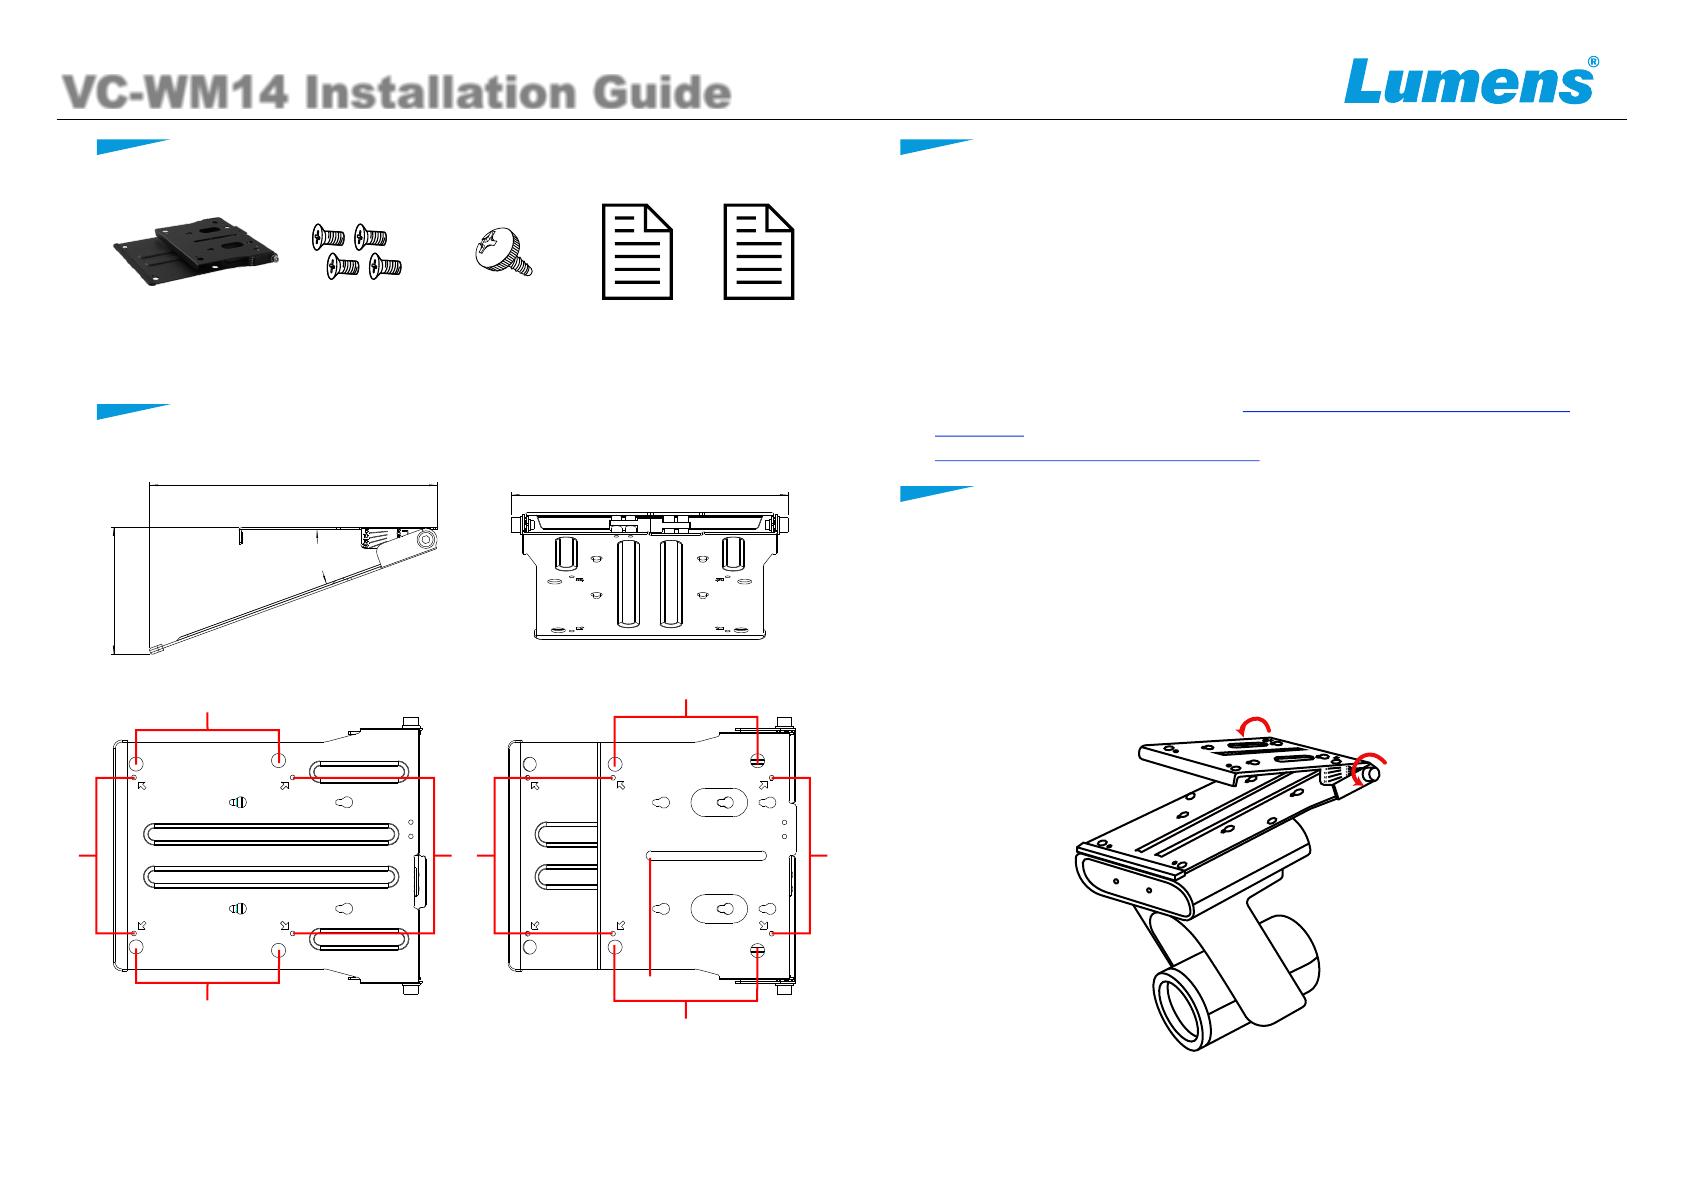
2. Product size and hole site
1. Package Contents
Drilling paper
PTZ Camera
Locking screw
*4 pcs
VC-WM14
4. Instruction for installation steps
3. Precautions for installation
3.1 Load Capacity: 2 Kg
3.2 To install by yourself, please follow the installation procedures steps by
steps, ensure steady and tight installation of the device.
3.3 Ensure the safety of the installation environment. Please do not install the
bracket on unstable ceiling, wall or in a place where the device is in danger
of fvalling to avoid any accident.
3.4 Box camera only supports monitor mounting, not for ceiling and wall
mounting
3.5 For the size diagram, please go to
.
Lumens website > Service Support >
Download
https://www.MyLumens.com/Support
4.1 Install on the ceiling
1. Use drilling paper to cut holes on the ceiling.
2. Fix the short-sided sheet metal on the ceiling.
3. Fix the camera on the long-sided sheet metal and lock with 4 pcs of screws.
4. Loosen the hexagonal screws on both sides to adjust the installation angle,
and then tighten them.
Guide
Installation
Box Camera
Locking screw
195.8 mm
203.1 mm
0-120°
89.4 mm
j Foot pad hole site
k Screw hole site
l Screw hole site of the Box Camera
j
k kk
j
l
j
j


 Breezary 24006-BK Kasutusjuhend