Turbo Energy Lithium Series 48V 5.1kWh Slim paigaldusjuhend

Tüüp
paigaldusjuhend
https://www.turbo-e.com/
QUICK INSTALLATION GUIDE
Lithium Series 48V 5.1kWh Slim
+
VICTRON INVERTER
c
2
1. INVERTER VICTRON configuration
The configuration between the inverter and the battery is quite simple. In fact, to facilitate
the control and operation of the installation, a GX device is used: COLOR CONTROL
GX, VENUS GX, CERBO GX.
The connection of the communication is made between the master battery and the Color
Control, and from the Color Control to the inverter.
We can use the
REGULADOR MPPT BlueSolar / SmartSolar (VE. Direct)
3
Underneath, a complete scheme of connection of all devices is shown.
CANbus type B Cable
5,1kWh 48V Slim
4
2. Configuration Lithium Series 48V 5.1 kWh Slim
Each module has 4 DIP (Dual Inline Package) switches that will be configured differently
depending on the number of batteries to be connected
They are configured according to the binary code, starting with the master.
Address Dial switch position Explain
#1 #2 #3 #4
1
ON OFF OFF OFF Pack1/Master
2
OFF ON OFF OFF Pack2
3
ON ON OFF OFF Pack3
4
OFF OFF ON OFF Pack4
5
ON OFF ON OFF Pack5
6
OFF ON ON OFF Pack6
7
ON ON ON OFF Pack7
8
OFF OFF OFF ON Pack8
9
ON OFF OFF ON Pack9
10
OFF ON OFF ON Pack10
11
ON ON OFF ON Pack11
12
OFF OFF ON ON Pack12
13
ON OFF ON ON Pack13
14
OFF ON ON ON Pack14
15
ON ON ON ON Pack15
1=ON
0=OFF
1 3
2 4
5
3. Wired configuration
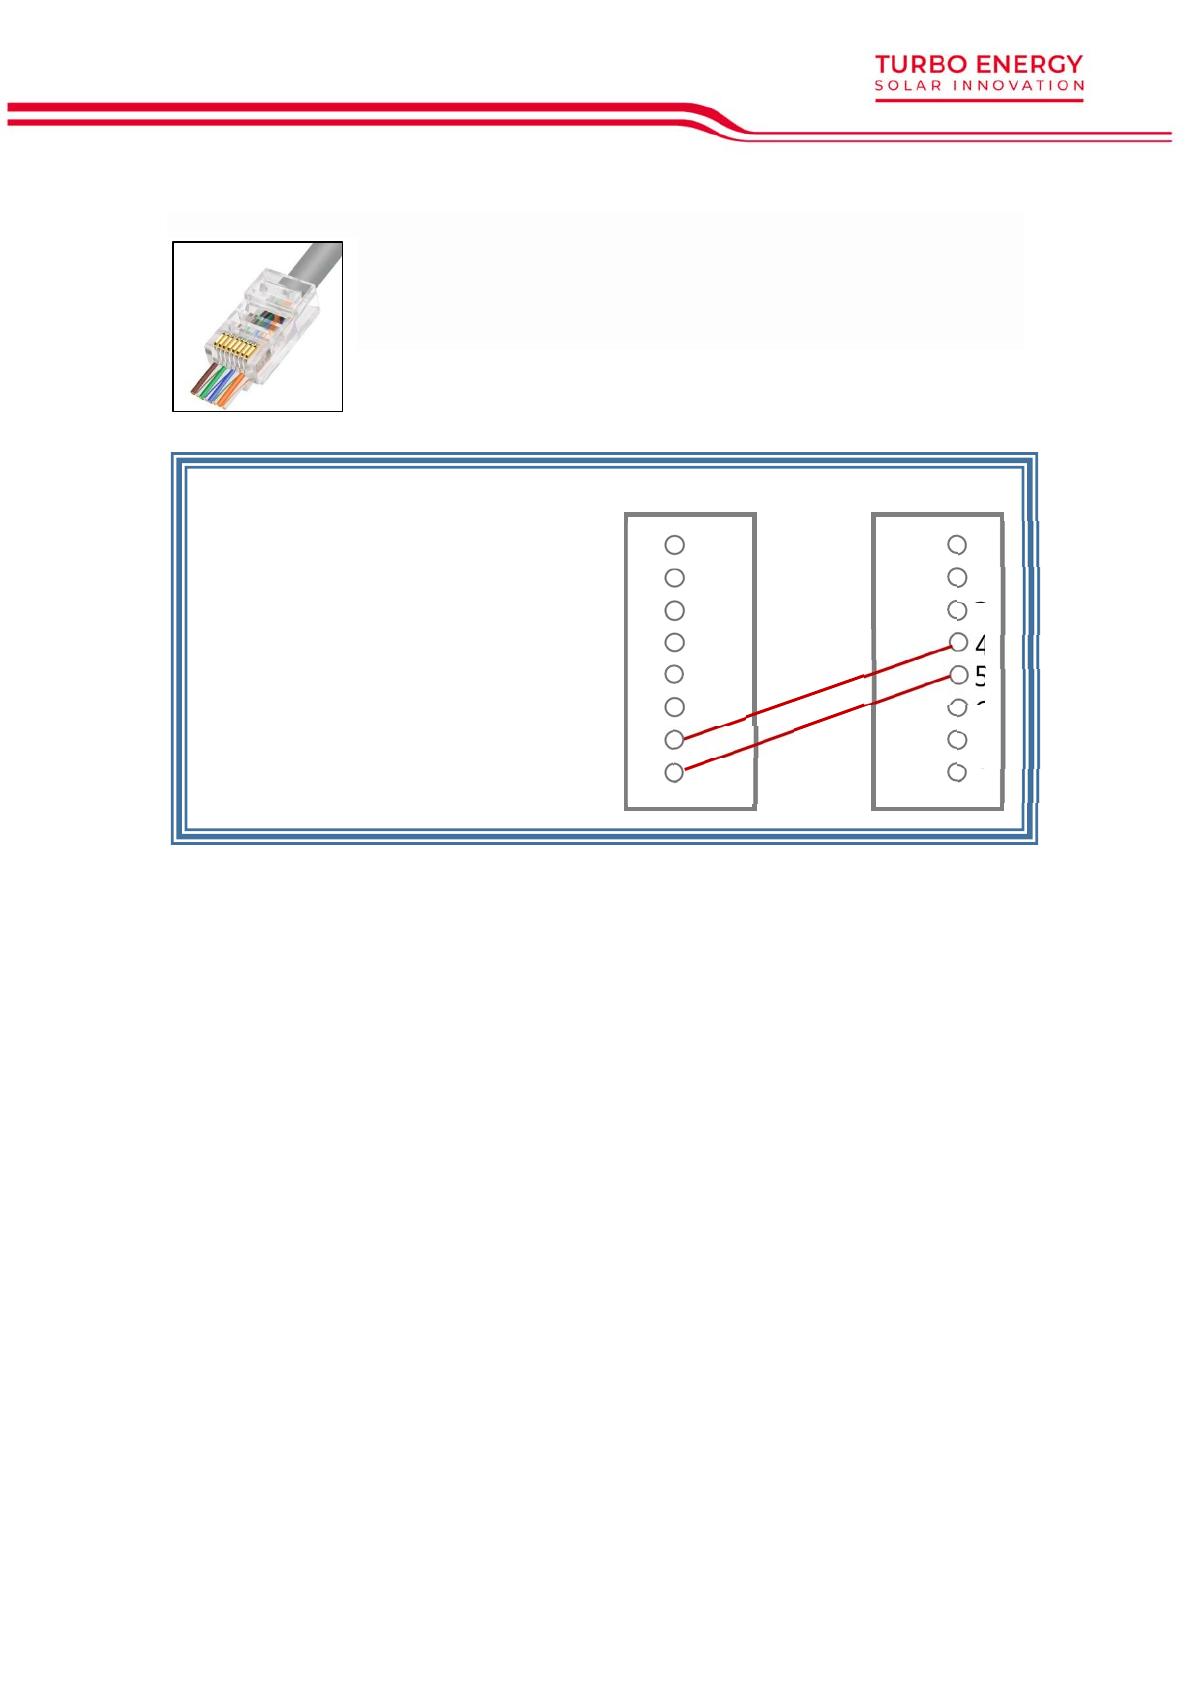
The cable needed to make the connection is the RJ45. It is a special
cable that is composed of 8 smaller cables each with a different color
configuration. The battery includes inside the connection cable with
the inverter. The cable is included inside the battery box.
4. Procedure
We need to check the firmware of the equipment that we are going to use.
The minimum device version GX is v2.42
The minimum version of the inverters MULTIPLUS / MULTIGRID / QUATTRO
is 422.
The minimum version of the VE. Direct MPPT is 1.29
We connect the CAN wire of communication from the port CAN IN to COLOR
CONTROL GX to its input VE CAN, besides adding the TERMINADOR RJ4 in the
other VE CAN port.
5. GX Device Setting
1. GENERAL → Services → CAN-BUS Profile → CAN-BUS BMS
(500Kbit/s)
2
3
1
4
5
6
7
8
CAN H
CAN L 8
7
6
5
4
3
2
1
CAN H
CAN L
The cable must be connected to
the port CAN-2
Battery
Inverter
6
2. SYSTEM SETTING → TURBO ENERGY battery on CAN-BUS
3. CONFIGURACIÓN DEL SISTEMA → Service →DVCC ON
4. CONNECTION VERIFICATION → We can check that connection
between Battery and Venus has been successful when the option Turbo-
e appears in the general menu.
7
6. VE CONFIGURE 3 Settings
Select the capacity in function of the number of batteries. 50Ah * Nº of batteries
Select the Charge current in function of the number of batteries. 25ª * Nº of modules
8
  • Page 1 1
  • Page 2 2
  • Page 3 3
  • Page 4 4
  • Page 5 5
  • Page 6 6
  • Page 7 7
  • Page 8 8

Turbo Energy Lithium Series 48V 5.1kWh Slim paigaldusjuhend

Tüüp
paigaldusjuhend