10
2
2
2
8
35
4
Connecting your equipment
Placing the speakers
By connecting the left and right front speakers (L/R), the center speaker (C), the left and right
surround speakers (SL/SR), and the subwoofer (SW), a 5.1 ch surround system can be
enjoyed.
To achieve the best possible surround sound, install your speakers as shown below.
Hints on the speaker placement
Where you put your speakers in the room has a big effect on the quality of the sound. The
following guidelines should help you to get the best sound from your system.
•
The subwoofer can be placed on the floor. Ideally, the other speakers should be at about
ear-level when you’re listening to them. Putting the speakers on the floor (except the
subwoofer), or mounting them very high on a wall is not recommended.
•
For the best stereo effect, place the front speakers 2 m to 3 m apart, at equal distance from
the TV.
•
If you’re going to place speakers around your CRT TV, use shielded speakers or place the
speakers at a sufficient distance from your CRT TV.
•
If you’re using a center speaker, place the front speakers at a wider angle. If not, place
them at a narrower angle.
•
Place the center speaker above or below the TV so that the sound of the center channel is
localized at the TV screen. Also, make sure the center speaker does not cross the line
formed by the leading edge of the front left and right speakers.
•
It is best to angle the speakers towards the listening position. The angle depends on the
size of the room. Use less of an angle for bigger rooms.
•
The optimal positioning for surround speakers is just above ear height. Make sure the
speakers don’t face each other. For DVD-Audio, the speakers should be more directly
behind the listener than for home theater playback.
•
Try not to place the surround speakers farther away from the listening position than the
front and center speakers. Doing so can weaken the surround sound effect.
•
Make sure that all speakers are securely installed. This not only improves sound quality,
but also reduces the risk of damage or injury resulting from speakers being knocked over
or falling in the event of external shocks such as earthquakes.
5.1 channel surround system:
2
2
2
8
35
4
Connecting your equipment
Placing the speakers
By connecting the left and right front speakers (L/R), the center speaker (C), the left and right
surround speakers (SL/SR), and the subwoofer (SW), a 5.1 ch surround system can be
enjoyed.
To achieve the best possible surround sound, install your speakers as shown below.
Hints on the speaker placement
Where you put your speakers in the room has a big effect on the quality of the sound. The
following guidelines should help you to get the best sound from your system.
•
The subwoofer can be placed on the floor. Ideally, the other speakers should be at about
ear-level when you’re listening to them. Putting the speakers on the floor (except the
subwoofer), or mounting them very high on a wall is not recommended.
•
For the best stereo effect, place the front speakers 2 m to 3 m apart, at equal distance from
the TV.
•
If you’re going to place speakers around your CRT TV, use shielded speakers or place the
speakers at a sufficient distance from your CRT TV.
•
If you’re using a center speaker, place the front speakers at a wider angle. If not, place
them at a narrower angle.
•
Place the center speaker above or below the TV so that the sound of the center channel is
localized at the TV screen. Also, make sure the center speaker does not cross the line
formed by the leading edge of the front left and right speakers.
•
It is best to angle the speakers towards the listening position. The angle depends on the
size of the room. Use less of an angle for bigger rooms.
•
The optimal positioning for surround speakers is just above ear height. Make sure the
speakers don’t face each other. For DVD-Audio, the speakers should be more directly
behind the listener than for home theater playback.
•
Try not to place the surround speakers farther away from the listening position than the
front and center speakers. Doing so can weaken the surround sound effect.
•
Make sure that all speakers are securely installed. This not only improves sound quality,
but also reduces the risk of damage or injury resulting from speakers being knocked over
or falling in the event of external shocks such as earthquakes.
5.1 channel surround system:
2
2
Laitteiden kytkeminen
Connecting your equipment
2
2
10
2
35
4
Making cable connections
Make sure not to bend the cables over the top of this unit (as
shown in the illustration). If this happens, the magnetic field
produced by the transformers in this unit may cause a
humming noise from the speakers.
•
Before making or changing connections, switch off the
power and disconnect the power cord from the AC outlet.
•
Before unplugging the power cord, switch the power into
standby.
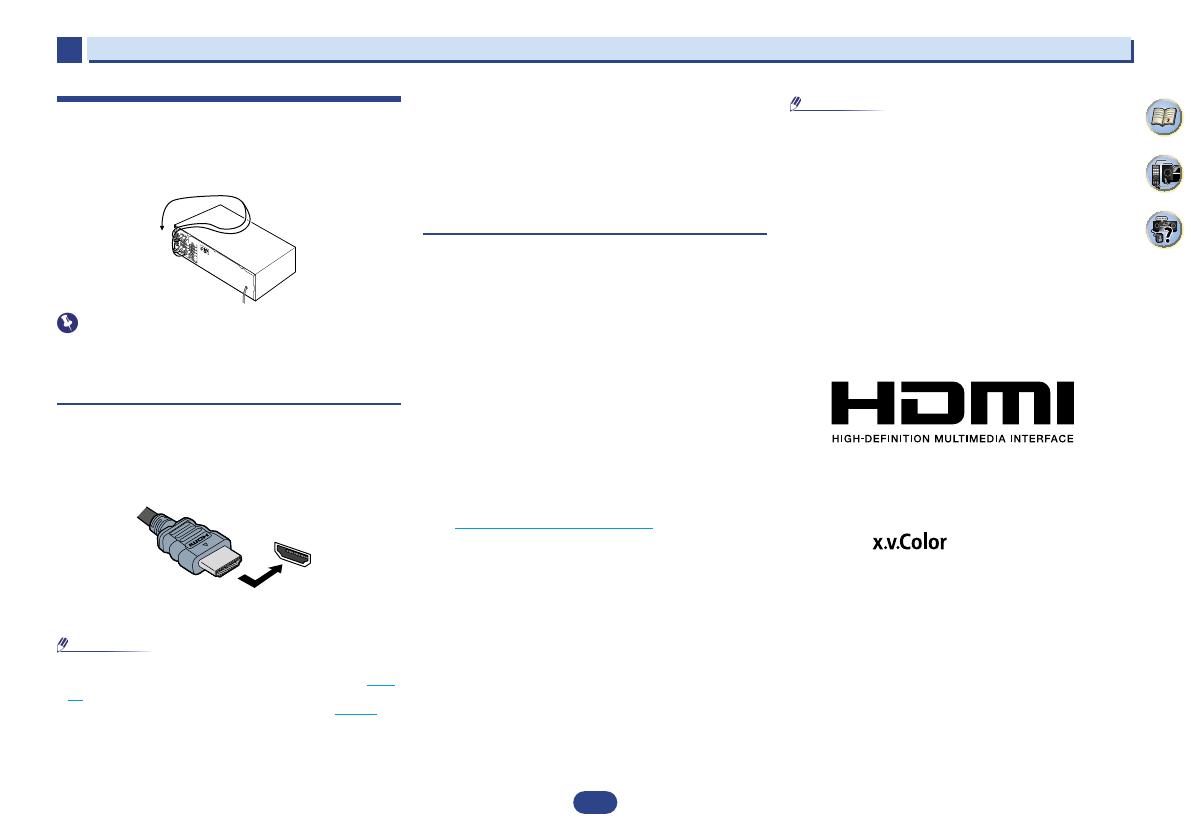
HDMI cables
Both video and sound signals can be transmitted
simultaneously with one cable. If connecting the player and
the TV via this receiver, for both connections, use HDMI
cables.
Be careful to connect the terminal in the proper direction.
•
Set the HDMI parameter in Setting the Audio options on
page 27 to THRU (THROUGH) and set the input signal in
Selecting the audio input signal
on page 18 to HDMI, if you
want to hear HDMI audio output from your TV (no sound
will be heard from this receiver).
•
If the video signal does not appear on your TV, try
adjusting the resolution settings on your component or
display. Note that some components (such as video game
units) have resolutions that may not be displayed. In this
case, use a (analog) composite connection.
•
When the video signal from the HDMI is 480i, 480p, 576i
or 576p, Multi Ch PCM sound and HD sound cannot be
received.
About HDMI
The HDMI connection transfers uncompressed digital video,
as well as almost every kind of digital audio that the
connected component is compatible with, including DVD-
Video, DVD-Audio, SACD, Dolby Digital Plus, Dolby
TrueHD, DTS-HD Master Audio (see below for limitations),
Video CD/Super VCD and CD.
This receiver incorporates High-Definition Multimedia
Interface (HDMI
®
) technology.
This receiver supports the functions described below through
HDMI connections.
•
Digital transfer of uncompressed video (contents
protected by HDCP (1080p/24, 1080p/60, etc.))
•
3D signal transfer
•
Deep Color signal transfer
•
x.v.Color signal transfer
•
Audio Return Channel (see The HDMI Setup menu on
page 33)
•
Input of multi-channel linear PCM digital audio signals
(192 kHz or less) for up to 8 channels
•
Input of the following digital audio formats:
– Dolby Digital, Dolby Digital Plus, DTS, High bitrate audio
(Dolby TrueHD, DTS-HD Master Audio), DVD-Audio, CD,
SACD (DSD 2 ch only), Video CD, Super VCD
•
4K signal transfer
– This may not operate properly, depending on the
connected equipment.
– 4K 24p, 4K 25p, 4K 30p, 4K 50p and 4K 60p signals are
supported.
•
HDCP 2.2 compatible terminal
•
Use a High Speed HDMI
®/
™ Cable. If HDMI cable other
than a High Speed HDMI
®/
™ Cable is used, it may not
work properly.
•
When an HDMI cable with a built-in equalizer is
connected, it may not operate properly.
•
3D, Deep Color, x.v.Color, 4K signal transfer and Audio
Return Channel are only possible when connected to a
compatible component.
•
HDMI format digital audio transmissions require a longer
time to be recognized. Due to this, interruption in the audio
may occur when switching between audio formats or
beginning playback.
•
Turning on/off the device connected to this unit’s HDMI
OUT terminal during playback, or disconnecting/
connecting the HDMI cable during playback, may cause
noise or interrupted audio.
The terms HDMI and HDMI High-Definition Multimedia
Interface, and the HDMI Logo are trademarks or registered
trademarks of HDMI Licensing, LLC in the United States and
other countries.
“x.v.Color” and are trademarks of Sony
Corporation.
Connecting your equipment
2
2
10
2
35
4
Making cable connections
Make sure not to bend the cables over the top of this unit (as
shown in the illustration). If this happens, the magnetic field
produced by the transformers in this unit may cause a
humming noise from the speakers.
•
Before making or changing connections, switch off the
power and disconnect the power cord from the AC outlet.
•
Before unplugging the power cord, switch the power into
standby.
HDMI cables
Both video and sound signals can be transmitted
simultaneously with one cable. If connecting the player and
the TV via this receiver, for both connections, use HDMI
cables.
Be careful to connect the terminal in the proper direction.
•
Set the HDMI parameter in Setting the Audio options on
page 27 to THRU (THROUGH) and set the input signal in
Selecting the audio input signal
on page 18 to HDMI, if you
want to hear HDMI audio output from your TV (no sound
will be heard from this receiver).
•
If the video signal does not appear on your TV, try
adjusting the resolution settings on your component or
display. Note that some components (such as video game
units) have resolutions that may not be displayed. In this
case, use a (analog) composite connection.
•
When the video signal from the HDMI is 480i, 480p, 576i
or 576p, Multi Ch PCM sound and HD sound cannot be
received.
About HDMI
The HDMI connection transfers uncompressed digital video,
as well as almost every kind of digital audio that the
connected component is compatible with, including DVD-
Video, DVD-Audio, SACD, Dolby Digital Plus, Dolby
TrueHD, DTS-HD Master Audio (see below for limitations),
Video CD/Super VCD and CD.
This receiver incorporates High-Definition Multimedia
Interface (HDMI
®
) technology.
This receiver supports the functions described below through
HDMI connections.
•
Digital transfer of uncompressed video (contents
protected by HDCP (1080p/24, 1080p/60, etc.))
•
3D signal transfer
•
Deep Color signal transfer
•
x.v.Color signal transfer
•
Audio Return Channel (see The HDMI Setup menu on
page 33)
•
Input of multi-channel linear PCM digital audio signals
(192 kHz or less) for up to 8 channels
•
Input of the following digital audio formats:
– Dolby Digital, Dolby Digital Plus, DTS, High bitrate audio
(Dolby TrueHD, DTS-HD Master Audio), DVD-Audio, CD,
SACD (DSD 2 ch only), Video CD, Super VCD
•
4K signal transfer
– This may not operate properly, depending on the
connected equipment.
– 4K 24p, 4K 25p, 4K 30p, 4K 50p and 4K 60p signals are
supported.
•
HDCP 2.2 compatible terminal
•
Use a High Speed HDMI
®/
™ Cable. If HDMI cable other
than a High Speed HDMI
®/
™ Cable is used, it may not
work properly.
•
When an HDMI cable with a built-in equalizer is
connected, it may not operate properly.
•
3D, Deep Color, x.v.Color, 4K signal transfer and Audio
Return Channel are only possible when connected to a
compatible component.
•
HDMI format digital audio transmissions require a longer
time to be recognized. Due to this, interruption in the audio
may occur when switching between audio formats or
beginning playback.
•
Turning on/off the device connected to this unit’s HDMI
OUT terminal during playback, or disconnecting/
connecting the HDMI cable during playback, may cause
noise or interrupted audio.
The terms HDMI and HDMI High-Definition Multimedia
Interface, and the HDMI Logo are trademarks or registered
trademarks of HDMI Licensing, LLC in the United States and
other countries.
“x.v.Color” and are trademarks of Sony
Corporation.
HDMI
Connecting your equipment
2
2
10
2
35
4
Making cable connections
Make sure not to bend the cables over the top of this unit (as
shown in the illustration). If this happens, the magnetic field
produced by the transformers in this unit may cause a
humming noise from the speakers.
•
Before making or changing connections, switch off the
power and disconnect the power cord from the AC outlet.
•
Before unplugging the power cord, switch the power into
standby.
HDMI cables
Both video and sound signals can be transmitted
simultaneously with one cable. If connecting the player and
the TV via this receiver, for both connections, use HDMI
cables.
Be careful to connect the terminal in the proper direction.
•
Set the HDMI parameter in Setting the Audio options on
page 27 to THRU (THROUGH) and set the input signal in
Selecting the audio input signal
on page 18 to HDMI, if you
want to hear HDMI audio output from your TV (no sound
will be heard from this receiver).
•
If the video signal does not appear on your TV, try
adjusting the resolution settings on your component or
display. Note that some components (such as video game
units) have resolutions that may not be displayed. In this
case, use a (analog) composite connection.
•
When the video signal from the HDMI is 480i, 480p, 576i
or 576p, Multi Ch PCM sound and HD sound cannot be
received.
About HDMI
The HDMI connection transfers uncompressed digital video,
as well as almost every kind of digital audio that the
connected component is compatible with, including DVD-
Video, DVD-Audio, SACD, Dolby Digital Plus, Dolby
TrueHD, DTS-HD Master Audio (see below for limitations),
Video CD/Super VCD and CD.
This receiver incorporates High-Definition Multimedia
Interface (HDMI
®
) technology.
This receiver supports the functions described below through
HDMI connections.
•
Digital transfer of uncompressed video (contents
protected by HDCP (1080p/24, 1080p/60, etc.))
•
3D signal transfer
•
Deep Color signal transfer
•
x.v.Color signal transfer
•
Audio Return Channel (see The HDMI Setup menu on
page 33)
•
Input of multi-channel linear PCM digital audio signals
(192 kHz or less) for up to 8 channels
•
Input of the following digital audio formats:
– Dolby Digital, Dolby Digital Plus, DTS, High bitrate audio
(Dolby TrueHD, DTS-HD Master Audio), DVD-Audio, CD,
SACD (DSD 2 ch only), Video CD, Super VCD
•
4K signal transfer
– This may not operate properly, depending on the
connected equipment.
– 4K 24p, 4K 25p, 4K 30p, 4K 50p and 4K 60p signals are
supported.
•
HDCP 2.2 compatible terminal
•
Use a High Speed HDMI
®/
™ Cable. If HDMI cable other
than a High Speed HDMI
®/
™ Cable is used, it may not
work properly.
•
When an HDMI cable with a built-in equalizer is
connected, it may not operate properly.
•
3D, Deep Color, x.v.Color, 4K signal transfer and Audio
Return Channel are only possible when connected to a
compatible component.
•
HDMI format digital audio transmissions require a longer
time to be recognized. Due to this, interruption in the audio
may occur when switching between audio formats or
beginning playback.
•
Turning on/off the device connected to this unit’s HDMI
OUT terminal during playback, or disconnecting/
connecting the HDMI cable during playback, may cause
noise or interrupted audio.
The terms HDMI and HDMI High-Definition Multimedia
Interface, and the HDMI Logo are trademarks or registered
trademarks of HDMI Licensing, LLC in the United States and
other countries.
“x.v.Color” and are trademarks of Sony
Corporation.
Kaapelien kytkemisestä
Varmista, että kaapelit eivät kulje laitteen päältä kuvan
osoittamalla tavalla. Jos näin käy, laitteen muuntajan
magneettikenttä voi aiheuttaa hurinan kuulumista
kaiuttimista.
Tärkeä
• Irrota virtajohto seinäkoskettimesta ennen kytkentöjen
tekemistä tai muuttamista.
• Kytke laite valmiustilaan ennen virtajohdon irrottamista.
HDMI-kaapelit
Yhdellä kaapelilla voi siirtää samanaikaisesti sekä kuva-
että äänisignaalit. Jos kytket soittimen ja TV:n toisiinsa
tämän vastaanottimen kautta, käytä HDMI-kaapelia
molempiin kytkentöihin.
Ole huolellinen ja kytke liitin oikein päin.
Huomio
• Jos haluat HDMI-audion kuluvan TV:sta, aseta HDMI:n
asetus kohdassa Audion asetuksien valitseminen (sivu
27) tilaan THRU ja tuloliitännän asetukseksi HDMI
kohdassa Audion tulosignaalin valitseminen (sivu 18).
Tällöin vastaanottimen kautta ei kuulu ääntä.
• Jos TV:ssa ei näy videosignaalia, kokeile sen tai
liittämäsi laitteen resoluution vaihtamista. Huomioi, että
joillakin laitteilla (kuten pelikoneilla) on resoluutioita,
joita ei voi näyttää. Tällaisessa tapauksessa käytä
kytkemiseen analogista komposiittiliitäntää.
• Jos HDMI-videosignaali on 480i, 480p, 576i tai 576p,
monikanavaista PCM-ääntä tai HD-ääntä ei oteta
vastaan.
Tietoa HDMI:stä
HDMI-kytkentä siirtää kompressoimatonta digitaalista
videota sekä melkein kaikkia digitaalisia audioformaatteja,
jotka ovat yhteensopivia kytketyn laitteen kanssa, kuten
DVD-Video, DVD-Audio, SACD, Dolby Digital Plus,
Dolby TrueHD, DTS-HD Master Audio (katso poikkeukset
jäljempänä), Video CD/Super VCD ja CD.
Tämä vastaanotin sisältää High-Denition Multimedia
Interface (HDMI)-teknologiaa.
Vastaanotin tukee seuraavia toimintoja HDMI-kytkennän
kautta:
• Kompressoimattoman videon digitaalinen siirto
(HDCP:lla suojattu sisältö (1080p/24, 1080p/60 jne.))
• 3D-signaalin siirto
• Deep Color-signaalin siirto
• x.v.Color-signaalin siirto
• Audion paluukanava (Audio Return Channel,
ks. HDMI-asetuksien valikko, sivu 33)
• Monikanavaisen lineaarisen digitaalisen
PCM-audiosignaalin (192 kHz tai vähemmän) tulo aina
8 kanavalle asti.
• Seuraavien digitaalisten audioformaattien tulo:
- Dolby Digital, Dolby Digital Plus, DTS, High bitrate
audio (Dolby TrueHD, DTS-HD Master Audio),
DVD-Audio, CD, SACD (DSD, vain 2 kanavaa),
Video CD, Super VCD.
• 4K-signaalin siirto
- Kytketyistä laitteista riippuen, tämä ei aina toimi
kunnolla.
- Tuetut signaalit: 4K 24p, 4K 25p, 4K 30p, 4K 50p ja
4K 60p.
• HDCP 2.2-yhteensopiva liitäntä.
Huomio
• Käytä High Speed HDMI-kaapelia. Jos käytät
muunlaista HDMI-kaapelia, se ei ehkä toimi kunnolla.
• HDMI-kaapeli sisäänrakennetulla ekvalisaattorilla ei
ehkä toimi kunnolla.
• 3D, Deep Color, x.v.Color ja 4K-signaalin siirto
sekä Audio Return Channel ovat mahdollisia vain
yhteensopivien laitteiden välillä.
• Digitaalisen audiosiirron tunnistaminen HDMI-
formaatissa saattaa kestää vähän aikaa. Siksi audiossa
saattaa olla katkos formaattia vaihdettaessa tai soiton
alussa.
• Jos soiton aikana kytket tämän vastaanottimen HDMI
OUT -liitännästä yhdistetyn laitteen päälle tai pois tai
irrotat HDMI-kaapelin, voi kuulua häiriöitä tai audio
keskeytyy.
HDMI ja HDMI High-Denition Multimedia Interface sekä
logo HDMI ovat HDMI Licencing,LLC:n tuotemerkkejä
tai rekisteröityjä tuotemerkkejä Yhdysvalloissa ja muissa
maissa.
x.v. Color ja ovat Sony Corporationin
tuotemerkkejä.


 amadeus SENZA GRANDE BT HØYTTALER DAB+, SVART Omaniku manuaal
 Altec Lansing ABT385 Kasutusjuhend
 YukiHalu YUKIHALU-02 Kasutusjuhend
