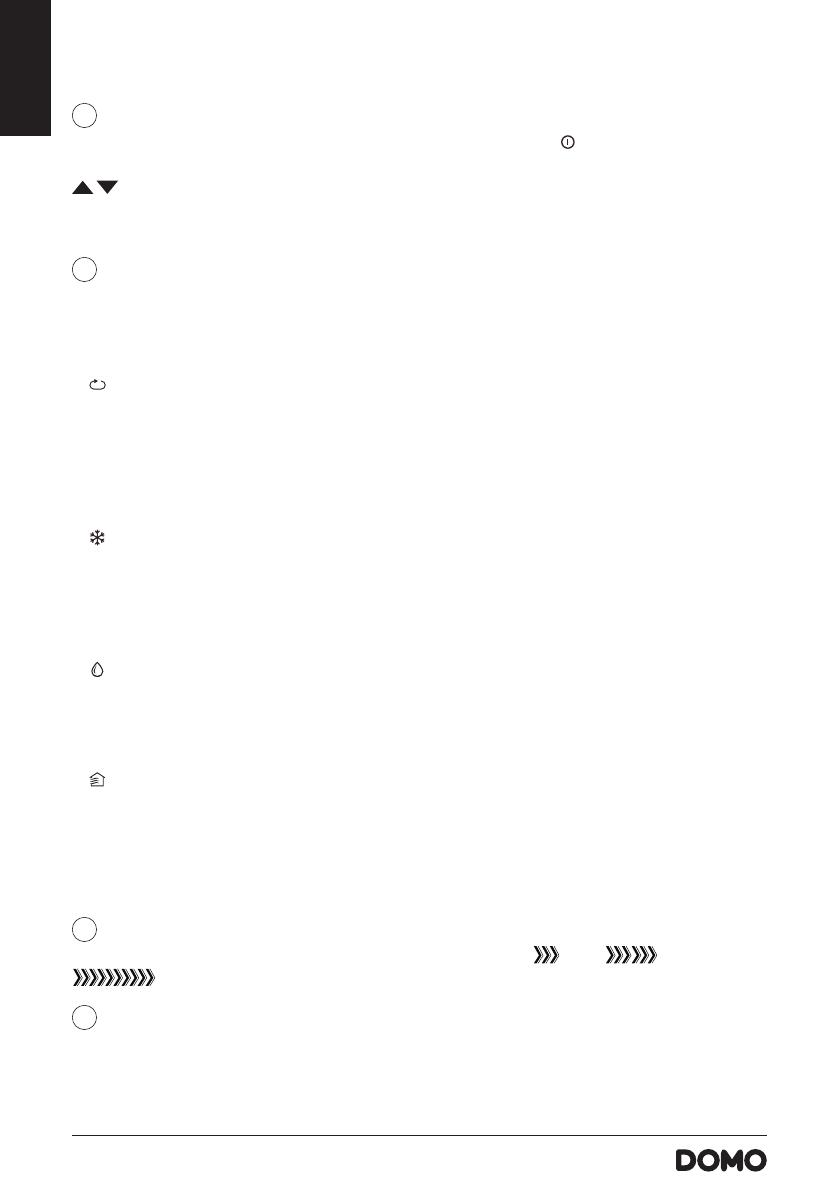
Domo DO324A Omaniku manuaal

Tüüp
Omaniku manuaal
PRODUCT OF
DO324A
Handleiding Air conditioner
Mode d’emploi Climatiseur
Gebrauchsanleitung Klimaanlage
Instruction booklet Air conditioner
Manual de instrucciones Aire acondicionado portátil
Istruzioni per l’uso Condizionatore d’aria portatile
 Mobilná klimatizácia
 
Lees aandachtig alle instructies - bewaar deze handleiding voor latere raadpleging.
Lisez attentivement les instructions - gardez le mode d’emploi pour utilisation ultérieur.
Lesen Sie genau die Anweisungen - bewahren Sie die Gebrauchsanleitung für spätere
heranziehung.
Read all instructions carefully - save this instruction manual for future reference.
Lea detenidamente todas las instrucciones - Conserve este manual para futura referencia.
Leggere con attenzione le istruzioni - conservarle per future consultazioni



budúceho nahliadnutie.
NL Nederlands 3
FR Français 17
DE Deutsch 31
EN English 46
ES Espagnol 60
IT Italiano 73
CZ  86
SK  99
3
DO324A
www.domo-elektro.be
NL
GARANTIE
Geachte klant,
Al onze producten ondergaan steeds een strenge kwaliteitscontrole,




+32 14 21 71 91 [email protected]
Maandag – Donderdag : 8.30u – 12.00u en van 13.00u – 17.00u


garantieperiode zal de distributeur volledige verantwoording op zich nemen voor gebreken die





toestel hebt aangekocht.


automatisch in de volgende gevallen:
· 
· 
· 
· 
· 
· 

VEILIGHEIDSVOORSCHRIFTEN

worden:
· Lees deze instructies zorgvuldig door. Bewaar deze handleiding om later te raadplegen.
· 
Zorg ervoor dat kinderen niet met de verpakkingsmaterialen spelen.
· 
zoals:
· 
omgevingen
· 
· Hotel- en motelkamers en andere omgevingen met een residentieel karakter
· 
4
DO324A
NL
· 
sensoriële beperking of mensen met een beperkte mentale capaciteit of gebrek aan ervaring of


toestel. Kinderen mogen niet met het toestel spelen. Het onderhoud en de reiniging van het toestel

· 
· Opgelet: het toestel mag niet gebruikt worden met een externe timer.
· 

· Laat het snoer niet op een heet oppervlak of over de rand van een tafel of aanrecht hangen.
· Gebruik het toestel nooit wanneer het snoer of de stekker beschadigd is, na een slechte werking


· 
· Het gebruik van accessoires die niet aanbevolen of verkocht worden door de fabrikant, kan brand,
elektrische schokken of verwondingen veroorzaken.
· Trek de stekker uit het stopcontact wanneer het toestel niet in gebruik is, vooraleer onderdelen te
monteren of demonteren en vooraleer het toestel te reinigen. Zet eerst alle knoppen in de ‘uit’-stand

stopcontact te trekken.
· Laat een werkend toestel niet zonder toezicht achter.
· Zet dit toestel nooit op of in de buurt van een gasvuur of elektrisch vuur of op een plaats waar het in
contact zou kunnen komen met een warm toestel.
· Gebruik het toestel niet buiten.
· Gebruik het toestel enkel voor het doel waarvoor het bestemd is.
· 
· 


· Alle herstellingen, buiten het gewone onderhoud van het toestel, moeten uitgevoerd worden door de

· Dompel het toestel, het elektrisch snoer of de stekker nooit onder in water of een andere vloeistof.
· Zorg ervoor dat kinderen het elektrisch snoer of het toestel niet kunnen aanraken.
· Hou het snoer uit de buurt van scherpe randen en hete onderdelen of andere warmtebronnen.
· Plaats het toestel nooit in de buurt van een gastoestel, vuur of een lichtontvlambare vloeistof.
· Sla nooit op het toestel of schud niet met het toestel, om schade te voorkomen.
· Dek de luchtinlaat en -uitlaat nooit af, om oververhitting te voorkomen.
· Besprenkel het toestel nooit met water of plaats het toestel nooit in de buurt van water, om
elektrocutie te voorkomen.
· Deel de stroomtoevoer naar de airco nooit met een ander toestel.
· 
handen.
· Steek nooit vreemde voorwerpen in de openingen van het toestel.
· Gebruik nooit een verlengsnoer.
· Laat kinderen nooit in de buurt van het toestel spelen.
· 
nodig hebben om terug op te starten.
5
DO324A
www.domo-elektro.be
NL
· Plaats het toestel minstens op 1 meter afstand van tv of radio, om storingen te voorkomen.
· Plaats het toestel niet in rechtstreeks zonlicht, om verkleuring van het toestel te voorkomen.
· 
rechtopstaand. Verplaats het toestel nooit ondersteboven.
· 
toestel.
· Gebruik geen chemische middelen om het toestel te reinigen, dit zal het toestel beschadigen.
· 
· Zorg ervoor dat de airco steeds beschermd is tegen vocht, zoals condensatie, spatwater, etc. Zorg


· Gebruik de airco niet in een vochtige ruimte zoals een badkamer of wasplaats.
· 
· 
· 
· 
· 
functioneert, wanneer het toestel gevallen of beschadigd is.
· Gebruik nooit de stekker om het toestel aan of uit te zetten.
· 
petroleum, …
· Herstellingen, detectie van lekken en werkzaamheden aan de installatie dienen te gebeuren door

Specieke informatie over apparaten met R290 koelgas
· Lees grondig alle waarschuwingen.
· 

· Het apparaat moet worden geplaatst in een ruimte zonder permanente ontstekingsbronnen

· Het mag niet worden doorprikt of verbrand.
· 
· Het apparaat moet worden geïnstalleerd, gebruikt en bewaard in een ruimte die groter is dan 11 m
2
.
· 
· 
koelcircuit mag worden doorprikt.
· Als het apparaat geïnstalleerd, gebruikt of bewaard wordt in een niet-geventileerde ruimte, moet deze

tot een risico op brand of explosies door de ontsteking van het koelmiddel, die wordt veroorzaakt door
elektrische verwarming, elektrische kachels of andere ontstekingsbronnen.
· Het apparaat moet zodanig worden bewaard dat mechanische defecten worden voorkomen.
· Personen die het koelcircuit gebruiken of er werkzaamheden aan uitvoeren, moeten beschikken


beoordeling erkend door verenigingen in de sector.
· 

moeten worden uitgevoerd onder toezicht van een persoon die is aangeduid voor het gebruik van
ontvlambare koelmiddelen.
6
DO324A
NL

Dit apparaat gebruikt een ontvlambaar koelmiddel. Als het koelmiddel lekt en is
blootgesteld aan een externe ontstekingsbron, is er gevaar voor brand.

ENERGIETIPS
· 
· Plaat het toestel zo, dat luchtstroom niet belemmerd wordt door meubelen of andere voorwerpen.
· 
· 
· Houd ramen en deuren steeds gesloten om de koude lucht binnen te houden en de warme lucht
buiten.
7
DO324A
www.domo-elektro.be
NL
1
2
3
4
10
6
5
8
9
7
ONDERDELEN
1. Controle paneel
2. Luchtuitlaat
3. 
4. Handvat
5. Permanente drainage
6. Luchtuitlaat
7. Stekkeropberging
8. Snoeropberging
9. Drainage onderaan
10. 
11. Drainageslang
12. Luchtuitlaatslang
13. Raambevestiging
· Raamadapter
· 
· Raamdichtingen
· Adapterstop
· 
14. Muurbevestiging
· 
· Muuradapter
· Schroeven en pluggen
15. Accessoire snoeropberging
16. 
17. 
11 12
13
14 15
16
17
8
DO324A
NL
INSTALLATIE
INSTALLATIE
· Plaats de airco op een solide en stabiele ondergrond, om de geluidshinder en
vibratie tot een minimum te beperken. Zorg er ook voor dat de ondergrond sterk
genoeg is om het gewicht van het toestel te dragen.
· 



· Plaats het toestel in de buurt van een geaard stopcontact.
· Monteer het accessoire voor snoeropberging op de achterkant van het toestel.
· Plaats geen voorwerpen binnen een straal van 30 cm rondom het toestel.
· Zorg er ook voor dat zich rondom de luchtuitlaat buiten, in een straal van 50 cm,
geen obstakels bevinden.
· Zorg ervoor dat de luchtuitlaat met de slang naar buiten wordt gebracht. Houd de

binnen kan.
· 
50cm
or
max 120cm
min 30cm
INSTALLATIE VAN DE RAAMUITLAAT


luchtuitlaatslang niet nodig.
1. 

andere kant van de slang. De koppelstukken klikken vast zodra

2. Bevestig de slang aan het toestel. De kant van de slang met

luchtuitlaat aan de achterkant van het toestel. Schuif het
koppelstuk in de houders van de luchtuitlaat. Zorg ervoor dat

boven de luchtuitlaat.
3. Plaats de raamadapter in het venster. Dit kan zowel
horizontaal als verticaal. Maak gebruik van de raamdichtingen
om eventuele openingen in de venster af te sluiten. Blokkeer
de raamadapter op de gewenste lengte met behulp van de
meegeleverde raamadapter stop.
4. 
5. Bevestig het koppelstuk op de raamadapter.
50cm
or
max 120cm
min 30cm
1.
50cm
or
max 120cm
min 30cm
2.
50cm
or
max 120cm
min 30cm
3.
50cm
max 120cm
min 30cm
50cm
or
max 120cm
min 30cm
50cm
or
max 120cm
min 30cm
4.
50cm
or
max 120cm
min 30cm
50cm
or
max 120cm
min 30cm
5.
50cm
or
max 120cm
min 30cm
9
DO324A
www.domo-elektro.be
NL
INSTALLATIE MUURUITLAAT


luchtuitlaatslang niet nodig.
1. Maak een opening in de muur ter grootte van de

Plaats de muuradapter in de opening en bevestig deze in de
muur met de 4 meegeleverde pluggen en schroeven.
2. 

de andere kant van de slang. De koppelstukken klikken vast

3. Bevestig de slang aan het toestel. De kant van de slang met

luchtuitlaat aan de achterkant van het toestel. Schuif het
koppelstuk in de houders van de luchtuitlaat. Zorg ervoor dat

boven de luchtuitlaat.
4. Bevestig de luchtuitlaatslang op de muuradapter.
5. 
muuradapter afsluiten met het deksel.
GEBRUIK
CONTROLEPANEEL
50cm
or
max 120cm
min 30cm
1234567
9
8
50cm
or
max 120cm
min 30cm
1. ON-OFF – toets
Om het toestel aan en uit te schakelen.
50cm
or
max 120cm
min 30cm
2. SLEEP – toets




temperatuur en wordt de “sleep”-instelling beëindigd.

50cm
or
max 120cm
min 30cm
3.
2.
50cm
or
max 120cm
min 30cm
1.
10
DO324A
NL
50cm
or
max 120cm
min 30cm
3. FAN – toets

het controlepaneel.

·
50cm
or
max 120cm
min 30cm
laag
·
50cm
or
max 120cm
min 30cm
midden
·
50cm
or
max 120cm
min 30cm
hoog
· 
4. “+” en “-” – toetsen


Fahrenheit “F°”.
50cm
or
max 120cm
min 30cm
5. MODE – toets


controlepaneel zal oplichten.
50cm
or
max 120cm
min 30cm



De airco zal automatisch de kamertemperatuur stabiliseren op de ingestelde temperatuur.

50cm
or
max 120cm
min 30cm
COOL-instelling
Het toestel zal koelen met deze instelling.

gewenste kamertemperatuur in te stellen. Gebruik de “fan”-toets om de gewenste ventilatiesnelheid in
te stellen.
50cm
or
max 120cm
min 30cm



temperatuur of de ventilatiesnelheid niet instellen. Houd ramen en deuren gesloten, om zo de

functie.
50cm
or
max 120cm
min 30cm
FAN-instelling


ventilatiesnelheid in te stellen. De temperatuur kan niet worden ingesteld. Het is niet nodig de

50cm
or
max 120cm
min 30cm
6. TIMER – toets

11
DO324A
www.domo-elektro.be
NL

geeft aan dat de automatische uitschakeling actief is. Druk opnieuw op de “timer”-toets, het “timer on”-


uur.




50cm
or
max 120cm
min 30cm

Aanpassing van de luchtstroom.
50cm
or
max 120cm
min 30cm


met de afstandsbediening.
9. LED display

staat, zal op de display de kamertemperatuur weergegeven worden.
AFSTANDSBEDIENING
· Gebruik de afstandsbediening op maximum 8 meter van het toestel. Richt de
afstandsbediening in de richting van de airco. De ontvangst wordt bevestigd met
een biep signaal.
· De airco zal niet reageren op de afstandsbediening als het signaal geblokkeerd

· Zorg ervoor dat de afstandsbediening niet nat wordt. Stel de afstandsbediening
niet bloot aan direct zonlicht of warmte.
· 
dat de airco niet reageert op de afstandsbediening. Zorg er dus voor dat er geen
direct zonlicht op de infrarood ontvanger staat.
· 

· 

· 

· 
Batterijen
· 
· 


· 

programmeren.
ON /OFF
TE MP
SH ORT
CU T
TI MER
ON
TI MER
OF F
MO DE
FAN
LE D
SL EEP
FO LLO W
SW ING
ME
ON /OFF
TE MP
SH ORT
CU T
TI MER
ON
TI MER
OF F
MO DE
FAN
LE D
SL EEP
FO LLO W
SW ING
ME
12
DO324A
NL
Functietoetsen
ON/OFF
TOETS

ON/OF F
TEM P
SHO RT
CUT
TIM ER
ON
TIM ER
OFF
MOD E
FAN
LED
SLE EP
FOL LOW
SWI NG
ME
PIJLTJESTOETSEN


MODE
MODE – TOETS



ON/OF F
TEM P
SHO RT
CUT
TIM ER
ON
TIM ER
OFF
MOD E
FAN
LED
SLE EP
FOL LOW
SWI NG
ME

Zorg ervoor dat de stekker in het stopcontact steekt. Druk op de “mode”-toets van de




ON /OFF
TE MP
SH ORT
CU T
TIM ER
ON
TIM ER
OFF
MO DE
FAN
LE D
SL EEP
FOL LOW
SW ING
ME
COOL-instelling
Zorg ervoor dat de stekker in het stopcontact steekt. Druk op de “mode”-toets om de gewenste


het toestel aan te zetten.
ON /OFF
TE MP
SH ORT
CU T
TIM ER
ON
TIM ER
OFF
MO DE
FAN
LE D
SL EEP
FOL LOW
SW ING
ME

Zorg ervoor dat de stekker in het stopcontact steekt. Druk op de “mode”-toets en selecteer de “dry”-

airco aan te zetten.
ON /OFF
TE MP
SH ORT
CU T
TIM ER
ON
TIM ER
OFF
MO DE
FAN
LE D
SL EEP
FOL LOW
SW ING
ME
FAN-instelling
Zorg ervoor dat de stekker in het stopcontact steekt. Druk op de “mode”-toets om de gewenste



kamertemperatuur kan ook niet ingesteld worden.
FAN
FAN – TOETS
Je gebruikt deze toets om de ventilatiesnelheid in te stellen: auto, low
55
66
MODE display
Displays the current
mode, including:
AUTO
COOL
DRY
HEAT
FAN
Transmission Indicator
Lights up when remote sends
signal to unit
ON/OFF display
Appears when the unit is turned on,
and disappears when it is turned off
TIMER ON display
Displays when TIMER
ON is set
TIMER OFF display
Displays when TIMER
OFF is set
SLEEP display
Battery display
SILENT display
ECO display
Displays when
SLEEP function
is activated
FOLLOW ME
display
Indicates that
the FOLLOW ME
function is on
FAN SPEED display
Displays selected FAN SPEED:
HIGH, MED,
or LOW
This display is blank when
set to AUTO speed.
Temperature/Timer display
Displays the set temperature by default, or timer setting
when using TIMER ON/OFF functions
o O O
Temperature range: 17-30 C(62 F-86 F)
Timer setting range: 0-24 hours
This display is blank when operating in FAN mode.
1. Press the MODE button to select
COOL mode.
2. Set your desired temperature using
the Temp or Temp button.
3. Press the FAN button to select the
fan speed: AUTO, LOW, MED,or
HIGH.
4. Press the ON/OFF button to start the
unit.
In AUTO mode, the unit will automatically
select the COOL, FAN, HEAT or DRY mode
based on the set temperature.
1. Press the MODE button to select Auto mode.
2. Set your desired temperature using the
Temp or Temp button.
3. Press the ON/OFF button to start the unit.
,
NOTE: FAN SPEED can t be set in Auto mode.
SETTING TEMPERATURE
AUTO operation
The operating temperature range for units is
O O O
17-30 C(62 F-86 F). You can increase or
O O
decrease the set tmeperature in 1 C(1 F)
increments.
COOL operation
1
3
2
1
3
2
4
Not available for this unit
Not available for
this unit
Not available for
this unit
Low battery
detection
Remote LED Screen Indicators
How To Use The Basic Functions
ON/OFF
ON/OFF
TEMP
TEMP
SHORT
CUT
SHORT
CUT
TIMER
ON
TIMER
ON
TIMER
OFF
TIMER
OFF
MODE
MODE
FAN
FAN
SLEEP
SLEEP
LED
LED
FOLLOW
ION
SWING
ME
FOLLOW
ION
SWING
ME
, med
55
66
MODE display
Displays the current
mode, including:
AUTO
COOL
DRY
HEAT
FAN
Transmission Indicator
Lights up when remote sends
signal to unit
ON/OFF display
Appears when the unit is turned on,
and disappears when it is turned off
TIMER ON display
Displays when TIMER
ON is set
TIMER OFF display
Displays when TIMER
OFF is set
SLEEP display
Battery display
SILENT display
ECO display
Displays when
SLEEP function
is activated
FOLLOW ME
display
Indicates that
the FOLLOW ME
function is on
FAN SPEED display
Displays selected FAN SPEED:
HIGH, MED,
or LOW
This display is blank when
set to AUTO speed.
Temperature/Timer display
Displays the set temperature by default, or timer setting
when using TIMER ON/OFF functions
o O O
Temperature range: 17-30 C(62 F-86 F)
Timer setting range: 0-24 hours
This display is blank when operating in FAN mode.
1. Press the MODE button to select
COOL mode.
2. Set your desired temperature using
the Temp or Temp button.
3. Press the FAN button to select the
fan speed: AUTO, LOW, MED,or
HIGH.
4. Press the ON/OFF button to start the
unit.
In AUTO mode, the unit will automatically
select the COOL, FAN, HEAT or DRY mode
based on the set temperature.
1. Press the MODE button to select Auto mode.
2. Set your desired temperature using the
Temp or Temp button.
3. Press the ON/OFF button to start the unit.
,
NOTE: FAN SPEED can t be set in Auto mode.
SETTING TEMPERATURE
AUTO operation
The operating temperature range for units is
O O O
17-30 C(62 F-86 F). You can increase or
O O
decrease the set tmeperature in 1 C(1 F)
increments.
COOL operation
1
3
2
1
3
2
4
Not available for this unit
Not available for
this unit
Not available for
this unit
Low battery
detection
Remote LED Screen Indicators
How To Use The Basic Functions
ON/OFF
ON/OFF
TEMP
TEMP
SHORT
CUT
SHORT
CUT
TIMER
ON
TIMER
ON
TIMER
OFF
TIMER
OFF
MODE
MODE
FAN
FAN
SLEEP
SLEEP
LED
LED
FOLLOW
ION
SWING
ME
FOLLOW
ION
SWING
ME
, high
55
66
MODE display
Displays the current
mode, including:
AUTO
COOL
DRY
HEAT
FAN
Transmission Indicator
Lights up when remote sends
signal to unit
ON/OFF display
Appears when the unit is turned on,
and disappears when it is turned off
TIMER ON display
Displays when TIMER
ON is set
TIMER OFF display
Displays when TIMER
OFF is set
SLEEP display
Battery display
SILENT display
ECO display
Displays when
SLEEP function
is activated
FOLLOW ME
display
Indicates that
the FOLLOW ME
function is on
FAN SPEED display
Displays selected FAN SPEED:
HIGH, MED,
or LOW
This display is blank when
set to AUTO speed.
Temperature/Timer display
Displays the set temperature by default, or timer setting
when using TIMER ON/OFF functions
o O O
Temperature range: 17-30 C(62 F-86 F)
Timer setting range: 0-24 hours
This display is blank when operating in FAN mode.
1. Press the MODE button to select
COOL mode.
2. Set your desired temperature using
the Temp or Temp button.
3. Press the FAN button to select the
fan speed: AUTO, LOW, MED,or
HIGH.
4. Press the ON/OFF button to start the
unit.
In AUTO mode, the unit will automatically
select the COOL, FAN, HEAT or DRY mode
based on the set temperature.
1. Press the MODE button to select Auto mode.
2. Set your desired temperature using the
Temp or Temp button.
3. Press the ON/OFF button to start the unit.
,
NOTE: FAN SPEED can t be set in Auto mode.
SETTING TEMPERATURE
AUTO operation
The operating temperature range for units is
O O O
17-30 C(62 F-86 F). You can increase or
O O
decrease the set tmeperature in 1 C(1 F)
increments.
COOL operation
1
3
2
1
3
2
4
Not available for this unit
Not available for
this unit
Not available for
this unit
Low battery
detection
Remote LED Screen Indicators
How To Use The Basic Functions
ON/OFF
ON/OFF
TEMP
TEMP
SHORT
CUT
SHORT
CUT
TIMER
ON
TIMER
ON
TIMER
OFF
TIMER
OFF
MODE
MODE
FAN
FAN
SLEEP
SLEEP
LED
LED
FOLLOW
ION
SWING
ME
FOLLOW
ION
SWING
ME
.
SHORT
CUT



gedurende 3 seconden ingedrukt te houden. Het toestel onthoudt dan de instellingen die op het moment

13
DO324A
www.domo-elektro.be
NL


instellingen.

auto-functie functioneren. Dit is op 26° en de fan-snelheid is auto.
TIMER
ON
TIMER ON – TOETS



display staat.

alle timers geannuleerd.
Zorg ervoor dat de stekker in het stopcontact steekt. Druk op de “timer



aangepast worden, tot max. 24 uur. Na het beeïndigen van de instelling,

het display.

TIMER
OFF
TIMER OFF – TOETS



drukken tot er terug 0.0 op de display staat.

alle timers geannuleerd.
Zorg ervoor dat de stekker in het stopcontact steekt. Druk op de “timer



worden, tot max. 24 uur. Na het beëindigen van de instelling, duurt het

display.



ook wanneer het toestel uitschakelt.

Je wil het toestel laten werken van 16:30 tot 18:00. Stel de functie TIMER ON in op 3,5 h en de TIMER OFF
op 5,0 h.
99
1010
NOTE:
" 0.0h "
When setting the TIMER ON or
TIMER OFF functions, up to 10 hours,
the time will increase in 30 minute
increments with each press. After 10
hours and up to 24, it will increase in 1
hour increments. The timer will revert to
zero after 24 hours.
You can turn off either function by
setting its timer to .
2. Press the TIMER ON button repeatedly
to set the time when you want the unit to
turn on.
3. Wait 2 seconds, then the TIMER ON
function will be activated. The digital
display on your remote control will then
return to the temperature display.
2. Press the TIMER OFF button repeatedly
to set the time when you want the unit to
turn off.
3. Wait 2 seconds, then the TIMER OFF
function will be activated. The digital
display on your remote control will then
return to the temperature display.
Example: Setting unit to turn on after 2.5
hours.
Example: Setting unit to turn off after 5
hours.
2sec
ON/OFF
MODE
FAN
SHORT
CUT
TIMER ON
TIMER OF
F
TEMP
S
L
E
EP
1sec
x5
1
3
2
4
TIMER OFF function
The TIMER OFF function allows you to
set a period of time after which the unit
will automatically turn off, such as when
you wake up.
1.
This number indicates the
amount of time after the current time
that you want the unit to turn on.
For example, if you set TIMER ON for
2 hours, will appear on the
screen, and the unit will turn on after
2 hours.
Press the TIMER ON button. By
default, the last time period that you
set and an "h" (indicating hours)will
appear on the display.
Note:
" 2.0h "
1.
This number indicates the
amount of time after the current time
that you want the unit to turn off.
For example, if you set TIMER OFF for
2 hours, will appear on the
screen, and the unit will turn off after
2 hours.
Press the TIMER OFF button. By
default, the last time period that you
set and an "h" (indicating hours)will
appear on the display.
Note:
" 2.0h "
2sec
x10
ON/OFF
MODE
FAN
SHORT
CUT
TIMER ON
TIMER OF
F
TEMP
S
L
EEP
1sec
1
3
2
4
TIMER ON function
The TIMER ON function allows you to set
a period of time after which the unit will
automatically turn on, such as when you
come home from work.
Your air conditioning unit has two
timer-related functions:
TIMER ON- sets the amount of timer after
which the unit will automatically turn on.
TIMER OFF- sets the amount of time after
which the unit will automatically turn off.
TIMER ON TIMER ON
TIMER OFF
TIMER OFF
Continue to press
TIMER ON
or
TIMER OFF until
desired time is
reached.
Setting the TIMER function
ON/OF F
TEMP
SHORT
CUT
TIMER
ON
TIMER
OFF
MODE
FAN
SLEEP
LED
Timer on
FOL LOW
SWING
ION
ME
14
DO324A
NL
SLEEP
SLEEP – TOETS


het symbool
ON/OF F
TEM P
SHO RT
CUT
TIM ER
ON
TIM ER
OFF
MOD E
FAN
LED
SLE EP
FOL LOW
SWI NG
ME

drukken.



wordt de “sleep”-instelling beëindigd.

SWING


FOLLOW
ME
 TOETS
Met deze wordt de omgevingstemperatuur gemeten door de afstandsbediening in plaats van door het

“auto” en “cool” - instelling zorgt deze functie voor de optimale temperatuur. Druk op de “follow me”
- toets om de functie te activeren. De afstandsbediening zal om de 3 minuten een signaal sturen naar

ON/OF F
TEM P
SHO RT
CUT
TIM ER
ON
TIM ER
OFF
MOD E
FAN
LED
SLE EP
FOL LOW
SWI NG
ME
. Druk opnieuw op de knop om de functie te
annuleren.
LED
LED – TOETS

gebruikt. Druk nog een keer op de knop om de display terug in te schakelen.
REINIGING EN ONDERHOUD
DRAINAGE
Permanente drainage

1. 
achteraan het toestel.
2. Bevestig de drainageslang aan de drainage opening.
3. Zorg ervoor dat het water op een veilige en permanente manier
kan wegvloeien.
Drainage bij P1 code

drainagebak, onderaan het toestel.
· 


is normaal.
· 

15
DO324A
www.domo-elektro.be
NL
· 
· 
· 


· 
REINIGING
· 
· Gebruik geen chemische of schurende producten om het toestel te reinigen.
· 
· 

Luchtlters
· 
weken. Om te voorkomen dat de ventilator slecht gaat werken door stof

· 
grondig en laat deze aan de lucht drogen.
· 
plaatsen.
Behuizing

reinigen. Maak het toestel achteraf grondig droog met een zachte, droge doek.
Opbergen

toestel te voorkomen :
· 
· Zet het toestel daarna aan op de FAN-instelling. Laat het toestel gedurende een halve dag in een

schimmelvorming.
· 
afstandsbediening.
· 
· Berg het toestel op in een droge, donkere ruimte.
1
2
16
DO324A
NL
MOGELIJKE PROBLEMEN EN HUN OPLOSSING
Het toestel werkt niet wanneer je op de aan/uit toets drukt.
· 
· De kamertemperatuur is lager dan de ingestelde temperatuur op het toestel. Pas de temperatuur op
het toestel aan.
De ruimte koelt niet voldoende af.
· 
· 
· De luchtuitlaatslang is niet aangesloten of geblokkeerd. Sluit de slang aan en zorg ervoor dat ze naar
behoren kan functioneren.
· De ingestelde temperatuur is te hoog. Pas de ingestelde temperatuur aan.
Het toestel maakt te veel lawaai of zorgt voor trillingen.
· De vloer is niet recht of vlak genoeg. Plaats het toestel op een rechte, vlakke ondergrond, indien

· 
Het toestel maakt een gorgelend geluid.
· Het geluid komt van de koelvloeistof in het toestel. Dit is normaal.
MILIEURICHTLIJNEN

als huishoudafval mag worden behandeld. Het moet naar een plaats worden
gebracht waar elektrische en elektronische apparatuur wordt gerecycleerd.


kunnen voordoen in geval van verkeerde afvalbehandeling. Voor meer



Het verpakkingsmateriaal is recycleerbaar. Behandel de verpakking
milieubewust.
17
DO324A
www.domo-elektro.be
FR
GARANTIE
Cher client,

d’être proposés à la vente. Si vous deviez toutefois rencontrer
un problème avec votre appareil, nous le déplorons vivement.
Dans ce cas, nous vous invitons à prendre contact avec notre service à la clientèle.
Nos collaboratrices se feront un plaisir de vous aider !
+32 14 21 71 91 [email protected]

Vendredi : 8 h 30 – 12 h et 13 h – 16 h 30
Cet appareil est garanti 2 ans à compter de la date d’achat. Durant la période de garantie, le distributeur

tel problème survient, l’appareil sera remplacé ou réparé. La période de garantie de 2 ans ne reprend pas

sur la base du ticket de caisse.


· Les instructions du manuel n’ont pas été suivies.
· 
· 
· 
· 
· 
fabricant.
CONSIGNES DE SÉCURITÉ

· 
ultérieurement.
· Avant la première utilisation, enlevez tous les éléments d’emballage et les éventuels autocollants

· 

· Coin-cuisine du personnel dans les commerces, les bureaux et autres environnements
professionnels comparables
· Fermes
· 
· 
· Cet appareil peut être utilisé par des enfants âgés de 16 ans ou plus et par des personnes présentant



18
DO324A
FR


surveillance d’un adulte.
· 
· Attention: l’appareil ne peut pas être utilisé avec une minuterie externe.
· 
votre domicile.
· Ne laissez pas le cordon pendre sur une surface chaude ou sur le rebord d’une table.
· 


· 
· 
électrocution ou des blessures.
· 


· 
· 
entrer en contact avec un appareil chaud.
· N’utilisez pas l’appareil à l’extérieur.
· 
· 
· 

fournies dans ce manuel.
· Toutes les réparations, en dehors de l’entretien ordinaire de l’appareil, doivent être réalisées par le
fabricant ou son service après-vente.
· 

· 
· Tenez le cordon éloigné de rebords tranchants et de pièces brûlantes ou d’autres sources de chaleur.
· Avant la première utilisation, enlevez tous les éléments d’emballage et les éventuels autocollants
promotionnels.
· 

· 
· 
· 
proximité d’un point d’eau.
· 
· 
mouillées.
· 
· 
· 
· 
3 minutes au moins pour redémarrer.
19
DO324A
www.domo-elektro.be
FR
· Placez l’appareil à au moins 1 mètre de distance d’un téléviseur ou d’une radio pour éviter des
interférences.
· Pour éviter toute décoloration, n’exposez pas l’appareil à la lumière directe du soleil.
· 

· 
vie.
· 
· 
· 
· 


· N’utilisez pas le climatiseur dans un local humide comme une salle de bain ou une buanderie.
· 
· 
· Veillez à laisser un espace libre d’au moins 30 cm tout autour de l’appareil.
· 
· 
· 
· 
correctement, s’il est tombé ou s’il est endommagé.
· 
· 
· 
insecticide, essence,...
· Les réparations, la détection de fuites et toutes les autres interventions à l’installation doivent être

Informations spéciques concernant les appareils contenant du fluide frigorigène R290
· Lisez attentivement tous les avertissements.
· 
fabricant.
· 

· Ne pas percer, ne pas brûler.
· Les frigorigènes peuvent être sans odeur.
· 
2
.
· 

· R290 est un frigorigène conforme aux directives européennes en matière d’environnement. Ne percez

· Si l’appareil est installé, utilisé ou stocké dans une zone non-ventilée, la pièce doit être conçue de



· 
· 
20
DO324A
FR


· 






CONSEILS ÉNERGÉTIQUES
· 
· 
· 
· 
· Gardez les portes et les fenêtres fermées pour garder l’air froid à l’intérieur et l’air chaud à l’extérieur.
  • Page 1 1
  • Page 2 2
  • Page 3 3
  • Page 4 4
  • Page 5 5
  • Page 6 6
  • Page 7 7
  • Page 8 8
  • Page 9 9
  • Page 10 10
  • Page 11 11
  • Page 12 12
  • Page 13 13
  • Page 14 14
  • Page 15 15
  • Page 16 16
  • Page 17 17
  • Page 18 18
  • Page 19 19
  • Page 20 20
  • Page 21 21
  • Page 22 22
  • Page 23 23
  • Page 24 24
  • Page 25 25
  • Page 26 26
  • Page 27 27
  • Page 28 28
  • Page 29 29
  • Page 30 30
  • Page 31 31
  • Page 32 32
  • Page 33 33
  • Page 34 34
  • Page 35 35
  • Page 36 36
  • Page 37 37
  • Page 38 38
  • Page 39 39
  • Page 40 40
  • Page 41 41
  • Page 42 42
  • Page 43 43
  • Page 44 44
  • Page 45 45
  • Page 46 46
  • Page 47 47
  • Page 48 48
  • Page 49 49
  • Page 50 50
  • Page 51 51
  • Page 52 52
  • Page 53 53
  • Page 54 54
  • Page 55 55
  • Page 56 56
  • Page 57 57
  • Page 58 58
  • Page 59 59

Domo DO324A Omaniku manuaal

Tüüp
Omaniku manuaal