
HQ8150, HQ8142, HQ8140
ENGLISH 4
DANSK 15
26
SUOMI
39
NORSK
50
SVENSKA
61
82
93

4
Important
Read this user manual carefully before you use the
appliance and save it for future reference.
This appliance is not intended for use by persons
(including children) with reduced physical, sensory
or mental capabilities, or lack of experience
and knowledge, unless they have been given
supervision or instruction concerning use of the
appliance by a person responsible for their safety.
Children should be supervised to ensure that they
do not play with the appliance.
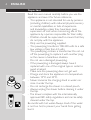
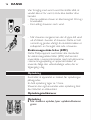
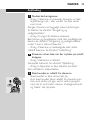
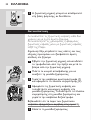
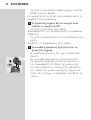
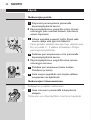
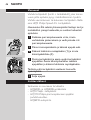
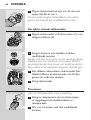
Only use the powerplug supplied.
The powerplug transforms 100-240 volts to a safe
low voltage of less than 24 volts.
The powerplug contains a transformer. Do not cut
off the powerplug to replace it with another plug,
as this causes a hazardous situation.
Do not use a damaged powerplug.
If the powerplug is damaged, always have it
replaced with one of the original type in order to
avoid a hazard.
Make sure the powerplug does not get wet.
Charge and store the appliance at a temperature
between 15°C and 35°C.
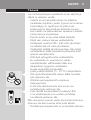
Never immerse the charging stand in water nor
rinse it under the tap.
Do not recharge the shaver in a closed pouch.
Always unplug the shaver before cleaning it under
the tap.
The shaver complies with the internationally
approved IEC safety regulations and can be safely
cleaned under the tap.
Be careful with hot water. Always check if the water
is not too hot, to prevent your hands from getting
burnt.
-
-
-
-
-
-
-
-
-
-
-
-
-
ENGLISH

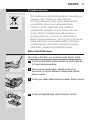
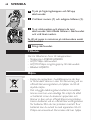
This washable shaver is not suitable for shaving in
the shower.
Do not immerse the shaver in water.
Water may leak from the socket at the bottom
of the appliance, when you rinse it. This is normal
and not dangerous because all electronics are
enclosed in a sealed shell inside the shaver.
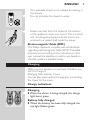
This Philips appliance complies with all standards
regarding electromagnetic elds (EMF). If handled
properly and according to the instructions in this
user manual, the appliance is safe to use based on
scientic evidence available today.
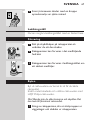
Charging
Make sure the appliance is switched off before you
start to charge it.
Charging takes approx. 1 hour.
You can also shave without charging by connecting
the shaver to the mains.
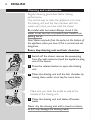
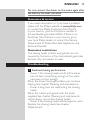
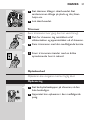
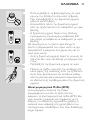
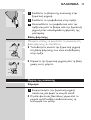
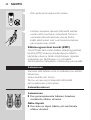
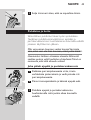
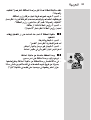
Charging
When the shaver is being charged, the charge
light burns green.
When the battery has been fully charged, the
top light ashes green.
-
-
-
,
,
ENGLISH 5

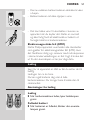
When the battery is running low, the bottom
light burns red.
When you switch the shaver off, this light ashes a
few times.
A fully charged shaver has a cordless shaving time of
up to 55 minutes.
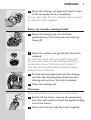
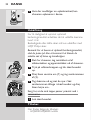
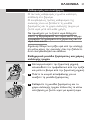
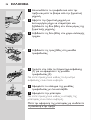
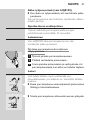
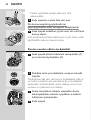
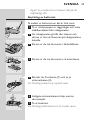
Charging the appliance
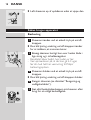
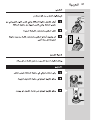
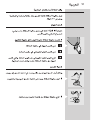
HQ8150 only: Charge the shaver when the bottom
light burns red.
Do not recharge the shaver in a closed pouch.
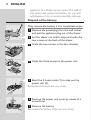
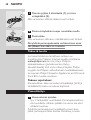
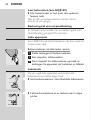
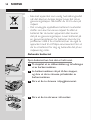
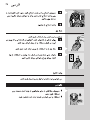
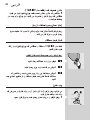
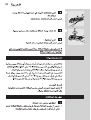
1 Put the appliance plug in the shaver.
2 Put the powerplug in the wall socket.
3 Remove the powerplug from the wall socket
and pull the appliance plug out of the shaver
when the battery has been fully charged.
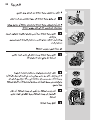
You can also charge the appliance by placing it in the
charging stand, if provided.
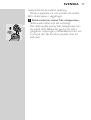
Place the shaver properly in the plugged-in
charging stand.
Lift the shaver from the stand without tilting it.
,
,
,
ENGLISH6

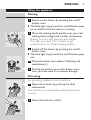
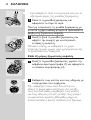
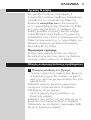
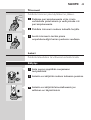
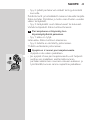
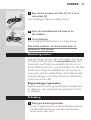
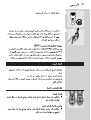
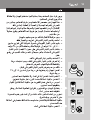
1 Switch on the shaver by pressing the on/off
button once.
The blue light ring around the on/off button goes
on to indicate that the motor is running.
2 Move the shaving heads quickly over your skin,
making both straight and circular movements.
Shaving on a dry face gives the best results.
Your skin may need 2 or 3 weeks to get
accustomed to the Philips shaving system.
3 Switch off the shaver by pressing the on/off
button once.
The blue light ring around the on/off button goes
out.
4 Clean the shaver (see chapter ‘Cleaning and
maintenance’).
5 Put the protection cap on the shaver every
time you have used it, to prevent damage.
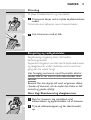
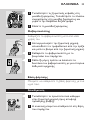
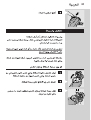
Trimming
For grooming sideburns and moustache.
1 Open the trimmer by pushing the slide
downwards.
The trimmer can be activated while the motor is
running.
2 Close the trimmer (‘click’).
,
-
-
,
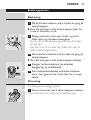
ENGLISH 7

Regular cleaning guarantees better shaving
performance.
The normal way to clean the appliance is to rinse
the shaving unit and the hair chamber with hot
water every time you have used the shaver.
Be careful with hot water. Always check if the
water is not too hot, to prevent your hands from
getting burnt.
Note: Water may leak from the socket at the bottom of
the appliance when you rinse it. This is normal and not
dangerous.
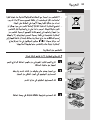
1 Switch off the shaver, remove the powerplug
from the wall socket and pull the appliance plug
out of the shaver.
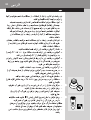
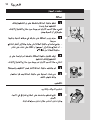
2 Press the release button to open the shaving
unit.
3 Clean the shaving unit and the hair chamber by
rinsing them under a hot tap for some time.
Make sure you clean the inside as well as the
outside of the shaving unit.
4 Close the shaving unit and shake off excess
water.
Never dry the shaving unit with a towel or tissue,
as this may damage the shaving heads.
-
ENGLISH8

5 Open the shaving unit again and leave it open
to let the appliance dry completely.
You can also clean the hair chamber without water
by using the brush supplied.
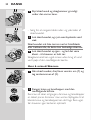
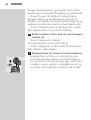
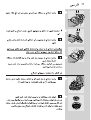
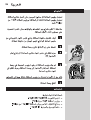
1 Open the shaving unit, turn the lock
anticlockwise (1) and remove the retaining
frame (2).
2 Clean the cutters and guards with the brush
supplied.
Do not clean more than one cutter and guard
at a time, since they are all matching sets. If you
accidentally mix up the cutters and guards, it
may take several weeks before optimal shaving
performance is restored.
3 Put the shaving heads back into the shaving
unit. Put the retaining frame back into the
shaving unit and turn the lock clockwise.
4 Close the shaving unit.
Trimmer
Clean the trimmer every time you have used it.
1 Switch off the shaver, remove the powerplug
from the wall socket and pull the appliance plug
out of the shaver.
2 Clean the trimmer with the brush supplied.
ENGLISH 9

3 Lubricate the trimmer teeth with a drop of
sewing machine oil every six months.
You can clean the charging stand with a moist cloth.
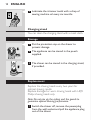
Storage
1
Put the protection cap on the shaver to
prevent damage.
2 The appliance can be stored in the pouch
supplied.
3 The shaver can be stored in the charging stand,
if provided.
Replacement
Replace the shaving heads every two years for
optimal shaving results.
Replace damaged or worn shaving heads with HQ9
Philips shaving heads only.
Note: Do not mix up the cutters and the guards to
guarantee optimal shaving performance.
1 Switch the shaver off, remove the powerplug
from the wall socket and pull the appliance plug
out of the shaver.
ENGLISH10

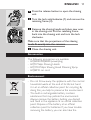
2 Press the release button to open the shaving
unit.
3 Turn the lock anticlockwise (1) and remove the
retaining frame (2).
4 Remove the shaving heads and place new ones
in the shaving unit. Put the retaining frame
back into the shaving unit and turn the lock
clockwise.
Make sure that the projections of the shaving
heads t exactly into the recesses.
5 Close the shaving unit.
The following accessories are available:
HQ8500/HQ8000 powerplug.
HQ9 Philips Shaving Heads.
HQ110 Philips Shaving Head Cleaning Spray.
HQ8010 car cord.
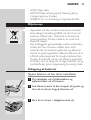
Do not throw away the appliance with the normal
household waste at the end of its life, but hand
it in at an ofcial collection point for recycling. By
doing this, you help to preserve the environment.
The built-in rechargeable battery contains
substances that may pollute the environment.
Always remove the battery before you discard
and hand in the appliance at an ofcial collection
point. Dispose of the battery at an ofcial
collection point for batteries. If you have trouble
removing the battery, you can also take the
-
-
-
-
-
-
ENGLISH 11

appliance to a Philips service centre. The staff of
this centre will remove the battery for you and
will dispose of it in an environmentally safe way.
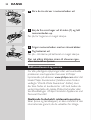
Only remove the battery if it is completely empty.
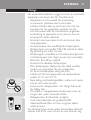
1 Remove the powerplug from the wall socket
and pull the appliance plug out of the shaver.
2 Let the shaver run until it stops and undo the
two screws at the back of the shaver.
3 Undo the two screws in the hair chamber.
4 Undo the three screws in the power unit.
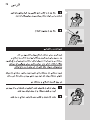
5 Bend the 4 hooks aside (1) to take out the
power unit (2).
Be careful, the hooks are very sharp.
6 Remove the power unit cover by means of a
screwdriver.
7 Remove the battery.
Be careful, the battery strips are very sharp.
ENGLISH12

Do not connect the shaver to the mains again after
the battery has been removed.
If you need information or if you have a problem,
please visit the Philips website at www.philips.com
or contact the Philips Customer Care Centre
in your country (you nd its phone number in
the worldwide guarantee leaet). If there is no
Customer Care Centre in your country, go to
your local Philips dealer or contact the Service
Department of Philips Domestic Appliances and
Personal Care BV.
The shaving heads (cutters and guards) are not
covered by the terms of the international guarantee
because they are subject to wear.
1
Reduced shaving performance.
Cause 1: the shaving heads are dirty.The shaver
has not been rinsed long enough or the water
used was not hot enough.
Clean the shaver thoroughly before you continue
shaving. See chapter ‘Cleaning and maintenance’.
Cause 2: long hairs are obstructing the shaving
heads.
Clean the cutters and guards with the brush
supplied. See chapter ‘Cleaning and maintenance’,
section ‘Every six months: shaving heads’.
Cause 3: the shaving heads are damaged or worn.
Replace the shaving heads. See chapter
‘Replacement’.
-
-
-
ENGLISH 13

2 The shaver does not work when the on/off
button is pressed.
Cause 1: the battery is empty.
Recharge the battery. See chapter ‘Charging’.
Cause 2: the appliance is not connected to the
mains.
Put the powerplug in the wall socket.
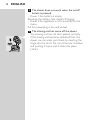
3 The shaving unit has come off the shaver.
The shaving unit has not been placed correctly.
If the shaving unit becomes detached from the
shaver, you can easily put it back by inserting the
hinge into the slot in the rim of the hair chamber
and pushing it home until it locks into place
(‘click’).
-
-
-
-
ENGLISH14

Vigtigt
Læs denne brugsvejledning omhyggeligt igennem,
inden apparatet tages i brug, og gem den til
eventuelt senere brug.
Dette apparat er ikke beregnet til at blive brugt af
personer (herunder børn) med nedsatte fysiske
og mentale evner, nedsat følesans eller manglende
erfaring og viden, medmindre de er blevet vejledt
eller instrueret i apparatets anvendelse af en
person, der er ansvarlig for deres sikkerhed.
Apparatet bør holdes uden for børns rækkevidde
for at sikre, at de ikke kan komme til at lege med
det.
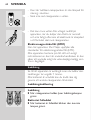
Brug kun det medfølgende netstik.
Net/transformerstikket omformer 100-240 Volt til
en lav sikkerhedsspænding under 24 Volt.
Netstikket indeholder en transformer. Derfor må
det aldrig klippes af og udskiftes med et andet stik,
da det vil resultere i en farlig situation.
Brug aldrig et beskadiget netstik.
Hvis netstikket beskadiges, må det kun udskiftes
med et originalt netstik af samme type for at
undgå enhver risiko ved efterfølgende brug.
Sørg for, at netstikket ikke bliver vådt.
Apparatet skal oplades og opbevares ved
temperaturer mellem 15° C og 35° C.
Opladeren må aldrig kommes ned i vand eller
skylles under vandhanen.
Shaveren må ikke oplades i et lukket etui.
Tag altid stikket ud af shaveren, inden den skylles
under vandhanen.
Produktet opfylder de internationalt godkendte
IEC-sikkerhedsregler og kan skylles under rindende
vand uden risiko.
-
-
-
-
-
-
-
-
-
-
-
-
-
DANSK 15

Vær forsigtig med varmt vand. Kontrollér altid, at
vandet ikke er for varmt, så du ikke skolder dine
hænder.
Denne vaskbare shaver er ikke beregnet til brug i
brusebadet.
Kom aldrig shaveren ned i vand.
Når shaveren rengøres, kan der dryppe lidt vand
ud af stikket i bunden af shaveren. Dette er helt
normalt og ganske ufarligt, da al elektronikken er
indkapslet i en forseglet skal inde i shaveren.
Dette Philips-apparat overholder alle standarder
for elektromagnetiske felter (EMF). Ved korrekt
anvendelse i overensstemmelse med instruktionerne
i denne brugsvejleding, er apparatet sikkert at
anvende, ifølge den videnskabelige viden, der er
tilgængelig i dag.
Kontrollér, at apparatet er slukket, før opladningen
påbegyndes.
En fuld opladning tager ca. 1 time.
Shaveren kan også anvendes uden opladning, blot
den tilsluttet en stikkontakt.
Når shaveren oplades, lyser opladeindikatoren
grønt.
-
-
-
,
DANSK16

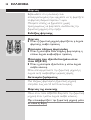
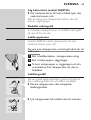
Når batteriet er fuldt opladet, blinker den
øverste lysdiode grønt.
Når batteriet er ved at løbe tør for strøm, lyser
den nederste lysdiode rød.
Når du slukker for shaveren, blinker den et par
gange.
En fuldt opladet shaver giver en ledningsfri brugstid
på op til 55 minutter.
Kun HQ8150: Oplad shaveren, når den nederste
lysdiode lyser rødt.
Shaveren må ikke oplades i et lukket etui.
1 Sæt apparatstikket ind i shaveren.
2 Sæt netstikket i stikkontakten.
3 Så snart shaveren er ladet helt op, tages stikket
ud af stikkontakten og apparatstikket ud af
shaveren.
Hvis der medfølger en opladeenhed, kan shaveren
oplades i denne.
Placér shaveren korrekt i opladeren, som skal
være tilsluttet strøm.
,
,
,
DANSK 17

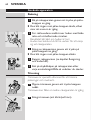
Løft shaveren op af opladeren uden at vippe den.
1 Shaveren tændes ved et enkelt tryk på on/off-
knappen.
Den blå lysring omkring on/off-knappen tænder
for at indikere, at motoren kører.
2 Bevæg skærene hurtigt hen over huden både i
lige strøg og i cirkelbevægelser.
Resultatet bliver bedst, hvis huden er tør.
Vær opmærksom på, at der kan gå 2-3 uger,
før din hud helt har vænnet sig til Philips’
barberingssystem.
3 Shaveren slukkes ved et enkelt tryk på on/off-
knappen.
Den blå lysring omkring on/off-knappen slukker.
4 Rengør shaveren (se afsnittet “Rengøring og
vedligeholdelse”).
5 Sæt altid beskyttelseskappen på shaveren efter
brug for at undgå beskadigelse.
,
,
-
-
,
DANSK18

Trimning
Til pleje af bakkenbarter og moustache.
1 Trimmeren åbnes ved at trykke skydekontakten
nedad.
Trimmeren kan aktiveres, mens shaveren kører.
2 Luk trimmeren med et klik.
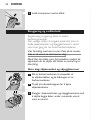
Regelmæssig rengøring sikrer det bedste
barberingsresultat.
Apparatet rengøres normalt ved at skylle skærhoved
og skægkammer under rindende, varmt vand, hver
gang den har været brugt.
Vær forsigtig med varmt vand. Kontrollér altid, at
vandet ikke er for varmt, så du ikke skolder dine
hænder.
Bemærk: Der kan dryppe lidt vand ud gennem stikket
i bunden af shaveren, når du skyller den. Dette er helt
normalt og ganske ufarligt.
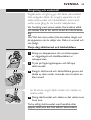
1 Sluk for shaveren, tag netstikket ud af
stikkontakten og apparatstikket ud af shaveren.
2 Tryk på udløserknappen og luk skærhovedet
op.
DANSK 19

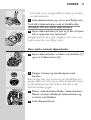
3 Skyl skærhoved og skægkammer grundigt
under den varme hane.
Sørg for, at rengøre både inder- og ydersiden af
skærhovedet.
4 Luk skærhovedet, og ryst overskydende vand
væk.
Skærhovedet må ikke tørres med et håndklæde
eller køkkenrulle, da dette kan beskadige skærene.
5 Luk skærhovedet op igen - og lad det være
åbent - til shaveren er helt tør.
Skægkammeret kan også renses uden brug af vand
ved hjælp af den medfølgende børste.
1 Åbn skærhovedet, drej låsen venstre om (1) og
tag samlerammen af (2).
2 Rengør knive og lamelkapper med den
medfølgende børste.
Rens kun ét skær ad gangen, da knive og lamelkapper
er slebet parvis. Kommer man ved en fejltagelse til at
blande knive og lamelkapper, kan det tage ere uger,
før shaveren igen barberer optimalt.
-
DANSK20

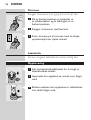
3 Sæt skærene tilbage i skærhovedet. Sæt
samlerammen tilbage på plads og drej låsen
højre om.
4 Luk skærhovedet.
Trimmer
Rens trimmeren hver gang den har været brugt.
1 Sluk for shaveren, tag netstikket ud af
stikkontakten og apparatstikket ud af shaveren.
2 Rens trimmeren med den medfølgende børste.
3 Smør trimmerens tænder med en dråbe
symaskineolie hver 6. måned.
Opladeren kan rengøres med en fugtig klud.
1
Sæt beskyttelseskappen på shaveren, så den
ikke beskadiges.
2 Apparatet kan opbevares i den medfølgende
pung.
DANSK 21

3 Hvis der medfølger en opladerenhed, kan
shaveren opbevares i denne.
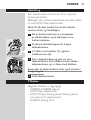
For til stadighed at opnå et optimalt
barberingsresultat anbefales det at udskifte skærene
hvert 2. år.
Beskadigede eller slidte skær må kun udskiftes med
HQ9 Philips skær.
Bemærk: For at bevare et optimalt barberingsresultat,
skal du passe på ikke at komme til at blande de
enkelte sæt af knive og lamelkapper.
1 Sluk for shaveren, tag netstikket ud af
stikkontakten og apparatstikket ud af shaveren.
2 Tryk på udløserknappen og luk skærhovedet
op.
3 Drej låsen venstre om (1) og tag samlerammen
af (2).
4 Tag skærene ud og sæt de nye i. Sæt
samlerammen tilbage i skærhovedet og drej
låsen højre om..
Sørg for, at de små tappe passer præcist ned i
recesserne.
5 Luk skærhovedet.
Der ndes følgende tilbehør:
HQ8500/HQ8000 netstik-
DANSK22
Leht laaditakse ...
Leht laaditakse ...
Leht laaditakse ...
Leht laaditakse ...
Leht laaditakse ...
Leht laaditakse ...
Leht laaditakse ...
Leht laaditakse ...
Leht laaditakse ...
Leht laaditakse ...
Leht laaditakse ...
Leht laaditakse ...
Leht laaditakse ...
Leht laaditakse ...
Leht laaditakse ...
Leht laaditakse ...
Leht laaditakse ...
Leht laaditakse ...
Leht laaditakse ...
Leht laaditakse ...
Leht laaditakse ...
Leht laaditakse ...
Leht laaditakse ...
Leht laaditakse ...
Leht laaditakse ...
Leht laaditakse ...
Leht laaditakse ...
Leht laaditakse ...
Leht laaditakse ...
Leht laaditakse ...
Leht laaditakse ...
Leht laaditakse ...
Leht laaditakse ...
Leht laaditakse ...
Leht laaditakse ...
Leht laaditakse ...
Leht laaditakse ...
Leht laaditakse ...
Leht laaditakse ...
Leht laaditakse ...
Leht laaditakse ...
Leht laaditakse ...
Leht laaditakse ...
Leht laaditakse ...
Leht laaditakse ...
Leht laaditakse ...
Leht laaditakse ...
Leht laaditakse ...
Leht laaditakse ...
Leht laaditakse ...
Leht laaditakse ...
Leht laaditakse ...
Leht laaditakse ...
Leht laaditakse ...
Leht laaditakse ...
Leht laaditakse ...
Leht laaditakse ...
Leht laaditakse ...
Leht laaditakse ...
Leht laaditakse ...
Leht laaditakse ...
Leht laaditakse ...
Leht laaditakse ...
Leht laaditakse ...
Leht laaditakse ...
Leht laaditakse ...
Leht laaditakse ...
Leht laaditakse ...
Leht laaditakse ...
Leht laaditakse ...
Leht laaditakse ...
Leht laaditakse ...
-
 1
1
-
 2
2
-
 3
3
-
 4
4
-
 5
5
-
 6
6
-
 7
7
-
 8
8
-
 9
9
-
 10
10
-
 11
11
-
 12
12
-
 13
13
-
 14
14
-
 15
15
-
 16
16
-
 17
17
-
 18
18
-
 19
19
-
 20
20
-
 21
21
-
 22
22
-
 23
23
-
 24
24
-
 25
25
-
 26
26
-
 27
27
-
 28
28
-
 29
29
-
 30
30
-
 31
31
-
 32
32
-
 33
33
-
 34
34
-
 35
35
-
 36
36
-
 37
37
-
 38
38
-
 39
39
-
 40
40
-
 41
41
-
 42
42
-
 43
43
-
 44
44
-
 45
45
-
 46
46
-
 47
47
-
 48
48
-
 49
49
-
 50
50
-
 51
51
-
 52
52
-
 53
53
-
 54
54
-
 55
55
-
 56
56
-
 57
57
-
 58
58
-
 59
59
-
 60
60
-
 61
61
-
 62
62
-
 63
63
-
 64
64
-
 65
65
-
 66
66
-
 67
67
-
 68
68
-
 69
69
-
 70
70
-
 71
71
-
 72
72
-
 73
73
-
 74
74
-
 75
75
-
 76
76
-
 77
77
-
 78
78
-
 79
79
-
 80
80
-
 81
81
-
 82
82
-
 83
83
-
 84
84
-
 85
85
-
 86
86
-
 87
87
-
 88
88
-
 89
89
-
 90
90
-
 91
91
-
 92
92


teistes keeltes
- svenska: Philips HQ8140/16 Användarmanual
- English: Philips HQ8140/16 User manual
- dansk: Philips HQ8140/16 Brugermanual
