Philips PT720/14 Kasutusjuhend

Kategooria
Meeste pardlid
Tüüp
Kasutusjuhend
User manual
PT919
PT866
PT860
PT845
PT739
PT737
PT731
PT730
PT727
PT726
PT725
PT723
PT721
PT720
1
PT919, PT866, PT860, PT845, PT739, PT737, PT731, PT730, PT727, PT726, PT725, PT723, PT721, PT720
ENGLISH 4
БЪЛГАРСКИ 15
ČEŠTINA 27
EESTI 38
HRVATSKI 49
MAGYAR 60
ҚАЗАҚША 71
LIETUVIŠKAI 83
LATVIEŠU 94
POLSKI 105
ROMÂNĂ 117
РУССКИЙ 129
SLOVENSKY 141
SLOVENŠČINA 152
SRPSKI 163
УКРАЇНСЬКА 174
4
Introduction
Congratulations on your purchase and welcome to Philips!
To fully benet from the support that Philips offers, register your product
at www.philips.com/welcome.
Please read this user manual, as it contains information about the wonderful
features of this shaver as well as some tips to make shaving easier
and more enjoyable.
General description (Fig. 1)
1 Protection cap
2 Shaving unit
3 Shaving unit release button
4 Shaver on/off button
5 Shaving head symbol
6 Charging light
7 Charging stand (PT866*/PT739*)
8 Pouch (PT866*)
9 Adapter
10 Cleaning brush
11 Trimmer release slide (PT919/PT866/PT860/PT845/PT739/PT737/
PT731 only)
12 Trimmer (PT919/PT866/PT860/PT845/PT739/PT737/PT731 only)
Note: You can nd the type number on the back of the shaver.
* only for UK, Holland, Germany, France, Turkey, Sweden, Finland, Norwegia,
Denmark, Italy, Portugal, Spain and Greece.
Important
Read this user manual carefully before you use the appliance and save it for
future reference.
Danger
- Keep the adapter dry.
Warning
- The adapter contains a transformer. Do not cut off the adapter to
replace it with another plug, as this causes a hazardous situation.
- The appliance is not intended for use by persons (including children)
with reduced physical, sensory or mental capabilities, or lack of
experience and knowledge, unless they have been given supervision or
instruction concerning use of the appliance by a person responsible for
their safety.
- Children should be supervised to ensure that they do not play with
the appliance.
- Always unplug the shaver before you clean it under the tap.
ENGLISH
Caution
- Never immerse the shaver in water.
- Do not use the shaver in the bath or in the shower.
- Never use water hotter than 80°C to rinse the shaver.
- Be careful with hot water. Always check if the water is not too hot,
to prevent your hands from getting burnt.
- The shaver is not dishwasher-proof.
- Water may leak from the socket at the bottom of the shaver when you
rinse it. This is normal and not dangerous because all electronics are
enclosed in a sealed power unit inside the shaver.
- Do not use the shaver, adapter or any other part if it is damaged, as this
may cause injury. Always replace a damaged adapter, charger or part
with one of the original type.
- Use, charge and store the appliance at a temperature between 10°C
and 35°C.
- Always place and use the shaver on a surface that is uid-resistant.
- Only use the adapter, charger and accessories supplied.
- Always put the protection cap on the shaver to prevent damage and
to avoid dirt accumulation in the shaving heads.
Compliance with standards
- This Philips appliance complies with all standards and regulations
regarding exposure to electromagnetic elds (EMF) and can be safely
cleaned under the tap.
General
- The appliance is equipped with an automatic voltage selector and is
suitable for mains voltages ranging from 100 to 240 volts.
- The adapter transforms 100-240 volts to a safe low voltage of less than
24 volts.
Charging
PT919/PT866/PT860: It takes approx. 1 hour to fully charge the shaver.
PT845/PT739/PT737/PT731/PT730/PT727/PT726/PT725/PT721/PT720:
It takes approx. 8 hours to fully charge the shaver.
When you charge the shaver for the rst time or after a long period of
disuse, let it charge until the charging light lights up continuously.
A fully charged shaver provides up to 50 (PT919/PT866/PT860) or up to
45 shaving minutes (PT845/PT739/PT737/PT731/PT730/PT727/PT726/
PT725/PT721/PT720).
The shaving time may be less than 50 (PT919/PT866/PT860) or 45 shaving
minutes (PT845/PT739/PT737/PT731/PT730/PT727/PT726/PT725/PT721/
PT720) as a result of your shaving behaviour, your cleaning habits or your
beard type.
ENGLISH 5
Charge indications
Battery low
- When the battery is almost empty (when there are only 5 or fewer
shaving minutes left), the charging light starts to ash orange.
- When you switch off the shaver, the charging light continues to ash
orange for a few seconds.
Quick charging
- When you start charging the empty battery, the charging light
alternately ashes orange and green. After approx. 3 minutes, the
charging light continues to ash green. The shaver now contains enough
energy for a 5-minute shave.
Charging
- When the shaver is charging, the charging light ashes green.
Battery fully charged
- When the battery is fully charged, the charging light lights up green
continuously.
Note: After approx. 30 minutes, the charging light goes out to save energy.
Charging with the adapter
1 Put the small plug in the shaver.
2 Put the adapter in the wall socket.
, The charging light shows the charging status of the shaver
(see section ‘Charge indications’ in this chapter).
Charging in the charging stand (PT866/PT739 only)
1 Put the small plug in the charging stand.
2 Put the adapter in the wall socket.
3 Place the shaver in the charging stand.
, The charging light shows the charging status of the shaver
(see section ‘Charge indications’ in this chapter).
ENGLISH6
Using the shaver
Note: You can also use the shaver directly from the mains. Simply connect the
shaver to the mains.
Shaving
1 Press the on/off button once to switch on the shaver.
2 Move the shaving heads over your skin. Make circular movements.
- Your skin may need 2 or 3 weeks to get accustomed to the Philips
shaving system.
3 Press the on/off button once to switch off the shaver.
4 Clean the shaver (see chapter ‘Cleaning and maintenance’).
Trimming (PT919/PT866/PT860/PT845/PT739/PT737/PT731 only)
You can use the trimmer to groom your sideburns and moustache.
1 Press the on/off button once to switch on the shaver.
2 Push the trimmer slide downwards to open the trimmer.
, You can now start trimming.
3 After trimming, close the trimmer and switch off the shaver.
Cleaning and maintenance
Never use compressed air, scouring pads, abrasive cleaning agents or
aggressive liquids such as petrol or acetone to clean the appliance.
- Clean the shaver after every shave for optimal shaving performance.
- Regular cleaning guarantees better shaving performance.
- For the best cleaning results, we advise you to use the Philips Cleaning
spray (HQ110).
- Be careful with hot water. Always check if the water is not too hot,
to prevent your hands from getting burnt.
Note: Water may leak from the socket at the bottom of the shaver when you
rinse it. This is normal and not dangerous because all electronics are enclosed
in a sealed power unit inside the shaver.
ENGLISH 7
Cleaning the shaving unit under the tap
1 Switch off the shaver and disconnect it from the mains.
2 Press the release button to open the shaving unit.
3 Rinse the shaving unit and hair chamber under a hot tap for
30 seconds.
Be careful with hot water. Always check if the water is not too hot,
to prevent your hands from getting burnt.
- Rinse the hair chamber and the inside of the shaving unit.
- Rinse the outside of the shaving unit.
4 Close the shaving unit and shake off excess water.
Be careful not to hit the shaving unit against anything while shaking off
excess water.
Never dry the shaving unit and the hair chamber with a towel or tissue,
as this may damage the shaving heads and the coupling spindles.
5 Open the shaving unit again and leave it open to let the shaver dry
completely.
Cleaning the shaving unit with the cleaning brush
1 Switch off the shaver and disconnect it from the mains.
2 Press the release button to open the shaving unit.
3 Pull the shaving unit off the shaver.
ENGLISH8
4 Turn the lock anticlockwise (A) and remove the retaining frame (B).
5 Remove and clean one shaving head at a time. Each shaving head
consists of a cutter and a guard.
Note: Do not clean more than one cutter and guard at a time, since they are
all matching sets. If you accidentally mix up the cutters and guards, it may take
several weeks before optimal shaving performance is restored.
- Remove the cutter from the shaving guard and clean it with the brush.
- Clean the inside and outside of the shaving guard with the brush.
6 Put the shaving heads back into the shaving unit.
Note: Make sure that the projections of the shaving heads t exactly into
the recesses.
ENGLISH 9
7 Put the retaining frame back into the shaving unit (A) and turn the
lock clockwise (B).
8 Insert the lug of the shaving unit into the slot in the top of the shaver.
Then close the shaving unit.
Note: If the shaving unit does not close smoothly, check if you have inserted
the shaving heads properly and if the retaining frame is locked.
Cleaning the trimmer with the cleaning brush (PT919/PT866/
PT860/PT845/PT739/PT737/PT731 only)
Clean the trimmer every time you have used it.
1 Switch off the shaver and disconnect it from the mains.
2 Push the trimmer slide downwards to open the trimmer.
3 Clean the trimmer with the short-bristled side of the cleaning brush.
Brush up and down along the trimmer teeth.
4 Close the trimmer (‘ click’).
Tip: For optimal trimming performance, lubricate the trimmer teeth with a drop
of sewing machine oil every six months.
ENGLISH10
Storage
- Put the protection cap on the shaver after use to prevent damage and
to avoid dirt accumulation in the shaving heads.
- PT866 only: Store the appliance and the accessories in the pouch.
Replacement
For maximum shaving performance, we advise you to replace the shaving
heads every two years.
Replacement reminder
The shaving head symbol will light up to indicate that the shaving heads
need to be replaced. Replace damaged shaving heads right away.
Only replace the shaving heads with original HQ8 or HQ9 (PT919 only)
Philips Shaving Heads.
1 The shaving head symbol lights up orange continuously.
2 Switch off the shaver. Disconnect the shaver from the mains.
3 Press the release button to open the shaving unit.
4 Pull the shaving unit off the shaver.
5 Turn the lock anticlockwise (A) and remove the retaining frame (B).
6 Remove the shaving heads and place new ones in the shaving unit.
ENGLISH 11
Note: Make sure that the projections of the shaving heads t exactly into the
recesses.
7 Put the retaining frame back into the shaving unit (A) and turn the
lock clockwise (B).
8 Insert the lug of the new shaving unit into the slot in the top of the
shaver. Then close the shaving unit.
Note: If the shaving unit does not close smoothly, check if you have inserted
the shaving heads properly and if the retaining frame is locked.
9 Press and hold the on/off button for 5 seconds to reset the
replacement reminder on the shaver. The orange light goes out.
Accessories
To retain the top performance of your shaver, make sure you clean it
regularly and replace its shaving heads at the recommended time.
Shaving heads
- We advise you to replace your shaving heads every two years. Always
replace with HQ8 or HQ9 (PT919 only) Philips Shaving Heads
Cleaning
- Use Cleaning spray (HQ110) to clean the shaving heads thoroughly.
ENGLISH12
Environment
- Do not throw away the appliance with the normal household waste at
the end of their life, but hand them in at an ofcial collection point for
recycling. By doing this, you help to preserve the environment.
- The built-in rechargeable shaver battery contains substances that
may pollute the environment. Always remove the battery before you
discard or hand in the shaver at an ofcial collection point. Dispose
of the battery at an ofcial collection point for batteries. If you have
trouble removing the battery, you can also take the appliance to a
Philips service centre. The staff of this centre will remove the battery
for you and will dispose of it in an environmentally safe way.
Removing the rechargeable shaver battery
Only remove the rechargeable battery when you discard the shaver.
Make sure the rechargeable battery is completely empty when you
remove it.
1 Disconnect the shaver from the mains.
2 Let the shaver run until it stops.
3 Undo the screws in the back of the shaver and in the hair chamber.
4 Remove the front panel and the back panel.
5 Bend the 6 hooks aside and take out the power unit.
Be careful, the hooks are sharp.
6 Remove the battery.
Be careful, the battery strips are sharp.
Do not connect the shaver to the mains again after you have removed
the rechargeable battery.
Guarantee and support
If you need information or support, please visit www.philips.com/
support or read the separate worldwide guarantee leaet. If there is no
Consumer Care Centre in your country, go to your local Philips dealer.
Guarantee restrictions
The shaving heads (cutters and guards) are not covered by the terms of
the international guarantee because they are subject to wear.
ENGLISH 13
Troubleshooting
This chapter summarises the most common problems you could
encounter with the appliance. If you are unable to solve the problem with
the information below, contact the Consumer Care Centre in your country.
Problem Possible cause Solution
The shaver does
not shave as well
as it used to.
The shaving heads are
damaged or worn.
Replace the shaving heads (see chapter
‘Replacement’).
Long hairs obstruct the
shaving heads.
Clean the shaving heads one by one (see chapter
‘Cleaning and maintenance’).
You have not inserted the
shaving heads properly.
Make sure that the projections of the shaving heads
t exactly into the recesses (see chapter ‘Cleaning
and maintenance’).
The shaver does
not work when I
press the on/off
button.
The rechargeable battery
is empty.
Recharge the battery (see chapter ‘Charging’) or
connect the shaver to the mains.
The temperature of the
shaver is too high. In this
case, the shaver does not
work.
As soon as the temperature of the shaver has
dropped sufciently, you can switch on the shaver
again.
Water leaks from
the shaver after
cleaning.
This is normal and not
dangerous.
During rinsing some water may collect between
the power unit and the housing. After rinsing this
water ows out through the socket. The power unit
is completely watertight so water cannot reach the
electronic parts of the shaver. Your shaver continues
to be absolutely safe.
ENGLISH14
15
Въведение
Поздравления за вашата покупка и добре дошли във Philips! За
да се възползвате изцяло от предлаганата от Philips поддръжка,
регистрирайте продукта си на адрес www.philips.com/welcome.
Прочетете внимателно това ръководство за експлоатация, тъй като то
съдържа информация за прекрасните функции на тази самобръсначка,
а също и някои съвети, които ще направят бръсненето ви по-бързо и
по-приятно.
Общо описание (фиг. 1)
1 Предпазна капачка
2 Бръснещ блок
3 Бутон за освобождаване на бръснещия блок
4 Бутон за вкл./изкл. на самобръсначката
5 Символ на бръснеща глава
6 Светлинен индикатор за зареждане
7 Зарядна поставка (PT866*/PT739*)
8 Калъф (PT866*)
9 Адаптер
10 Четка за почистване
11 Плъзгач за освобождаване на машинката за подстригване (само за
PT919/PT866/PT860/PT845/PT739/PT737/PT731)
12 Машинка за подстригване (само за PT919/PT866/PT860/PT845/
PT739/PT737/PT731)
Забележка: Можете да откриете номера на модела на гърба на
самобръсначката.
* само за Великобритания, Холандия, Германия, Франция, Турция,
Швеция, Финландия, Норвегия, Дания, Италия, Португалия, Испания и
Гърция.
Важно
Преди да използвате уреда, прочетете внимателно това ръководство
за потребителя и го запазете за справка в бъдеще.
Опасност
- Пазете адаптера сух.
Предупреждение
- В адаптера има трансформатор. Не отрязвайте адаптера, за да го
замените с друг щепсел, тъй като това крие опасности.
- Уредът не е предназначен за използване от хора, включително
деца, с намалени физически усещания или умствени недостатъци,
или без опит и познания, ако са оставени без наблюдение и не са
инструктирани от страна на отговарящо за тяхната безопасност
лице относно начина за използване на уреда.
- Наглеждайте децата, за да не си играят с уреда.
- Винаги изключвайте щепсела от контакта, преди да измиете
самобръсначката с течаща вода.
БЪЛГАРСКИ
Внимание
- Никога не потапяйте самобръсначката във вода.
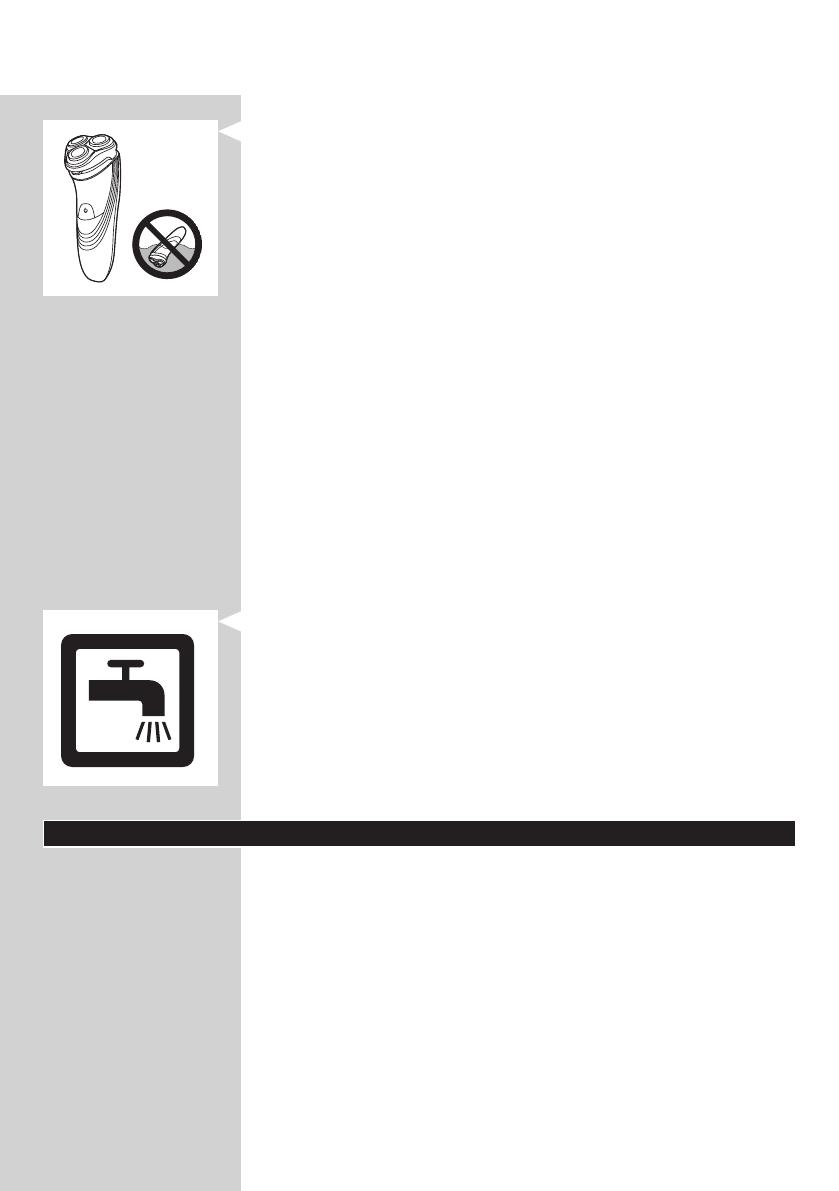
- Не използвайте самобръсначката във ваната или под душа.
- Никога не изплаквайте самобръсначката с вода, по-гореща от 80°C.
- Внимавайте с горещата вода. Винаги проверявайте дали водата не
е прекалено гореща, за да предпазите ръцете си от изгаряне.
- Самобръсначката не може да се мие в съдомиялна машина.
- От гнездото отдолу на самобръсначката може да тече вода,
когато я изплаквате. Това е нормално и не е опасно, тъй като
цялата електроника е затворена в капсулован захранващ блок
вътре в самобръсначката.
- Не използвайте самобръсначката, адаптера или която и да било
друга принадлежност, ако са повредени, тъй като това може да
причини наранявания. Винаги подменяйте повредения адаптер,
зарядно устройство или принадлежност само с оригинални такива.
- Използвайте, зареждайте и съхранявайте уреда при температура
между 10°C и 35°C.
- Винаги поставяйте и използвайте самобръсначката върху
устойчива на течности повърхност.
- Използвайте само приложените адаптер, зарядно
устройство и принадлежности.
- Винаги поставяйте предпазната капачка на самобръсначката, за да
избегнете повреди и натрупване на прах или замърсяване върху
бръснещите глави.
Съответствие със стандартите
- Този уред на Philips е в съответствие с нормативната уредба
и всички действащи стандарти, свързани с излагането на
електромагнитни излъчвания (ЕМП) и може да се почиства
безопасно с течаща вода.
Общи положения
- Уредът е съоръжен с автоматичен селектор на напрежение и е
подходящ за напрежения на мрежата от 100 до 240 волта.
- Адаптерът преобразува 100-240 волта в безопасно ниско
напрежение под 24 волта.
Зареждане
PT919/PT866/PT860: Необходим е около 1 час за пълно зареждане на
самобръсначката.
PT845/PT739/PT737/PT731/PT730/PT727/PT726/PT725/PT721/PT720:
Необходими са около 8 часа за пълно зареждане на самобръсначката.
Когато зареждате самобръсначката за първи път или след като
не е използвана дълго време, оставете я да се зарежда, докато
индикаторът за зареждане започне да свети постоянно.
Напълно заредена самобръсначка осигурява до 50 (PT919/PT866/
PT860) или до 45 минути за бръснене (PT845/PT739/PT737/PT731/
PT730/PT727/PT726/PT725/PT721/PT720).
Времето за бръснене може да е по-малко от 50 (PT919/PT866/PT860)
или 45 минути (PT845/PT739/PT737/PT731/PT730/PT727/PT726/PT725/
PT721/PT720) в зависимост от начина ви на бръснене, навиците ви за
почистване и вида на брадата ви.
БЪЛГАРСКИ16
Индикации за зареждане
Изтощена батерия
- Когато батерията е почти изтощена (остават само 5 или по-малко
минути за бръснене), индикаторът за зареждане започва да мига в
оранжево.
- Когато изключите самобръсначката, индикаторът за зареждане
продължава да мига в оранжево още няколко секунди.
Бързо зареждане
- Когато започне зареждането на напълно изтощената батерия,
индикаторът за зареждане мига последователно в оранжево и
зелено. След около 3 минути индикаторът продължава да мига в
зелено. Сега самобръсначката има достатъчно заряд за 5-минутно
бръснене.
Зареждане
- Когато самобръсначката се зарежда, индикаторът за зареждане
мига в зелено.
Напълно заредена батерия
- Когато батерията е напълно заредена, индикаторът за зареждане
свети непрекъснато в зелено.
Забележка: След около 30 минути индикаторът за зареждане угасва,
за да се пести енергия.
Зареждане с адаптера
1 Включетемалкиящепселвсамобръсначката.
2 Включетеадаптеравконтакта.
, Индикаторътзазарежданепоказвасъстояниетоназареждане
насамобръсначката(вижтераздел“Индикациизазареждане”
втазиглава).
Зареждане в зарядната поставка (само за PT866/PT739)
1 Включетемалкиящепселвзаряднатапоставка.
2 Включетеадаптеравконтакта.
3 Сложетесамобръсначкатавзаряднатапоставка.
, Индикаторътзазарежданепоказвасъстояниетоназареждане
насамобръсначката(вижтераздел“Индикациизазареждане”
втазиглава).
БЪЛГАРСКИ 17
Използване на самобръсначката
Забележка: Можете да използвате самобръсначката и с директно
захранване от електрическата мрежа. Просто включете
самобръсначката в контакта.
Бръснене
1 Натиснетеведнъжбутонавкл./изкл.,задавключите
самобръсначката.
2 Движетебръснещитеглавипокожатаси.Праветекръгови
движения.
- Може да са необходими 2 или 3 седмици, докато кожата ви
свикне със системата за бръснене Philips.
3 Натиснетееднократнобутонавкл./изкл.,задаизключите
самобръсначката.
4 Почистетесамобръсначката(вж.раздел“Почистванеи
поддръжка”).
Подстригване (само за PT919/PT866/PT860/PT845/PT739/
PT737/PT731)
Можете да ползвате машинката за подстригване, за да оформите
бакенбардите и мустаците.
1 Натиснетеведнъжбутонавкл./изкл.,задавключите
самобръсначката.
2 Избутайтеплъзгачанамашинкатазаподстригваненадолу,зада
отворитемашинката.
, Сегаможетедазапочнетеподстригването.
3 Следподстригване,затворетемашинкатазаподстригванеи
изключетесамобръсначката.
Почистване и поддръжка
Никоганепочиствайтеуредасвъздухподналягане,абразивнигъби,
абразивнипочистващипрепаратиилиагресивнитечности,като
бензинилиацетон.
- За най-добри резултати при бръснене почиствайте
самобръсначката след всяка употреба.
- Редовното почистване гарантира по-ефикасно бръснене.
- За най-добри резултати при почистване ви съветваме да
използвате спрей за почистване Philips (HQ110).
БЪЛГАРСКИ18
- Внимавайте с горещата вода. Винаги проверявайте дали водата не
е прекалено гореща, за да предпазите ръцете си от изгаряне.
Забележка: От гнездото отдолу на самобръсначката може да тече
вода, когато я изплаквате. Това е нормално и не е опасно, тъй като
цялата електроника е затворена в капсулован захранващ блок вътре
в самобръсначката.
Почистване на бръснещия блок с течаща вода
1 Изключетесамобръсначкатаиизвадетещепселаотконтакта.
2 Натиснетебутоназаосвобождаване,задаотворитебръснещия
блок.
3 Изплакнетебръснещияблокиотделениетозакосмисгореща
течащаводаза30секунди.
Внимавайтесгорещатавода.Винагипроверявайтедаливодатане
епрекаленогореща,задапредпазитеръцетесиотизгаряне.
- Изплакнете отделението за косми и вътрешността на бръснещия
блок.
- Изплакнете бръснещия блок отвън.
4 Затворетебръснещияблокиизтръскайтеизлишнатавода.
Докатоизтръскватеводата,внимавайтеданеударитенякъде
бръснещияблок.
Никоганеподсушавайтебръснещияблокиотделениетозакосмис
кърпазабаняилихартиенисалфетки,защототоваможедаповреди
бръснещитеглавиисвързващитешпиндели.
5 Отворетеотновобръснещияблокигооставетеотворен,зада
можесамобръсначкатадаизсъхненапълно.
Почистване на бръснещия блок с четката за почистване
1 Изключетесамобръсначкатаиизвадетещепселаотконтакта.
2 Натиснетебутоназаосвобождаване,задаотворитебръснещия
блок.
БЪЛГАРСКИ 19
3 Извадетебръснещияблокотсамобръсначката.
4 Завъртетеограничителяобратноначасовниковатастрелка(А)
исвалетезадържащатарамка(В).
5 Сваляйтеипочиствайтебръснещитеглавиеднапоедна.Всяка
бръснещаглавасесъстоиотножчеипредпазител.
Забележка: Ножчетата и предпазителите са в комплекти по двойки.
Почиствайте двойките една по една, защото ако случайно размените
ножчетата и предпазителите, може да минат няколко седмици,
докато се възстанови оптималната работа при бръснене.
- Извадете ножчето от предпазителя и го почистете с четката.
- Почистете предпазителя отвътре и отвън с четката.
6 Поставетебръснещитеглавиобратновбръснещияблок.
БЪЛГАРСКИ20
  • Page 1 1
  • Page 2 2
  • Page 3 3
  • Page 4 4
  • Page 5 5
  • Page 6 6
  • Page 7 7
  • Page 8 8
  • Page 9 9
  • Page 10 10
  • Page 11 11
  • Page 12 12
  • Page 13 13
  • Page 14 14
  • Page 15 15
  • Page 16 16
  • Page 17 17
  • Page 18 18
  • Page 19 19
  • Page 20 20
  • Page 21 21
  • Page 22 22
  • Page 23 23
  • Page 24 24
  • Page 25 25
  • Page 26 26
  • Page 27 27
  • Page 28 28
  • Page 29 29
  • Page 30 30
  • Page 31 31
  • Page 32 32
  • Page 33 33
  • Page 34 34
  • Page 35 35
  • Page 36 36
  • Page 37 37
  • Page 38 38
  • Page 39 39
  • Page 40 40
  • Page 41 41
  • Page 42 42
  • Page 43 43
  • Page 44 44
  • Page 45 45
  • Page 46 46
  • Page 47 47
  • Page 48 48
  • Page 49 49
  • Page 50 50
  • Page 51 51
  • Page 52 52
  • Page 53 53
  • Page 54 54
  • Page 55 55
  • Page 56 56
  • Page 57 57
  • Page 58 58
  • Page 59 59
  • Page 60 60
  • Page 61 61
  • Page 62 62
  • Page 63 63
  • Page 64 64
  • Page 65 65
  • Page 66 66
  • Page 67 67
  • Page 68 68
  • Page 69 69
  • Page 70 70
  • Page 71 71
  • Page 72 72
  • Page 73 73
  • Page 74 74
  • Page 75 75
  • Page 76 76
  • Page 77 77
  • Page 78 78
  • Page 79 79
  • Page 80 80
  • Page 81 81
  • Page 82 82
  • Page 83 83
  • Page 84 84
  • Page 85 85
  • Page 86 86
  • Page 87 87
  • Page 88 88
  • Page 89 89
  • Page 90 90
  • Page 91 91
  • Page 92 92
  • Page 93 93
  • Page 94 94
  • Page 95 95
  • Page 96 96
  • Page 97 97
  • Page 98 98
  • Page 99 99
  • Page 100 100
  • Page 101 101
  • Page 102 102
  • Page 103 103
  • Page 104 104
  • Page 105 105
  • Page 106 106
  • Page 107 107
  • Page 108 108
  • Page 109 109
  • Page 110 110
  • Page 111 111
  • Page 112 112
  • Page 113 113
  • Page 114 114
  • Page 115 115
  • Page 116 116
  • Page 117 117
  • Page 118 118
  • Page 119 119
  • Page 120 120
  • Page 121 121
  • Page 122 122
  • Page 123 123
  • Page 124 124
  • Page 125 125
  • Page 126 126
  • Page 127 127
  • Page 128 128
  • Page 129 129
  • Page 130 130
  • Page 131 131
  • Page 132 132
  • Page 133 133
  • Page 134 134
  • Page 135 135
  • Page 136 136
  • Page 137 137
  • Page 138 138
  • Page 139 139
  • Page 140 140
  • Page 141 141
  • Page 142 142
  • Page 143 143
  • Page 144 144
  • Page 145 145
  • Page 146 146
  • Page 147 147
  • Page 148 148
  • Page 149 149
  • Page 150 150
  • Page 151 151
  • Page 152 152
  • Page 153 153
  • Page 154 154
  • Page 155 155
  • Page 156 156
  • Page 157 157
  • Page 158 158
  • Page 159 159
  • Page 160 160
  • Page 161 161
  • Page 162 162
  • Page 163 163
  • Page 164 164
  • Page 165 165
  • Page 166 166
  • Page 167 167
  • Page 168 168
  • Page 169 169
  • Page 170 170
  • Page 171 171
  • Page 172 172
  • Page 173 173
  • Page 174 174
  • Page 175 175
  • Page 176 176
  • Page 177 177
  • Page 178 178
  • Page 179 179
  • Page 180 180
  • Page 181 181
  • Page 182 182
  • Page 183 183
  • Page 184 184
  • Page 185 185
  • Page 186 186

Philips PT720/14 Kasutusjuhend

Kategooria
Meeste pardlid
Tüüp
Kasutusjuhend