Samsung PS43E450A1W Lühike juhend

Kategooria
Plasmatelerid
Tüüp
Lühike juhend

See käsiraamat sobib ka

Plasma TV
user manual
Thank you for purchasing this Samsung product.
To receive more complete service, please register
your product at
www.samsung.com/register
Model _____________ Serial No. _____________
E-MANUAL
© 2012 Samsung Electronics Co., Ltd. All rights reserved.
Contact SAMSUNG WORLDWIDE
If you have any questions or comments relating to Samsung products, please contact the SAMSUNG customer care centre.
Country
Customer Care Centre
Web Site
ALBANIA 42 27 5755 www.samsung.com
AUSTRIA 0810 - SAMSUNG (7267864, € 0.07/min) www.samsung.com
BELGIUM 02-201-24-18 www.samsung.com/be (Dutch)
www.samsung.com/be_fr (French)
BOSNIA 05 133 1999 www.samsung.com
BULGARIA 07001 33 11 www.samsung.com
CROATIA 062 SAMSUNG (062 726 7864) www.samsung.com
CZECH 800 - SAMSUNG (800-726786) www.samsung.com
Samsung Electronics Czech and Slovak, s.r.o., Oasis Florenc, Sokolovská 394/17, 180 00, Praha 8
DENMARK 70 70 19 70 www.samsung.com
FINLAND 030 - 6227 515 www.samsung.com
FRANCE 01 48 63 00 00 www.samsung.com
GERMANY 01805 - SAMSUNG (726-7864 € 0,14/Min) www.samsung.com
CYPRUS From landline : 8009 4000 www.samsung.com
GREECE From landline : 80111-SAMSUNG (7267864)
From landline & mobile : (+30) 210 6897691
www.samsung.com
HUNGARY 06-80-SAMSUNG(726-7864) www.samsung.com
ITALIA 800-SAMSUNG(726-7864) www.samsung.com
KOSOVO +381 0113216899 www.samsung.com
LUXEMBURG 261 03 710 www.samsung.com
MACEDONIA 023 207 777 www.samsung.com
MONTENEGRO 020 405 888 www.samsung.com
NETHERLANDS 0900-SAMSUNG (0900-7267864) (€ 0,10/Min) www.samsung.com
NORWAY 815-56 480 www.samsung.com
POLAND 0 801-1SAMSUNG(172-678)
+48 22 607-93-33
www.samsung.com
PORTUGAL 808 20-SAMSUNG (808 20 7267) www.samsung.com
RUMANIA From landline : 08010-SAMSUNG (7267864)
From landline & mobile : (+40) 21 206 01 10
www.samsung.com
SERBIA 0700 Samsung (0700 726 7864) www.samsung.com
SLOVAKIA 0800 - SAMSUNG (0800-726 786) www.samsung.com/sk
SPAIN 902 - 1 - SAMSUNG (902 172 678) www.samsung.com
SWEDEN 0771 726 7864 (SAMSUNG) www.samsung.com
SWITZERLAND 0848 - SAMSUNG(7267864, CHF 0.08/min) www.samsung.com/ch
www.samsung.com/ch_fr (French)
U.K 0330 SAMSUNG (7267864) www.samsung.com
EIRE 0818 717100 www.samsung.com
LITHUANIA 8-800-77777 www.samsung.com
LATVIA 8000-7267 www.samsung.com
ESTONIA 800-7267 www.samsung.com
TURKEY 444 77 11 www.samsung.com
BN68-03998G
BN68-03998G-01
Plasma TV
user manual
[PE450-BT]BN68-03998G.indb 1 2012-02-14 �� 11:40:52
English - 2
For more information on how to use e-Manual (p. 9)
Figures and illustrations in this User Manual are provided for reference only and may differ from actual product appearance. Product
design and specifications may be changed without notice.
Digital TV notice
1. Functionalities related to Digital TV (DVB) are only available in countries/areas where DVB-T (MPEG2 and MPEG4 AVC) digital terrestrial
signals are broadcasted or where you are able to access to a compatible DVB-C (MPEG2 and MPEG4 AAC) cable-TV service. Please
check with your local dealer the possibility to receive DVB-T or DVB-C signal.
2. DVB-T is the DVB European consortium standard for the broadcast transmission of digital terrestrial television and DVB-C is that for the
broadcast transmission of digital TV over cable. However, some differentiated features like EPG (Electric Programme Guide), VOD (Video On
Demand) and so on, are not included in this specification. So, they cannot be workable at this moment.
3. Although this TV set meets the latest DVB-T and DVB-C standards, as of [August, 2008], the compatibility with future DVB-T digital
terrestrial and DVB-C digital cable broadcasts cannot be guaranteed.
4. Depending on the countries/areas where this TV set is used some cable-TV providers may charge an additional fee for such a service and
you may be required to agree to terms and conditions of their business.
5. Some Digital TV functions might be unavailable in some countries or regions and DVB-C might not work correctly with some cable service
providers.
6. For more information, please contact your local Samsung customer care centre.
The reception quality of TV may be affected due to differences in broadcasting method between the countries. Please check the TV
performance in the local SAMSUNG Authorized Dealer, or the Samsung Call Centre whether it can be improved by reconfiguring TV
setting or not.
User Instructions
• Screen Image retention
Do not display a still image (such as on a video game) on the plasma display panel for more than several minutes as it can cause screen
image retention. This image retention is also known as “screen burn”. To avoid such image retention, reduce the degree of brightness and
contrast of the screen when displaying a still image.
• Heat on the top of the Plasma TV
The top side of the product may be hot after long periods of use as heat dissipates from the panel through the vent hole in the upper part of
the product.
This is normal and does not indicate any defect or operation failure of the product.
However, children should be prevented from touching the upper part of the product.
• The product is making a cracking” noise.
A “cracking” noise may occur when the product contracts or expands due to a change in the surrounding environment such as
temperature or humidity. This is normal and not a defect of the unit.
• Cell Defects
The PDP uses a panel consisting of 2,360,000(HD-level) to 6,221,000(FHD-level) pixels which require sophisticated technology to produce.
However, there may be a few bright or dark pixels on the screen. These pixels will have no impact on the performance of the product.
• Avoid operating the TV at temperatures below 41°F (C)
• A still image displayed too long may cause permanent damage to the PDP Panel.
Watching the Plasma TV in 4:3 format for a long period of time may leave traces of borders displayed on the left, right
and centre of the screen caused by the difference of light emission on the screen. Playing a DVD or a game console may
cause similar effects to the screen.
Damages caused by the above effect are not covered by the Warranty.
• After-images on the Screen.
Displaying still images from Video games and PC for longer than a certain period of time may produce partial after-images.
To prevent this effect, reduce the “brightness” and “contrast” when displaying still images for a long time.
• Warranty
Warranty does not cover any damage caused by image retention.
Burn-in is not covered by the warranty.
Correct Disposal of This Product (Waste Electrical & Electronic Equipment)
(Applicable in the European Union and other European countries with separate collection systems)
This marking on the product, accessories or literature indicates that the product and its electronic accessories (e.g. charger, headset, USB cable) should
not be disposed of with other household waste at the end of their working life. To prevent possible harm to the environment or human health from
uncontrolled waste disposal, please separate these items from other types of waste and recycle them responsibly to promote the sustainable reuse of
material resources. Household users should contact either the retailer where they purchased this product, or their local government office, for details
of where and how they can take these items for environmentally safe recycling. Business users should contact their supplier and check the terms and
conditions of the purchase contract. This product and its electronic accessories should not be mixed with other commercial wastes for disposal.
Correct disposal of batteries in this product
(Applicable in the European Union and other European countries with separate battery return systems)
This marking on the battery, manual or packaging indicates that the batteries in this product should not be disposed of with other household
waste at the end of their working life. Where marked, the chemical symbols Hg, Cd or Pb indicate that the battery contains mercury, cadmium
or lead above the reference levels in EC Directive 2006/66. If batteries are not properly disposed of, these substances can cause harm to human
health or the environment. To protect natural resources and to promote material reuse, please separate batteries from other types of waste and
recycle them through your local, free battery return system.
[PE450-BT]BN68-03998G.indb 2 2012-02-14 �� 11:40:54
English - 3
Accessories
Please make sure the following items are included with your TV. If any items are missing, contact your dealer.
The items’ colours and shapes may vary depending on the models.
Cables not included in the package contents can be purchased separately.
• Remote Control & Batteries (AAA x 2) • Power Cord
• Owner’s Instructions • Cleaning Cloth
• Warranty Card / Safety Guide (Not available in some locations)
Ferrite Core for Power Cord: The ferrite cores are used to shield the cables from interference.
When connecting a cable, open the ferrite core and clip it around the cable near the plug as
shown in the figure.
x
A Maximum distance between the ferrite core and the end of the cord inserted in the TV: 3/4
inches
x
B Maximum distance between the ferrite core and the other end of the cord inserted in the AC
outlet: 3/4 inches
B
A
Power Cord
Ferrite Core: The ferrite cores are used to shield the cables from interference. When connecting a
cable, open the ferrite core and clip it around the cable near the plug as shown in the figure.
Antenna Cable
(sold separately)
An administration fee may be charged if either
(a) an engineer is called out at your request and there is no defect in the product
(i.e. where you have failed to read this user manual)
(b) you bring the unit to a repair centre and there is no defect in the product
(i.e. where you have failed to read this user manual)
The amount of such administration charge will be advised to you before any work or home visit is carried out.
Ferrite Core (3EA) Ferrite Core (1EA) Ferrite Core (2EA)
PS43E450 PS51E450
[PE450-BT]BN68-03998G.indb 3 2012-02-14 �� 11:40:55
English - 4
Using the TV’s Controller (Panel Key)
TV Controller is a multi directional button that
helps navigate without remote control.
Some functions which require a PIN code
may not be available.
The product colour and shape may vary
depending on the model.
Exits the menu when pressing the controller
more than 1 second.
When selecting the function by moving
the controller to the up/down/left/right
directions, be sure not to press the
controller. If you press it first, you cannot
operate it to move the up/down/left/right
directions.
Function menu
Return
Remote control sensor
TV Controller
Down (Front)
Up (Rear)
Right
Left
Power on Turns the TV on by pressing the controller in standby mode.
Adjusting the volume Adjusts the volume by moving the controller from side to side when the power is on.
Selecting a channel Selects a channel by moving the controller up and down when the power is on.
Using the function menu Press the controller when the power is on, then the function menu screen appears. If
you press it again, the function menu screen disappears.
Using the Menu
Selects the MENU(
m
) by moving the controller in the function menu screen. The
OSD(On Screen Display) of your TV’s feature appears.
Selecting the Source Selects the Source( ) by moving the controller in the function menu screen. The
Source list screen appears.
Selecting the Contents Home Selects the Contents Home( ) by moving the controller in the function menu
screen. The Contents Home main screen appears.
Power Off
Selects the Power Off(
P
) to turn the TV off by moving the controller in the function
menu screen.
Standby mode
Do not leave your TV in standby mode for long periods of time (when you are away on a holiday, for example). A small amount of
electric power is still consumed even when the power button is turned off. It is best to unplug the power cord.
Securing the Installation Space
Keep the required distances between the product and other objects (e.g. walls) to ensure proper ventilation.
Failing to do so may result in fire or a problem with the product due to an increase in the internal temperature of the product.
When using a stand or wall-mount, use parts provided by Samsung Electronics only.
x
If you use parts provided by another manufacturer, it may result in a problem with the product or an injury due to the product
falling.
The appearance may differ depending on the product.
Be careful when you contact the TV because some parts can be somewhat hot.
Installation with a stand. Installation with a wall-mount.
10 cm10 cm
10 cm
10 cm
10 cm
10 cm
10 cm
[PE450-BT]BN68-03998G.indb 4 2012-02-14 �� 11:40:57
English - 5
Viewing the Remote Control
This is a special remote control for the visually impaired persons and has Braille points on the Power, Channel, and Volume
buttons.
A B C D
E-MANUAL
P.SIZE
AD/SUBT.
CONTENT
Installing batteries (Battery size: AAA)
Turns the TV on and off.
Displays and selects the available video
sources.
Returns to the previous channel.
Cuts off the sound temporarily.
Changes channels.
Displays channel lists on the screen.
Displays the EPG (Electronic Programme
Guide).
Displays information on the TV screen.
Exits the menu.
Press to directly access to channels.
Adjusts the volume.
Alternately select Teletext ON, Double, Mix
or OFF.
Displays the main on-screen menu.
Quickly select frequently used functions.
Views the Contents Home.
Returns to the previous menu.
Selects the on-screen menu items and
changes the values seen on the menu.
Use these buttons according to the direction
on screen.
Use these buttons in a specific feature.
For details, refer to the e-Manual.
E-MANUAL: Displays the e-Manual
guide. (p. 9)
P.SIZE: Selects the picture size.
AD/SUBT.: Audio Description selection.
(Not available in some locations) / Displays
digital subtitles.
[PE450-BT]BN68-03998G.indb 5 2012-02-14 �� 11:40:57
English - 6
Initial Setup
When the TV is initially powered on, a sequence of on-screen prompts will assist in configuring basic settings. Press the POWER
P
button. Setup is available only when the source is set to TV.
1. Menu Language: Selecting a menu language
Press the or button, then press the ENTER
E
button.
Select the desired OSD (On Screen Display) language.
2. Use Mode: Selecting Store Demo or Home Use
Press the or button, then press the ENTER
E
button.
Select the Home Use mode. Store Demo mode is for retail environments.
When pressing TV controller, the function menu screen appears. Select the MENU(
m
) and press it more than 5 seconds
using the controller. The Store Demo mode is set.
Cancel the Store Demo by selecting Source( ) and pressing it more than 5 seconds.
Store Demo is only for shop display. If you select it, several functions are not able to use. Please select Home Use when you
watch at home.
3. Country (Depending on the country): Selecting a country
Press the or button, then press the ENTER
E
button.
Select the appropriate country.
After selecting the country in the country menu, some models may proceed with an additional option to setup the pin number.
4. Auto Tuning (Step 1): Selecting how you watch your TV
Let’s find and store channels on your TV. Do you need to search for channels?
• Yes, I need to.: Memorises all of the available channels using RF cable.
• No, I don’t need to.: You don’t need to use Auto Tuning to find channels.
5. Auto Tuning (Step 2): Selecting a search options
Select the desired broadcasting signal and antenna source. Press the ▲/▼/◄/► button, then press the ENTER
E
button.
When setting the antenna source to Cable, a step appears allowing you to assign numerical values (channel frequencies) to the
channels. For more information, refer to Channel Auto Tuning.
Press the ENTER
E
button at any time to interrupt the memorisation process.
See e-Manual chapter “Retuning Channels > Auto Tuning
6. Clock: Setting the Clock Mode
• Auto: Set the current time automatically.
• Manual: Allows you to manually set the current date and time.
7. Time Zone (Depending on the country): Setting your Time Zone
This step is only available when the clock mode is set to Auto.
• Auto: Set the time zone automatically.
• Manual: Set the time zone manually.
If you selected Manual, you can select whether to turn DST (Daylight Savings Time) On or Off. (Depending on the
country)
8. Setup Complete
Press the ENTER
E
button.
The completed settings are displayed.
If You Want to Reset This Feature...
Select System - Setup (Initial Setup). Enter your 4 digit PIN number. The default PIN number is “0-0-0-0”. If you want to change the
PIN number, use the Change PIN function.
You should do Setup (MENU System) again at home although you did in shop.
If you forget the PIN code, press the remote control buttons in the following sequence in Standby mode, which resets the PIN to
“0-0-0-0”: MUTE 8 2 4 POWER (on)
[PE450-BT]BN68-03998G.indb 6 2012-02-14 �� 11:40:58
English - 7
Connections
HDMI IN 2
HDMI IN 1
(DVI)
COMPONENT / AV IN
AUDIO
VIDEO
SERVICE
ANT IN
EXT (RGB)
DIGITAL
AUDIO OUT
(OPTICAL)
(5V 0.5A)
OPTICAL
EXT
AUDIO OUT
R-AUDIO-L
P
R
P
B
Y
COMPONENT OUT
AUDIO OUT
R-AUDIO-L
VIDEO OUT
R B
R B RG
WR
R
Y
Y
W
WR
R
W
R
G
DVI OUT
HDMI OUT
AUDIO OUT
R-AUDIO-L
PC
R
W
VHF/UHF Antenna
Cable
USB
or
TV Rear Panel
TV Side Panel
BD Player / PC
HDMI, HDMI/DVI connection
Audio connection
SCART connection
Headphone
connection
BD Player
Component connection
BD Player
AV connection
The position of port may
differ depending on the
model.
It supports both
Component and AV
connection in one
port.
VCR or DVD
The PDP device may interfere with
an amateur radio or AM radio.
When using two-way radio mobile
and portable units or amateur radio
or AM radio near by your TV, this
may cause the TV to malfunction.
[PE450-BT]BN68-03998G.indb 7 2012-02-14 �� 11:40:59
English - 8
SERVICE
SERVICE
Connector for service only.
NOTE
• For HDMI/DVI cable connection, you must use the HDMI IN 1(DVI) port.
• The interlace mode is not supported.
• The set might operate abnormally if a non-standard video format is selected.
• Separate and Composite modes are supported. SOG(Sync On Green) is not supported.
• PC(D-Sub) input is not supported.
• Connecting through the HDMI cable may not be supported depending on the PC.
• The headphone jack supports only the 3 conductor tip-ring-sleeve (TRS) type.
Connecting to a COMMON INTERFACE slot
(Your TV viewing Card Slot)
To watch paid channels, the “CI or CI+ CARD” must be inserted.
• If you do not insert theCI or CI+ CARD”, some channels will display
the message “Scrambled Signal.
• The pairing information containing a telephone number, the “CI or CI+
CARD” ID the Host ID and other information will be displayed in about
2~3 minutes. If an error message is displayed, please contact your
service provider.
• When the configuration of channel information hasnished, the
message Updating Completedis displayed, indicating the channel
list is updated.
TV Side Panel
y The image may differ depending on the
model.
Changing the Input Source
Source
TV / Ext. / HDMI1/DVI / HDMI2 / AV / Component
Use to select TV or other external input sources such as DVD / Blu-ray players / cable box / STB satellite receiver connected to the TV.
In the displaying Source list, connected inputs will be highlighted.
PC(D-Sub) input is not supported. If you want to connect PC to the TV, use HDMI1/DVI input.
Ext. always stays activated.
Press the TOOLS button.
• Edit Name
You can set an external input sources name you want.
When connecting a PC to the HDMI IN 1(DVI) port with HDMI cable, you should set the TV to PC mode under Edit Name.
When connecting a PC to the HDMI IN 1(DVI) port with HDMI to DVI cable, you should set the TV to DVI PC mode under
Edit Name.
When connecting an AV devices to the HDMI IN 1(DVI) port with HDMI to DVI cable, you should set the TV to DVI Devices
mode under Edit Name.
• Information
You can see detailed information about the connected external device.
Display Modes (HDMI/DVI Input)
Optimal resolution is 1024 x 768@60Hz. See specification page for full available resolution.
[PE450-BT]BN68-03998G.indb 8 2012-02-14 �� 11:41:01
English - 9
How to use the e-Manual
E-MANUAL
You can find instructions about your TV’s features in the e-Manual in your TV. To use, press the E-MANUAL button
on your remote. Move the cursor using the up/down/right/left buttons to highlight a category, then a topic, and then
press the ENTER
E
button. The e-Manual displays the page you want to see.
You can also access it through the menu:
O
MENUm Support e-Manual ENTERE
To return to the e-Manual main menu, press the E-MANUAL button on the remote.
Screen Display
Operation Buttons
}
Index: Displays the index screen.
E
Enter: Selects a category or sub-menu.
e
Exit: Exit the e-Manual.
<Viewing the Contents>
a
Try now: Displays the OSD menu that corresponds to the topic. To return to the e-Manual screen, press
the E-MANUAL button.
b
Home: Moves to the e-Manual home screen.
L
Page: Moves to previous or next page.
{ Zoom: Magnifies a screen.
Select the Zoom, and then press ENTER
E
to magnify the screen. You can scroll through the
magnified screen by using the or buttons. To return to the screen to normal size, press the
RETURN button.
Basic Features
Changing the Preset Picture Mode
Adjusting Picture Settings
Changing the Picture Options
Changing the Preset Sound Mode
Adjusting Sound Settings
}
Index
E
Enter
e
Exit
Currently displayed
video, TV
Programme, etc.
The category list. Press or button to
select the category you want.
Displays the sub-menu list. Use the arrow
buttons on your remote to move the cursor.
Press ENTER
E
button to select the sub-
menu you want.
How to toggle between an e-Manual topic and the corresponding OSD menu(s).
This function is not enabled in some menus.
You cannot use the Try now function if the menu is not activated.
Method 1 Method 2
1. If you want to use the menu that corresponds to an e-Manual
topic, press the red button to select Try now.
2. To return to the e-Manual screen, press the E-MANUAL button.
1. Press the ENTER
E
button when a topic is displayed. “Are
you sure?” appears. Select Yes, and then press the ENTER
E
button. The OSD window appears.
2. To return to the e-Manual screen, press the E-MANUAL button.
How to search for a topic on the index page
This function may not be supported depending on the language.
1. If you want to search a keyword, press the blue button to select Index.
2. Press the or button to select a character order you want.
3. Press the or button to select a keyword you want to see, and then press the ENTER
E
button.
4. You can view the corresponding e-Manual instruction screen.
To close the Index screen, press the RETURN button.
[PE450-BT]BN68-03998G.indb 9 2012-02-14 �� 11:41:02
English - 10
Installing the Wall Mount
The wall mount kit (sold separately) allows you to mount the TV
on the wall. For detailed information on installing the wall mount,
see the instructions provided with the wall mount. Contact a
technician for assistance when installing the wall mount bracket.
We do not advice you to do it yourself.
Samsung Electronics is not responsible for any damage to the
product or injury to yourself or others if you elect to install the TV
on your own.
Wall Mount Kit Specifications (VESA)
Wall mount kit is not supplied but sold separately.
Install your wall mount on a solid wall perpendicular to the floor.
When attaching to other building materials, please contact your
nearest dealer. If installed on a ceiling or slanted wall, it may fall
and result in severe personal injury.
NOTE
x
Standard dimensions for wall mount kits are shown in
the table below.
x
When purchasing our wall mount kit, a detailed
installation manual and all parts necessary for assembly
are provided.
x
Do not use screws that do not comply with the VESA
standard screw specifications.
x
Do not use screws longer than the standard dimension,
as they may cause damage to the inside of the TV set.
x
For wall mounts that do not comply with the VESA
standard screw specifications, the length of the screws
may differ depending on their specifications.
x
Do not fasten the screws too strongly, this may damage
the product or cause the product to fall, leading to
personal injury. Samsung is not liable for these kinds of
accidents.
x
Samsung is not liable for product damage or personal
injury when a non-VESA or non-specified wall mount
is used or the consumer fails to follow the product
installation instructions.
x
Do not exceed 15 degrees tilt when mounting this TV.
inches
VESA Spec.
(A * B)
Standard
Screw
Quantity
43~51 400 X 400
M8 4
60~64 600 X 400
Do not install your Wall Mount
Kit while your TV is turned on.
It may result in personal injury
due to electric shock.
Securing the TV to the Wall
Caution: Pulling, pushing, or climbing onto the TV
may cause the TV to fall. In particular, ensure that
your children do not hang over or destabilize the TV;
doing so may cause the TV to tip over, resulting in
serious injuries or death. Follow all safety precautions
provided on the included Safety Flyer. For added
stability, install the anti-fall device for safety
purposes, as follows.
To avoid the TV from falling
1. Put the screws into the clamps and firmly fasten them onto the
wall. Confirm that the screws have been firmly installed onto the
wall.
You may need additional material such as an anchor
depending on the type of wall.
Since the necessary clamps, screws, and string are
not supplied, please purchase these additionally.
2. Remove the screws from the centre back of the TV, put the
screws into the clamps, and then fasten the screws onto the TV
again.
Screws may not be supplied with the product. In this
case, please purchase the screws of the following
specifications.
3. Connect the clamps fixed onto the TV and the clamps fixed onto
the wall with a strong string and then tie the string tightly.
NOTE
• Install the TV near to the wall so that it does not fall
backwards.
• It is safe to connect the string so that the clamps
fixed on the wall are equal to or lower than the
clamps fixed on the TV.
• Untie the string before moving the TV.
4. Verify all connections are properly secured. Periodically check
connections for any sign of fatigue for failure. If you have
any doubt about the security of your connections, contact a
professional installer.
[PE450-BT]BN68-03998G.indb 10 2012-02-14 �� 11:41:03
English - 11
Troubleshooting
If the TV seems to have a problem, first try this list of possible problems and solutions. If none of these troubleshooting tips
apply, visit “www.samsung.com”, then click on Support, or call Samsung customer service centre.
Issues
The TV will not turn on.
• Make sure the AC power cord is securely plugged in to the wall outlet and the TV.
• Make sure the wall outlet is working.
• Try pressing the POWER button on the TV to make sure the problem is not the remote. If the TV turns on, refer to “Remote
control does not work” below.
Issues
There is no picture/video.
• Check cable connections (remove and reconnect all cables connected to the TV and external devices).
• Set your external device’s (Cable/Set top Box, DVD, Blu-ray etc) video outputs to match the connections to the TV input. For
example, if an external device’s output is HDMI, it should be connected to an HDMI input on the TV.
• Make sure your connected devices are powered on.
• Be sure to select the TV’s correct source by pressing the SOURCE button on the remote control.
• Reboot the connected device by reconnecting the device’s power cable.
Issues
The remote control does not work.
• Replace the remote control batteries with the poles (+/–) in the right direction.
• Clean the sensor’s transmission window on the remote.
• Try pointing the remote directly at the TV from 5~6 feet away.
Issues
The cable/set top box remote control doesn’t turn the TV on or off, or adjust the volume.
• Program the Cable/Set top box remote control to operate the TV. Refer to the Cable/Set user manual for the SAMSUNG TV code.
You can keep your TV as optimum condition to upgrade the latest firmware on web site (www.samsung.com Support
Downloads) by USB.
Licence
Storage and Maintenance
If you remove the attached sticker on the TV screen, clean the residues and then watch TV.
The exterior and screen of the product can get scratched during cleaning. Be sure to wipe the exterior and screen carefully
using the cloth provided or a soft cloth to prevent scratches.
Do not spray water directly onto the product. Any liquid that goes
into the product may cause a failure, fire, or electric shock.
Clean the product with a soft cloth dapped in a small amount of
water. Do not use a flammable liquid (e.g. benzene, thinners) or a
cleaning agent.
[PE450-BT]BN68-03998G.indb 11 2012-02-14 �� 11:41:04
English - 12
Specifications
Display Resolution 1024 X 768
Environmental Considerations
Operating Temperature
Operating Humidity
Storage Temperature
Storage Humidity
10°C 40°C 50°F 104°F
-20°C 45°C -4°F 113°F
to
10°C 40°C 50°F 104°F
-20°C 45°C -4°F 113°F
(
10°C 40°C 50°F 104°F
-20°C 45°C -4°F 113°F
to
10°C 40°C 50°F 104°F
-20°C 45°C -4°F 113°F
)
10% to 80%, non-condensing
10°C 40°C 50°F 104°F
-20°C 45°C -4°F 113°F
to
10°C 40°C 50°F 104°F
-20°C 45°C -4°F 113°F
(
10°C 40°C 50°F 104°F
-20°C 45°C -4°F 113°F
to
10°C 40°C 50°F 104°F
-20°C 45°C -4°F 113°F
)
5% to 95%, non-condensing
TV System Analogue: B/G, D/K, L, I (Depending on your country selection)
Digital: DVB-T/DVB-C
Colour/Video System Analogue: PAL, SECAM, NTSC-4.43, NTSC-3.58, PAL60
Digital: MPEG-2 MP@ML, MPEG-4, H.264/AVC MP@L3, MP@L4.0, HP@L4.0
Sound System BG, DK, L, NICAM, MPEG1, DD, DD+, HEAAC
HDMI IN Video: 1080 24p, 1080p, 1080i, 720p, 576p, 480p
Audio: 2Ch Linear PCM 32/44.1/48kHz, 16/20/24bits.
Model Name PS43E450 PS51E450
Screen Size
inches
inches
Sound (Output) 10W X 2
Dimensions (WxDxH)
Body
With stand
1011.8 X 56.0 X 622.4 (mm)
1011.8 X 262.0 X 675.9 (mm)
1187.8 X 56.0 X 706.6 (mm)
1187.8 X 262.0 X 760.1 (mm)
Weight
Without Stand
With Stand
14.2 kg
15.4 kg
19.6 kg
20.8 kg
Design and specifications are subject to change without prior notice.
For information about power supply, and more about power consumption, refer to the label attached to the product.
Typical power consumption is measured according to IEC 62087 Ed.2
[PE450-BT]BN68-03998G.indb 12 2012-02-14 �� 11:41:05
English - 13
Supported Video Formats
File Extention Container Video Codec Resolution Frame rate (fps) Bit rate (Mbps) Audio Codec
*.avi
*.mkv
*.asf
*.wmv
*.mp4
*.3gp
*.vro
*.mpg
*.mpeg
*.ts
*.tp
*.trp
*.m2ts
*.mts
*.divx
AVI
MKV
ASF
MP4
3GP
VRO
VOB
PS
TS
DivX 3.11/4.x/5.x/6.1
1920 x 1080
6~30
30
AC3
LPCM
ADMPCM
(IMA, MS)
AAC
HE-AAC
WMA
DD+
MPEG
(MP3)
DTS Core
MPEG4 SP/ASP
H.264 BP/MP/HP
Motion JPEG 640 x 480 8
Window Media Video v9
1920 x 1080 30
MPEG2
MPEG1
Full available resolution: 1024 X 768 @ 60 Hz
Mode Resolution
Horizontal Frequency
(KHz)
Vertical Frequency
(Hz)
Pixel Clock Frequency
(MHz)
Sync Polarity (H / V)
IBM
640 x 350 31.469 70.086 25.175 +/-
720 x 400 31.469 70.087 28.322 -/+
MAC
640 x 480 35.000 66.667 30.240 -/-
832 x 624 49.726 74.551 57.284 -/-
VESA DMT
640 x 480 31.469 59.940 25.175 -/-
640 x 480 37.861 72.809 31.500 -/-
640 x 480 37.500 75.000 31.500 -/-
800 x 600 37.879 60.317 40.000 +/+
800 x 600 48.077 72.188 50.000 +/+
800 x 600 46.875 75.000 49.500 +/+
1024 x 768 48.363 60.004 65.000 -/-
1024 x 768 56.476 70.069 75.000 -/-
1024 x 768 60.023 75.029 78.750 +/+
[PE450-BT]BN68-03998G.indb 13 2012-02-14 �� 11:41:06
Čeština– 2
Další informace o použití Elektronické příručky (str. 9)
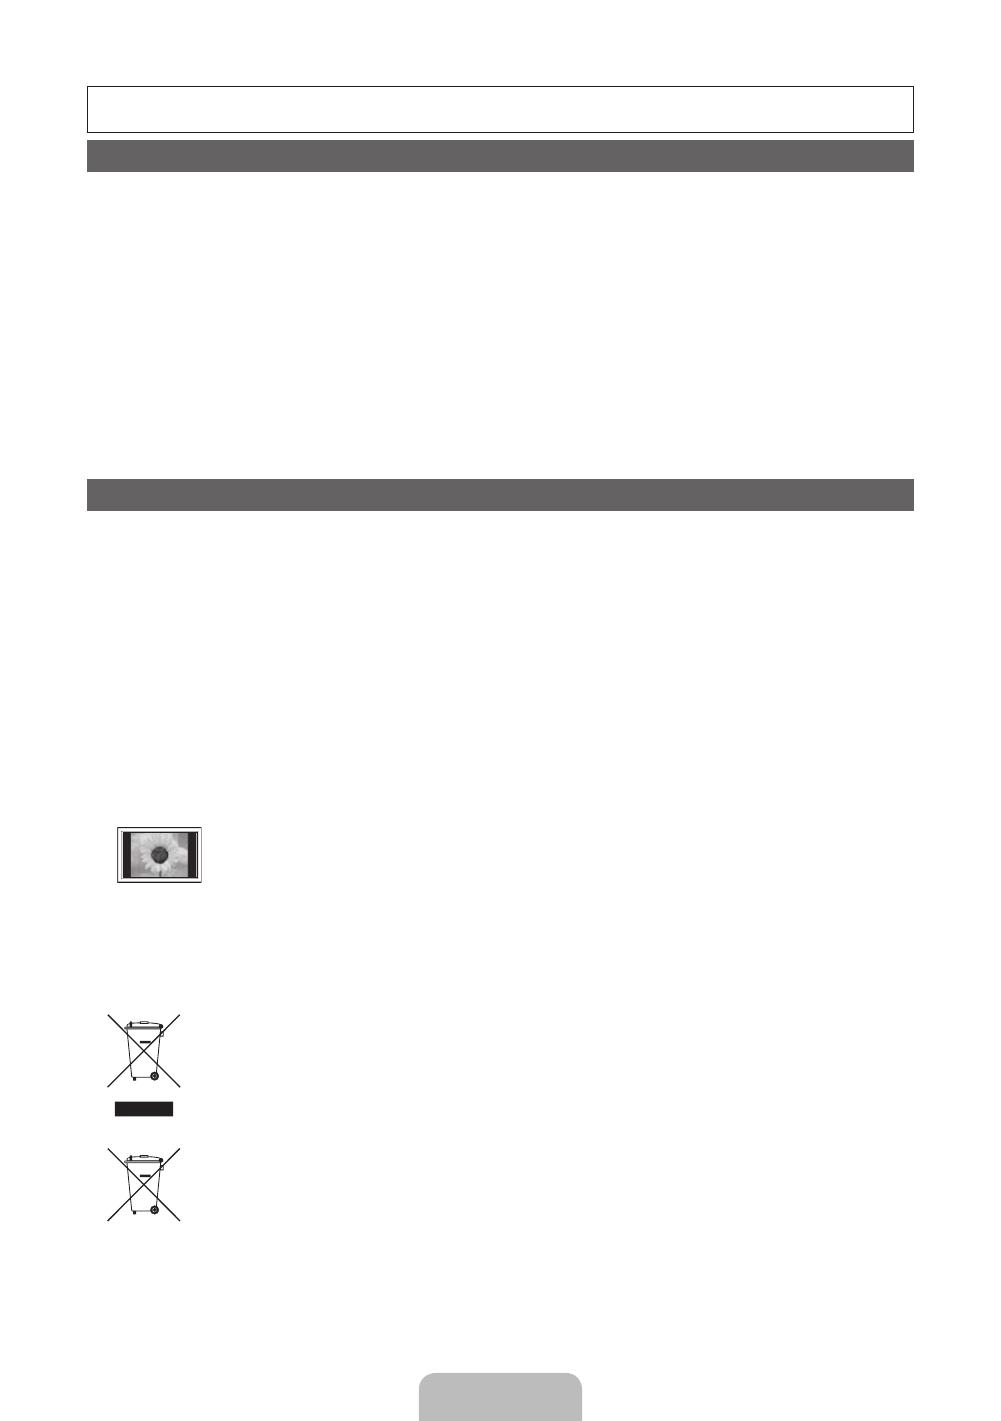
Obrázky a ilustrace v této uživatelské příručce slouží pouze pro informaci a mohou se lišit od skutečného vzhledu výrobku. Provedení
a specifikace výrobku se mohou změnit bez předchozího upozornění.
Oznámení odigitálním televizním vysíní
1. Funkce spojené s digitálním televizním vysíláním (DVB) jsou dostupné pouze v zemích/oblastech, kde jsou vysílány signály pozemního
digitálního vysílání DVB-T (MPEG2 a MPEG4 AVC) nebo kde je přístup ke kompatibilní službě kabelové televize DVB-C (MPEG2 a MPEG4
AAC). Ohledně příjmu signálů DVB-T nebo DVB-C kontaktujte svého místního prodejce.
2. DVB-T je evropský standard digitálního televizního vysílání přes pozemní vysílače a DVB-C je standard digitálního televizního vysílání v sítích
kabelových televizí. V těchto standardech však nejsou zahrnuty zvláštní služby, jako například EPG (Elektronický programový průvodce),
VOD (Video-On-Demand) a další. Tyto služby proto nejsou v tuto chvíli podporovány.
3. Ačkoli tento televizor splňuje nejnovější standardy DVB-T a DVB-C k datu [srpen, 2008], kompatibilitu s budoucím pozemním digitálním
vysíláním DVB-T a kabelovou televizí DVB-C nelze zaručit.
4. V závislosti na zemi nebo oblasti, ve které se nacházíte, mohou někteří poskytovatelé kabelového televizního vysílání za takovou službu
vybírat zvláštní poplatek a může být třeba váš souhlas s jejich smluvními podmínkami.
5. Některé funkce digitální televize nemusí být v některých zemích dostupné a DVB-C nemusí u některých poskytovatelů služeb kabelové
televize fungovat správně.
6. Další informace získáte ve vašem středisku péče o zákazníky Samsung.
Kvalita příjmu televizoru může být negativně ovlivněna rozdíly ve způsobu vysílání v různých zemích. Prověřtekon televizoru u místního
autorizovaného prodejce společnosti SAMSUNG nebo v centru telefonické podpory společnosti Samsung a zjistěte, zda jej lze zlepšit
změnou konfigurace nastavení televizoru.
Pokyny pro uživatele
• Zbytko obraz na obrazovce
Nenechávejte na plazmové obrazovce zobrazený statický obraz (například uvideohry) déle než několik minut, protože může dojít ke
zbytkovému obrazu. Zbytkový obraz se také označuje jako „vypálení obrazovky“. Abyste předešli zbytkovému obrazu, snižte při zobrazení
statického obrazu nastavení jasu a kontrastu.
• Zahřívání horní části plazmového televizoru
Horní strana výrobku se může při dlouhodobém používání silně zahřát, protože od panelu je odváděno teplo skrze ventilační otvor vhorní
části výrobku.
Tento jev je normální aneznamená žádný problém ani poruchu výrobku.
Je ovšem třeba zajistit, aby se horní části výrobku nedotýkaly děti.
• Zvýrobku se ozývá praskavý zvuk.
Praskání se může vyskytnout vpřípadě, že se výrobek smrští nebo roztáhne zdůvodu změn podmínek okolního prostředí, jako jsou teplota
nebo vlhkost. Tento jev je normální anejedná se ozávadu přístroje.
• Vad obrazo body
Televizor PDP je vybaven panelem složeným z2360000 (úroveň HD) až 6221000 (úroveň Full HD) pixelů zpracovaných vysoce vyspělou
technologií. Na obrazovce se však přesto může vyskytovat několik světlých nebo tmavých pixelů. Tyto pixely nebudou mít žádný vliv na
výkon výrobku.
• Vyvarujte se použití televizoru i teploch nších než 5°C.
• íliš dlouho zobrazovaný statický obraz může způsobit trvalé pkoze panelu PDP.
Dlouhodobé sledování plazmového televizoru ve formátu 4:3 může zanechat vlevé, pravé astřední části obrazovky stopy
okrajů způsobené rozdílem ve vyzařování světla na obrazovce. Přehrávání DVD nebo hraní na konzoli mohou na obrazovce
způsobit podobný jev.
Na poškození způsobené výše uvedeným efektem se nevztahuje záruka.
• Zbytko obraz na obrazovce.
Zobrazení statického obrazu zvideoher aPC po delší dobu může způsobit částečný zbytkový obraz.
Tomuto efektu lze při dlouhodobém zobrazování statického obrazu předejít snížením jasu akontrastu.
• ruka
Záruka se nevztahuje na žádné poškození způsobené zbytkovým obrazem.
Na vypálení obrazovky se nevztahuje záruka.
Správná likvidace tohoto výrobku (odpady z elektrických a elektronických zařízení)
(Platí v Evropské unii a v dalších evropských zemích se zavedenými systémy třídění odpadu.)
Toto označení na výrobku, na příslušenství a v tištěných materiálech znamená, že by se tento výrobek a jeho elektronická příslušenství (např. nabíječka,
sluchátka či kabel USB) na konci životnosti neměly likvidovat společně s jiným domovním odpadem. Oddělením od jiných druhů odpadu a zodpovědnou
recyklací podpoříte trvale udržitelné opakované využití materiálních zdrojů, zabráníte znečištění životního prostředí nebo poškození zdraví způsobenému
neřízenou likvidací odpadu. Domácí uživatelé by měli kontaktovat buď maloobchodního prodejce, u kterého tento výrobek zakoupili, nebo úřad místní
správy, a vyžádat si informace o tom, kam a jak mohou tyto jednotky dopravit za účelem recyklace bezpečné pro životní prostředí. Firemní uživatelé by se
měli obrátit na svého dodavatele a zkontrolovat podmínky kupní smlouvy. Tento výrobek a jeho elektronická příslušenství by neměla být slučována s jiným
hospodářským odpadem.
Správná likvidace baterií v tomto výrobku
(Platí v Evropské unii a v dalších evropských zemích se zavedenými systémy samostatného sběru baterií.)
Toto označení na baterii, v příručce nebo na obalu znamená, že by baterie na konci své životnosti neměla být likvidována společně s jiným
domovním odpadem. Označení chemickými symboly Hg, Cd nebo Pb znamená, že baterie obsahuje vyšší úroveň rtuti, kadmia nebo olova, než
určuje směrnice ES 2006/66. Pokud nebudou baterie vhodně zlikvidovány, tyto látky mohou poškozovat zdraví nebo životní prostředí. V zájmu
ochrany přírodních zdrojů a opětovného použití materiálů vás žádáme, abyste oddělili baterie od ostatních typů odpadu a recyklovali je v rámci
místního systému recyklace baterií.
[PE450-BT]BN68-03998G.indb 2 2012-02-14 �� 11:41:07
Čeština– 3
Příslušenství
Přesvědčte se, zda jste obdrželi spolu s televizorem všechny následující položky. Pokud některé položky chybí, obraťte se na
prodejce.
Barva a tvar výrobku se mohou u jednotlivých modelů lišit.
Kabely, které nejsou zahrnuty do obsahu balení, lze zakoupit samostatně.
• Dálkový ovladač a baterie (AAA x 2) • Napájecí kabel
• Návod k použití • Čisticí textilie
• Záruční list / Bezpečnostní příručka (v některých zemích nejsou dostupné)
Feritové jádro pro napájecí kabel: Feritová jádra slouží kochraně kabelů proti rušení. Při připojování
kabelu otevřete feritové jádro apřipněte ho ke kabelu blízko zásuvky tak, jak je zobrazeno na
obrázku.
x
A Maximální vzdálenost mezi feritovým jádrem akoncem kabelu zapojeným vtelevizoru: 2cm
x
B Maximální vzdálenost mezi feritovým jádrem adruhým koncem kabelu zapojeným do
elektrické zásuvky: 2cm
B
A
Napájecí kabel
Feritové jádro: Feritová jádra slouží kochraně kabelů proti rušení. Při připojování kabelu otevřete
feritové jádro apřipněte ho ke kabelu blízko zásuvky tak, jak je zobrazeno na obrázku.
Kabel antény
(prodává se samostatně)
Správní poplatek bude účtován v případě, že
(a) je na vaši žádost přivolán technik a na výrobku není odhalena žádná závada
(např. když jste řádně nenastudovali uživatelskou příručku),
(b) přinesete výrobek do opravárenského střediska a na výrobku není odhalena žádná závada
(např. když jste řádně nenastudovali uživatelskou příručku),
Výše takového správního poplatku vám bude oznámena před tím, než bude provedena jakákoli práce nebo než dojde k
návštěvě technika.
Feritové jádro (3x) Feritové jádro (1x) Feritové jádro (2x)
PS43E450 PS51E450
[PE450-BT]BN68-03998G.indb 3 2012-02-14 �� 11:41:08
Čeština– 4
Používání ovladače televizoru (tlačítko na panelu)
Televizní ovladač je vícesměrné tlačítko, spomocí
kterého můžete procházet nabídky bez použití
dálkového ovladače.
které funkce vyžadující zadání kódu PIN
nemusí být kdispozici.
Barva itvar výrobku mohou být různé
vzávislosti na modelu.
Stisknutím ovladače déle než 1sekundu
opustíte nabídku.
Při výběru funkce pomocí ovladače (ve
směrech nahoru/dolů/doleva/doprava)
buďte opatrní, abyste ovladač nestiskli.
Pokud ovladač nejprve stisknete, nebudete
pak již moci provádět akce směrem nahoru/
dolů/doleva/doprava.
Nabídka funkcí
Zpět
Snímač dálkového ovladače
Televizní ovladač
Do (doedu)
Nahoru (dozadu)
Vpravo
Vlevo
Zapnutí Slouží kzapnutí televizoru zpohotovostního režimu (stisknutí ovladače).
Nastavení hlasitosti Slouží knastavení hlasitosti, je-li televizor zapnutý (pohyb ovladače doleva a doprava).
Výběr kanálu Slouží kvýběru kanálu, je-li televizor zapnutý (pohyb ovladače nahoru a dolů).
Použití nabídky funkcí Je-li televizor zapnutý, po stisknutí ovladače se zobrazí obrazovka nabídky funkcí.
Dalším stisknutím obrazovka nabídky funkcí zmizí.
Použití nabídky
Vyberte možnost MENU(
m
) (pohyb ovladače na obrazovce nabídky funkcí). Zobrazí
se nabídka na obrazovce (OSD) funkcí vašeho televizoru.
Výběr zdroje Vyberte možnost Zdroj( ) (pohyb ovladače na obrazovce nabídky funkcí). Zobrazí se
obrazovka seznamu nabídky Zdroj.
Výběr Správa obsahu Vyberte možnost Správa obsahu( ) (pohyb ovladače na obrazovce nabídky
funkcí). Zobrazí se hlavní obrazovka nabídky Správa obsahu.
Vypnutí
Výběrem možnosti Vypnout(
P
) vypnete televizor (pohyb ovladače na obrazovce
nabídky funkcí).
Pohotovostní režim
Nenechávejte televizor v pohotovostním režimu delší dobu (například po dobu dovolené). I v případě, kdy je přístroj tlačítkem napájení
vypnutý, stále spotřebovává malé množství energie. Nejlepší je odpojit napájecí kabel.
Zabezpečení prostoru instalace
Zajistěte potřebnou vzdálenost mezi výrobkem a jinými objekty (např. zdmi), aby byla umožněna dostatečná ventilace.
V opačném případě může dojít k požáru nebo problémům s výrobkem v důsledku zvýšení teploty uvnitř výrobku.
Při použití stojanu nebo při montáži na zeď používejte pouze díly společnosti Samsung Electronics.
x
Použijete-li díly jiného výrobce, může dojít k potížím s výrobkem nebo ke zranění způsobenému jeho pádem.
Vzhled se může lišit v závislosti na modelu.
Při kontaktu s televizorem buďte opatrní, některé části mohou být horké.
Instalace se stojanem. Instalace s držákem na zeď.
10 cm10 cm
10 cm
10 cm
10 cm
10 cm
10 cm
[PE450-BT]BN68-03998G.indb 4 2012-02-14 �� 11:41:10
Čeština– 5
Popis dálkového ovladače
Jedná se o speciální dálkové ovládání pro zrakově postižené osoby, na tlačítkách Napájení, Kanál a Hlasitost jsou reliéfní znaky
Braillova písma.
A B C D
E-MANUAL
P.SIZE
AD/SUBT.
CONTENT
Instalace baterií (velikost baterií: AAA)
Zapnutí a vypnu televizoru.
Zobrazení a výběr dostupných zdrojů videa.
Návrat na předchozí kanál.
Dočasné vypnutí zvuku.
Přepnutí kanálů.
Zobrazení seznamu kanálů na obrazovce.
Slouží k zobrazení elektronického
programového průvodce EPG.
Zobrazení informací na obrazovce televizoru.
Zavře nabídku.
Stisknutím přejdete přímo ke kanálům.
Sloí k nastavení hlasitosti.
žete zvolit mnost Teletext ZAPNUTÝ,
Dvojitý, Mix nebo VYPNUTÝ.
Sloí k zobrazení hlavní nabídky na obrazovce.
Rych běr často používaných funkcí.
Sloí kzobrazení nadky Správa
obsahu.
Sloí k vratu do předchozí nadky.
Sloí k běru položek nabídky na obrazovce
a zně hodnot zobrazených v nabídce.
Tato tlačítka mají různé funkce vzávislosti na
aktuální obrazovce.
Funkce těchto tlačítek se liší v závislosti na
konkrétní činnosti.
Podrobnosti naleznete v elektronické příručce.
E-MANUAL: Slouží k zobrazení
elektronic íručky. (str.9)
P.SIZE: Slouží k výru velikosti obrazu.
AD/SUBT.: Sloí k běru zvukoho
popisu. (v některých oblastech
nedostupné) / Slouží k zobraze
digitálních titulků.
[PE450-BT]BN68-03998G.indb 5 2012-02-14 �� 11:41:11
Čeština– 6
Počáteční nastavení
Při prvním zapnutí televizoru vám sekvence výzev na obrazovce pomůže provést konfiguraci základního nastavení. Stiskněte tlačítko
POWER
P
. Nastavení je kdispozici pouze tehdy, je-li zdroj nastaven na možnost TV.
1. Jazyk menu: Výběr jazyka nabídky
Stiskněte tlačítko nebo , pak stiskněte tlačítko ENTER
E
.
Vyberte požadovaný jazyk nabídky na obrazovce (OSD).
2. Režim použití: Výběr možnosti Prodejna nebo Domácnost
Stiskněte tlačítko nebo , pak stiskněte tlačítko ENTER
E
.
Vyberte režim Domácnost. Režim Prodejna je určen pro použití vmaloobchodní prodejně.
Stisknutím ovladače televizoru zobrate obrazovku nabídky funkcí. Vyberte možnost MENU(
m
) a stiskněte na ní ovladač po
dobu více než 5 sekund. Bude nastaven režim Prodejna.
Režim Prodejna zrušíte výběrem možnosti Zdroj( ) a stisknutím ovladače po dobu více než 5sekund.
Režim Prodejna je určen pouze pro předvádění vprodejně. Pokud jej vyberete, nebude možné použít několik funkcí. Pro
sledování televizoru doma vyberte režim Domácnost.
3. Země (podle země): Výběr země
Stiskněte tlačítko nebo , pak stiskněte tlačítko ENTER
E
.
Vyberte příslušnou zemi.
Jakmile nastavíte vnabídce Země vaši zemi, některé modely mohou nabídnout další možnost– nastavení čísla PIN.
4. Automatické ladění (Krok1): Výběr způsobu sledování televizoru
Najde a uloží kanály na Vašem televizoru. Přejete si vyhledat kanály?
• Ano, chci.: Uloží všechny dostupné kanály kabelu RF.
• Ne, nechci.: Kvyhledání kanálů není třeba použít funkci Automatické ladění.
5. Automatické ladění (Krok2): Výběr možností vyhledávání
Vyberte požadovaný vysílací signál a zdroj antény. Stiskněte tlačítko ▲/▼/◄/► a pak tlačítko ENTER
E
.
Pokud zdroj antény nastavíte na možnost Kabel, zobrazí se krok postupu, který umožní kanálům přidělit číselné hodnoty (kmitočty
kanálů). Další informace najdete včásti Kanál Automatické ladění.
Proces ukládání do paměti můžete kdykoli přerušit stisknutím tlačítka ENTER
E
.
Viz příručka e-Manual, kapitola „Opětovné naladění kanálů > Automatické ladění
6. Hodiny: Nastavení režimu hodin.
• Autom.: Automatické nastavení aktuálního času.
• Manuální: Umožňuje ruční nastavení aktuálního data a času.
7. Časové pásmo (podle země): Nastavení vašeho časového pásma.
Tento krok můžete provést pouze vpřípadě, že je režim hodin nastaven na hodnotu Autom.
• Autom.: Automatické nastavení časového pásma.
• Manuální: Ruční nastavení časového pásma.
Pokud vyberete možnost Manuál, můžete si vybrat, zda nastavíte Letní čas na hodnotu Zapnuto nebo Vypnuto.
(podle země)
8. Nastavení dokončeno
Stiskněte tlačítko ENTER
E
.
Zobrazí se dokončené nastavení.
Obnovení původních nastavení této funkce...
Vyberte možnost Systém– Nastavení (Počáteční nastavení). Zadejte svůj 4číselný kód PIN. Výchozí kód PIN je „0-0-0-0“. Chcete-li
kód PIN změnit, použijte funkci Změna kódu PIN.
Nastavení (MENU Systém) byste měli provést znovu doma, přestože proběhlo vobchodě.
Zapomenete-li kód PIN, stiskněte v pohotovostním režimu tlačítka dálkového ovladače v následujícím pořadí. Obnovíte tak
vodní kód PIN „0-0-0-0“: MUTE 8 2 4 POWER (zapnuto)
BT-02-CZE.indd 6 2012-02-16 �� 9:25:09
Čeština– 7
Připojení
HDMI IN 2
HDMI IN 1
(DVI)
COMPONENT / AV IN
AUDIO
VIDEO
SERVICE
ANT IN
EXT (RGB)
DIGITAL
AUDIO OUT
(OPTICAL)
(5V 0.5A)
OPTICAL
EXT
AUDIO OUT
R-AUDIO-L
P
R
P
B
Y
COMPONENT OUT
AUDIO OUT
R-AUDIO-L
VIDEO OUT
R B
R B RG
WR
R
Y
Y
W
WR
R
W
R
G
DVI OUT
HDMI OUT
AUDIO OUT
R-AUDIO-L
PC
R
W
Anténa VHF/UHF
Kabel
USB
nebo
Zadní panel televizoru
Boční panel
televizoru
Přehrávač BD / PC
Připojení kabelem HDMI, HDMI/DVI
Připojení zvuku
Připojení SCART
Připojení sluchátka
Přehrávač BD
Připojení Component
Přehrávač BD
Připojení AV
Umístění konektoru se
může lišit podle modelu.
Jediný konektor
podporuje připoje
rozhraní Component i AV.
Videorekordér nebo
přehrávač DVD
Mezi zařízením PDP
aradioamatérským vysíláním nebo
vysíním rádia AM může docházet
kinterferenci.
Pokud vblízkosti televizoru
používáte vylačky, amatérské
rádio nebo rádio AM, nemusí
televizor pracovat správně.
[PE450-BT]BN68-03998G.indb 7 2012-02-14 �� 11:41:13
Čeština– 8
SERVICE
SERVICE
Konektor pouze pro servis.
POZNÁMKA
• Pro připojení pomocí kabelu HDMI/DVI je nutné použít konektor HDMI IN 1(DVI).
• Režim prokládaného zobrazení není podporován.
• Pokud je zvolen nestandardní videoformát, nemusí zařízení fungovat správně.
• Jsou podporovány režimy Separate a Composite. Režim SOG (Sync On Green) není podporován.
• Vstup z počítače (D-Sub) není podporován.
• Připojení kabelem HDMI nemusí být v závislosti na počítači podporováno.
• Konektor sluchátek podporuje pouze 3kontaktový typ TRS.
Připojení ke slotu rozhraní COMMON INTERFACE
(slot pro televizní kartu)
Chcete-li sledovat placené kanály, musí být vložena karta „CI nebo
CI+“.
• Pokud kartu „CI nebo CI+nevlíte, zobra které kanály zpvu
„Zadova sigl“.
• ibližně za 2 3 minuty se zobrazí přiřazovací údaje obsahující
telefonní číslo, ID karty CI nebo CI+, ID hostitele a další informace.
Pokud se objeví chybo zpráva, obraťte se na svého poskytovatele
služeb.
• Po dokončení konfigurace informací o kanálech se zobrazí zpráva
„Aktualizace dokončena“, která zní, že seznam kanálů je ny
aktualizon.
Boční panel televizoru
y Obrázek se může vzávislosti na modelu
lišit.
Změna zdroje vstupu
Zdroj
TV / Ext. / HDMI1/DVI / HDMI2 / AV / Komponent
Tuto možnost lze použít k výběru televizního vysílání či dalších externích vstupních zdrojů, jako je přehrávač disků DVD/Blu-ray,
kabelový přijímač nebo satelitní přijímač (set-top box), které jsou připojeny k televizoru.
Vzobrazeném seznamu nabídky Zdroj budou zvýrazněny připojené zdroje.
Vstup z počítače (D-Sub) není podporován. Chcete-li k televizoru připojit počítač, použijte vstup HDMI1/DVI.
Možnost Ext.stává vždy aktivovaná.
Stiskněte tlačítko TOOLS.
• Upravit název
Externí vstupní zdroje můžete libovolně pojmenovat.
Pro připojení osobního počítače ke konektoru HDMI IN 1(DVI) kabelem HDMI musíte televizor nastavit do režimu PC pod
položkou Upravit název.
Pro připojení osobního počítače ke konektoru HDMI IN 1(DVI) kabelem HDMI-DVI musíte televizor nastavit do režimu DVI
PC pod položkou Upravit název.
Pro připojení AV zařízení ke konektoru HDMI IN 1(DVI) kabelem HDMI-DVI musíte televizor nastavit do režimu Zařízení DVI
pod položkou Upravit název.
• Informace
Lze zobrazit podrobné informace opřipojeném externím zařízení.
Režimy zobrazení (vstup HDMI/DVI)
Optimální rozlišení je 1024 x 768 při 60Hz. Informace o úplném dostupném rozlišení najdete na stránce specifikací.
[PE450-BT]BN68-03998G.indb 8 2012-02-14 �� 11:41:14
1 / 1

Samsung PS43E450A1W Lühike juhend

Kategooria
Plasmatelerid
Tüüp
Lühike juhend
See käsiraamat sobib ka