Philips PT870/16 Kasutusjuhend

Kategooria
Meeste pardlid
Tüüp
Kasutusjuhend

See käsiraamat sobib ka

User manual
PT927
PT927CC
PT925
PT923
PT923CC
PT920
PT877
PT876
PT875
PT870
1
PT927, PT927CC, PT925, PT923, PT923CC, PT920, PT877, PT876, PT875, PT870
ENGLISH 6
 22
 39
EESTI 56
 73
 90
 107
 124
 141
 157
 174
 191
 208
 225
 241
 258
6
Introduction
Congratulations on your purchase and welcome to Philips! To fully benet
from the support that Philips offers, register your product at
www.philips.com/welcome.
Please read this user manual, as it contains information about the wonderful
features of this shaver as well as some tips to make shaving easier
and more enjoyable.
General description (Fig. 1)
A Shaver
1 Protection cap
2 Shaving unit
3 Shaving unit release button
4 Trimmer
5 Trimmer release slide
6 Shaver on/off button
7 Shaving head symbol
8 Battery symbol
B Charging stand (PT927/PT925/PT923/PT920/PT876/PT875 only)
C Adapter
D Jet Clean System (PT927CC/PT923CC only)
1 Locking lever
2 Shaver holder
3 Cleaning chamber release button
4 Jet Clean System on/off button
5 Cleaning symbol and ‘uid low’ symbol
6 Battery symbol
E Jet Clean solution (HQ200)
F Cleaning brush
G Storage pouch (PT927CC/PT927/PT925/PT923CC/PT920/PT876
only)
Note: You can nd the type number on the back of the shaver.
Important
Read this user manual carefully before you use the shaver, the Jet Clean
System (PT927CC/PT923CC only) and the charging stand (PT927/
PT925/PT923/PT920/PT876/PT875 only). Save the user manual for future
reference.
Danger
- Keep the adapter dry.
Warning
- The adapter contains a transformer. Do not cut off the adapter to
replace it with another plug, as this causes a hazardous situation.
- The shaver and the Jet Clean System are not intended for use
by persons (including children) with reduced physical, sensory or
mental capabilities, or lack of experience and knowledge, unless they
have been given supervision or instruction concerning use of these
appliances by a person responsible for their safety.
ENGLISH
- Children should be supervised to ensure that they do not play with
the shaver and the Jet Clean System.
- Always unplug the shaver before you clean it under the tap.
Caution
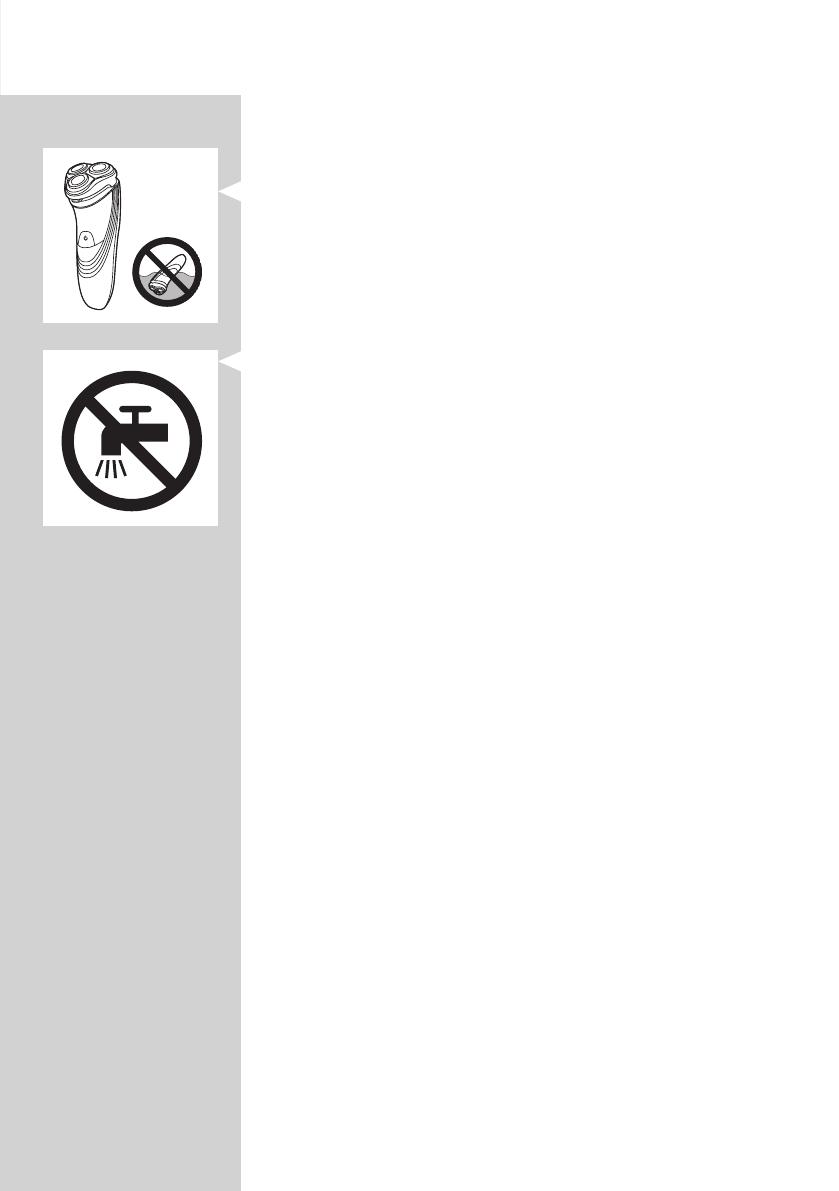
- Never immerse the shaver in water.
- Never immerse the Jet Clean System or the charging stand in water
nor rinse it under the tap.
- Do not use the shaver in the bath or in the shower.
- Never use water hotter than 80°C to rinse the shaver.
- Be careful with hot water. Always check if the water is not too hot, to
prevent your hands from getting burnt.
- The shaver, the Jet Clean System, the charging stand and the other
accessories are not dishwasher-proof.
- Water may leak from the socket at the bottom of the shaver when you
rinse it. This is normal and not dangerous because all electronics are
enclosed in a sealed power unit inside the shaver.
- Do not use the shaver, Jet Clean System, adapter, charging stand or any
other part if it is damaged, as this may cause injury. Always replace a
damaged adapter, charging stand or part with one of the original type.
- Use, charge and store the shaver and the Jet Clean System at a
temperature between 10°C and 35°C.
- Always place and use the shaver and the Jet Clean System on a surface
that is uid-resistant.
- Only use the adapter, charging stand and accessories supplied.
- Always put the protection cap on the shaver to prevent damage and to
avoid dirt accumulation in the shaving heads.
- Only use the Jet Clean System with the original Jet Clean solution
(HQ200).
- Always place the Jet Clean System on a stable, level and horizontal
surface to prevent leakage.
- When the Jet Clean System is ready for use, do not move it to prevent
leakage.
- The Jet Clean System thoroughly cleans but does not disinfect your
shaver, therefore do not share the shaver with others.
- Empty the cleaning chamber of the Jet Clean System and clean the
cleaning chamber thoroughly by rinsing it with hot tap water every
15 days.
- If the shaver and the Jet Clean System are subjected to a major change
in temperature, pressure or humidity, let them acclimatise for
30 minutes before you use them.
ENGLISH 7
Compliance with standards
- This Philips appliance complies with all applicable standards and
regulations regarding exposure to electromagnetic elds (EMF) can be
safely cleaned under the tap.
General
- The appliance is equipped with an automatic voltage selector and is
suitable for mains voltages ranging from 100 to 240 volts.
- The adapter transforms 100-240 volts to a safe low voltage of less than
24 volts.
Charging
It takes approx. 1 hour to fully charge the shaver.
When you charge the shaver for the rst time or after a long period of
disuse, let it charge until the white battery lights up continuously.
A fully charged shaver provides up to 60 (PT927CC/PT927/ PT925/PT923/
PT923CC/PT920) or 50 shaving minutes (PT877/PT876/PT875/PT870).
The shaving time may be less than 60(PT927CC/PT927/PT925/PT923/
PT923CC/PT920) or 50 shaving minutes (PT877/PT876/PT875/PT870) as
a result of your shaving behaviour, your cleaning habits or your beard type.
Charge indications
Battery low
- When the battery is almost empty (when there are only 5 or fewer
shaving minutes left), the battery light starts to ash orange.
- When you switch off the shaver, the battery light continues to ash
orange for a few seconds.
Quick charging
- When you start charging the empty battery, the battery light ashes
white and orange.
Note: When the battery light ashes white and orange towards only white, you
can have a quick shave of three minutes.
Charging
- When the shaver is charging, the battery light ashes white.
ENGLISH8
Battery fully charged
- When the battery is fully charged, the battery light lights up white
continuously.
Note: After approx. 30 minutes, the battery light goes out to save energy.
Charging with the adapter
Do not charge the shaver in a closed pouch (PT927CC/PT927/PT925/
PT923CC/PT923/PT920/PT877 only).
1 Put the small plug in the shaver.
2 Put the adapter in the wall socket.
, The battery symbol show the charging status of the shaver (see
section ‘Charge indications’ in this chapter).
Charging in the charging stand (PT927/PT925/PT923/PT920/
PT876/PT875 only)
1 Put the small plug in the charging stand.
2 Put the adapter in the wall socket.
3 Place the shaver in the charging stand.
, The battery symbol show the charging status of the shaver (see
section ‘Charge indications’ in this chapter).
Charging in the Jet Clean System (PT927CC/PT923CC only)
1 Put the small plug in the Jet Clean System.
2 Put the adapter in the wall socket.
3 Place the shaver without protection cap upside down in the shaver
holder.
Note: The shaver cannot be placed in the Jet Clean System when the protection
cap is on the shaving unit.
ENGLISH 9
4 Push down the locking lever completely to lock the shaver into place.
, The battery symbol on the Jet Clean System ashes to indicate that
the shaver is being charged.
Note: When the Jet Clean System is performing the cleaning program, the
battery symbol is out.
, When the battery is fully charged, the battery symbol on the Jet
Clean System lights up continuously.
Note: After approx. 30 minutes, the battery symbol goes out to save energy.
5 To remove the shaver from the Jet Clean System, move the locking
lever upwards until it does not go any further and remove the shaver.
Using the shaver
Note: You can also use the appliance directly from the mains. Simply connect
the shaver to the mains.
Shaving
1 Press the on/off button once to switch on the shaver.
2 Move the shaving heads over your skin. Make circular movements.
- Your skin may need 2 or 3 weeks to get accustomed to the Philips
shaving system.
3 Press the on/off button once to switch off the shaver.
4 Clean the shaver (see chapter ‘Cleaning and maintenance’).
ENGLISH10
Trimming
You can use the trimmer to groom your sideburns and moustache.
1 Press the on/off button once to switch on the shaver.
2 Push the trimmer slide downwards to open the trimmer.
, You can now start trimming.
3 After trimming, close the trimmer and switch off the shaver.
Cleaning and maintenance
Never use compressed air, scouring pads, abrasive cleaning agents or
aggressive liquids such as petrol or acetone to clean the shaver, the
charging stand (PT927/PT925/PT923/PT920/PT876/PT875 only) and the
Jet Clean System (PT927CC/PT923CC only).
- The best and most hygienic way to clean the shaver is in the Jet Clean
System (PT927CC/PT923CC only). You can also rinse the shaver under
the tap or clean it with the cleaning brush supplied.
- Clean the shaver after every shave for optimal shaving performance.
- Regular cleaning guarantees better shaving performance.
- For the best cleaning results, we advise you to use the Philips Cleaning
spray (HQ110) and (PT927CC/PT923CC only) the Jet Clean solution
(HQ200).
- Be careful with hot water. Always check if the water is not too hot, to
prevent your hands from getting burnt.
Note: Water may leak from the socket at the bottom of the shaver when you
rinse it. This is normal and not dangerous because all electronics are enclosed
in a sealed power unit inside the shaver.
ENGLISH 11
Cleaning the shaving unit under the tap
1 Switch off the shaver and disconnect it from the mains.
2 Press the release button to open the shaving unit.
3 Rinse the shaving unit and hair chamber under a hot tap for
30 seconds.
Be careful with hot water. Always check if the water is not too hot, to
prevent your hands from getting burnt.
- Rinse the hair chamber and the inside of the shaving unit.
- Rinse the outside of the shaving unit.
4 Close the shaving unit and shake off excess water.
Be careful not to hit the shaving unit against anything while shaking off
excess water.
Never dry the shaving unit and the hair chamber with a towel or tissue,
as this may damage the shaving heads and the coupling spindles.
5 Open the shaving unit again and leave it open to let the shaver dry
completely.
Cleaning the shaving unit with the cleaning brush
1 Switch off the shaver and disconnect it from the mains.
2 Press the release button to open the shaving unit.
3 Pull the shaving unit off the shaver.
ENGLISH12
4 Turn the lock anticlockwise (A) and remove the retaining frame (B).
5 Remove and clean one shaving head at a time. Each shaving head
consists of a cutter and a guard.
Note: Do not clean more than one cutter and guard at a time, since they are
all matching sets. If you accidentally mix up the cutters and guards, it may take
several weeks before optimal shaving performance is restored.
- Remove the cutter from the shaving guard and clean it with the brush.
- Clean the inside and outside of the shaving guard with the brush.
6 Put the shaving heads back into the shaving unit.
Note: Make sure that the projections of the shaving heads t exactly into the
recesses.
7 Put the retaining frame back into the shaving unit (A)and turn the
lock clockwise (B).
A
ENGLISH 13
8 Insert the lug of the shaving unit into the slot in the top of the shaver.
Then close the shaving unit.
Note: If the shaving unit does not close smoothly, check if you have inserted
the shaving heads properly and if the retaining frame is locked.
Cleaning the shaving unit in the Jet Clean System (PT927CC/
PT923CC only)
The Jet Clean System cleans the shaving unit.
Preparing the Jet Clean System for use
Note: Fill the cleaning chamber before rst use and when the ‘uid low’ symbol
ashes to indicate that the uid level is too low. When the uid level drops
below the minimum level, the cleaning symbol and the ‘uid low’ symbol start
to ash and the shaver holder returns to its starting position
1 Simultaneously press the release buttons on both sides of the
cleaning chamber (A). Then lift the Jet Clean System off the cleaning
chamber (B).
, The cleaning chamber remains behind.
2 Unscrew the cap from the bottle with Jet Clean solution
(HQ200) and remove the airtight seal.
3 Fill the cleaning chamber with Jet Clean solution (HQ200) up to the
MAX indication.
Note: Make sure the cleaning chamber is always lled above the MIN
indication.
4 Place the Jet Clean System back onto the cleaning chamber (‘click’).
Make sure that the release buttons snap back into place.
When the cleaning chamber is lled with Jet Clean solution, do not move
it to prevent leakage.
ENGLISH14
5 Put the small plug in the Jet Clean System and put the adapter in the
wall socket.
, The shaver holder automatically moves to its highest position.
The Jet Clean System is now ready for use.
Using the Jet Clean System
1 Place the shaver without protection cap upside down in the shaver
holder. Push down the locking lever completely to lock the shaver
into place.
, The battery symbol on the Jet Clean System goes on to indicate that
the shaver is being charged.
Note: The shaver cannot be placed in the Jet Clean System when the protection
cap is on the shaving unit.
2 Press the on/off button on the Jet Clean System to start the cleaning
program.
, The battery symbol on the Jet Clean System goes out.
, During the cleaning program, the cleaning symbol starts to ash and
the shaver is automatically lowered into the cleaning uid.
, The shaver automatically switches on and off several times
and moves up and down.
, The cleaning symbol ashes throughout the cleaning program, which
takes approx. 8 minutes.
, After the cleaning program, the battery symbol on the Jet Clean
System goes on to indicate that the shaver is being charged.
Note: If you press the on/off button of the Jet Clean System during the cleaning
program, the program aborts and resets. In this case, the cleaning stops
ashing and the shaver holder returns to its starting position. The shaver may
still be wet and dirty, because the cleaning program has not been nished.
Note: If you remove the adapter from the wall socket during the cleaning
program, the program aborts. The shaver holder remains in its current position.
When you put the adapter back into the wall socket, the shaver holder moves
to its highest position.
Note: When the uid level drops below the minimum level, the cleaning symbol
and the ‘uid low’ symbol start to ash with intervals and the shaver holder
returns to its starting position
ENGLISH 15
Cleaning the Jet Clean System
Empty the cleaning chamber and clean it thoroughly by rinsing it with hot
tap water every 15 days if you use the Jet Clean System daily. Otherwise
empty and clean the cleaning chamber at least once a month.
1 Clean the outside of the Jet Clean System with a moist cloth.
Never immerse the Jet Clean System in water, nor rinse it under the tap.
2 Simultaneously press the release buttons on both sides of the Jet
Clean System (A). Then lift the Jet Clean System off the cleaning
chamber (B).
, The cleaning chamber remains behind.
3 Pour any remaining cleaning uid out of the cleaning chamber.
You can simply pour the cleaning uid down the sink, this is not harmful to
the environment.
4 Rinse the cleaning chamber under a hot tap.
Be careful with hot water. Always check if the water is not too hot, to
prevent your hands from getting burnt.
The cleaning chamber is not dishwasher-proof.
5 Fill the cleaning chamber with Jet Clean solution (HQ200) up to the
MAX indication.
Note: Make sure the cleaning chamber is always lled above the MIN
indication.
6 Place the Jet Clean System back onto the cleaning chamber (‘click’).
Make sure that the release buttons snap back into place.
Cleaning the trimmer with the cleaning brush
Clean the trimmer every time you have used it.
1 Switch off the shaver and disconnect it from the mains.
2 Push the trimmer slide downwards to open the trimmer.
ENGLISH16
3 Clean the trimmer with the short-bristled side of the cleaning brush.
Brush up and down along the trimmer teeth.
4 Close the trimmer (‘ click’).
Tip: For optimal trimming performance, lubricate the trimmer teeth with a drop
of sewing machine oil every six months.
Storage
There are several ways to store the shaver or to take it with you when you
travel:
- Put the protection cap on the shaver after use to prevent damage and
to avoid dirt accumulation in the shaving heads.
- Store the shaver in the pouch supplied (PT927CC/PT927/PT925/
PT923CC/PT923/PT920/PT876 only).
- Store the shaver in the charging stand (PT927/PT923/PT920/PT876/
PT875 only).
- Put the shaver in the Jet Clean System (PT927CC/PT923CC only).
Make sure the protection cap is not on the shaving unit.
Note: If you do not want the shaver to charge while it is stored it in the Jet
Clean System, just leave the locking lever in upright position.
Replacement
For maximum shaving performance, we advise you to replace the shaving
heads every two years.
Replacement reminder
The shaving head symbol will light up to indicate that the shaving heads
need to be replaced. Replace damaged shaving heads right away.
Only replace the shaving heads with original HQ9 Philips Shaving Heads
(PT927CC/PT927/PT925/PT923CC/PT923/PT920) or HQ8 Philips Shaving
Heads (PT877/PT876/PT875/PT870).
1 The shaving head symbol lights up orange continuously.
ENGLISH 17
2 Switch off the shaver. Disconnect the shaver from the mains and
remove it from the Jet Clean System (PT927CC/PT923CC).
3 Press the release button to open the shaving unit.
4 Pull the shaving unit off the shaver.
5 Turn the lock anticlockwise (A) and remove the retaining frame (B).
6 Remove the shaving heads and place new ones in the shaving unit.
Note: Make sure that the projections of the shaving heads t exactly into the
recesses.
7 Put the retaining frame back into the shaving unit (A) and turn the
lock clockwise (B).
8 Insert the lug of the new shaving unit into the slot in the top of the
shaver. Then close the shaving unit.
Note: If the shaving unit does not close smoothly, check if you have inserted
the shaving heads properly and if the retaining frame is locked.
ENGLISH18
9 Press and hold the on/off button for 5 seconds to reset the
replacement reminder on the shaver. The orange light goes out.
Ordering accessories
To retain the top performance of your shaver, make sure you clean it
regularly and replace its shaving heads at the recommended time.
Shaving heads
- We advise you to replace your shaving heads every two years. Always
replace with HQ9 Philips Shaving Heads (PT927CC/PT927/PT925/
PT923CC/PT923/PT920) or HQ8 Philips Shaving Heads (PT877/
PT876/PT875/PT870).
Cleaning
- PT927CC/PT923CC only: use Jet Clean solution (HQ200) for regular
cleaning of the shaving heads.
- Use Cleaning spray (HQ110) to clean the shaving heads thoroughly.
Environment
- Do not throw away the shaver and the Jet Clean System (PT927CC/
PT923CC only) with the normal household waste at the end of their
life, but hand them in at an ofcial collection point for recycling. By
doing this, you help to preserve the environment.
- The built-in rechargeable shaver battery contains substances that
may pollute the environment. Always remove the battery before you
discard or hand in the shaver at an ofcial collection point. Dispose
of the battery at an ofcial collection point for batteries. If you have
trouble removing the battery, you can also take the appliance to a
Philips service centre. The staff of this centre will remove the battery
for you and will dispose of it in an environmentally safe way.
Removing the rechargeable shaver battery
Only remove the rechargeable battery when you discard the shaver. Make
sure the rechargeable battery is completely empty when you remove it.
5 sec.
ENGLISH 19
1 Disconnect the shaver from the mains, remove it from the Jet Clean
System (specic types only) or remove it from the charging stand
(specic types only).
2 Let the shaver operate until it stops.
3 Undo the screws in the back of the shaver and in the hair chamber.
4 Remove the front panel and the back panel.
5 Bend the 6 hooks aside and take out the power unit.
Be careful, the hooks are sharp.
6 Remove the battery.
Be careful, the battery strips are sharp.
Do not put the shaver back into the plugged-in Jet Clean System
(specic types only) or charging stand (specic types only) after you have
removed the rechargeable battery.
Do not connect the shaver to the mains again after you have removed
the rechargeable battery.
Guarantee and support
If you need information or support, please visit www.philips.com/
support or read the worldwide guarantee leaet.
Guarantee restrictions
The shaving heads (cutters and guards) are not covered by the terms of
the international guarantee because they are subject to wear.
Troubleshooting
This chapter summarises the most common problems you could encounter
with the appliance. If you are unable to solve the problem with the
information below, visit www.philips.com/support for a list of frequently
asked questions or contact the Consumer Care Centre in your country.
Problem Possible cause Solution
The shaver does
not shave as well
as it used to.
The Jet Clean System (PT927CC/
PT923CC only) has not cleaned the
shaver properly because the cleaning
uid in the cleaning chamber is soiled
or the cleaning uid level is too low.
Clean the shaver thoroughly before you
continue shaving. If necessary, clean and
rell the cleaning chamber (see chapter
‘Cleaning and maintenance’).
The shaving heads are damaged or
worn.
Replace the shaving heads (see chapter
‘Replacement’).
Long hairs obstruct the shaving heads. Clean the shaving heads one by one (see
section ‘Cleaning the shaving unit with the
cleaning brush’ in chapter ‘Cleaning and
maintenance’).
ENGLISH20
  • Page 1 1
  • Page 2 2
  • Page 3 3
  • Page 4 4
  • Page 5 5
  • Page 6 6
  • Page 7 7
  • Page 8 8
  • Page 9 9
  • Page 10 10
  • Page 11 11
  • Page 12 12
  • Page 13 13
  • Page 14 14
  • Page 15 15
  • Page 16 16
  • Page 17 17
  • Page 18 18
  • Page 19 19
  • Page 20 20
  • Page 21 21
  • Page 22 22
  • Page 23 23
  • Page 24 24
  • Page 25 25
  • Page 26 26
  • Page 27 27
  • Page 28 28
  • Page 29 29
  • Page 30 30
  • Page 31 31
  • Page 32 32
  • Page 33 33
  • Page 34 34
  • Page 35 35
  • Page 36 36
  • Page 37 37
  • Page 38 38
  • Page 39 39
  • Page 40 40
  • Page 41 41
  • Page 42 42
  • Page 43 43
  • Page 44 44
  • Page 45 45
  • Page 46 46
  • Page 47 47
  • Page 48 48
  • Page 49 49
  • Page 50 50
  • Page 51 51
  • Page 52 52
  • Page 53 53
  • Page 54 54
  • Page 55 55
  • Page 56 56
  • Page 57 57
  • Page 58 58
  • Page 59 59
  • Page 60 60
  • Page 61 61
  • Page 62 62
  • Page 63 63
  • Page 64 64
  • Page 65 65
  • Page 66 66
  • Page 67 67
  • Page 68 68
  • Page 69 69
  • Page 70 70
  • Page 71 71
  • Page 72 72
  • Page 73 73
  • Page 74 74
  • Page 75 75
  • Page 76 76
  • Page 77 77
  • Page 78 78
  • Page 79 79
  • Page 80 80
  • Page 81 81
  • Page 82 82
  • Page 83 83
  • Page 84 84
  • Page 85 85
  • Page 86 86
  • Page 87 87
  • Page 88 88
  • Page 89 89
  • Page 90 90
  • Page 91 91
  • Page 92 92
  • Page 93 93
  • Page 94 94
  • Page 95 95
  • Page 96 96
  • Page 97 97
  • Page 98 98
  • Page 99 99
  • Page 100 100
  • Page 101 101
  • Page 102 102
  • Page 103 103
  • Page 104 104
  • Page 105 105
  • Page 106 106
  • Page 107 107
  • Page 108 108
  • Page 109 109
  • Page 110 110
  • Page 111 111
  • Page 112 112
  • Page 113 113
  • Page 114 114
  • Page 115 115
  • Page 116 116
  • Page 117 117
  • Page 118 118
  • Page 119 119
  • Page 120 120
  • Page 121 121
  • Page 122 122
  • Page 123 123
  • Page 124 124
  • Page 125 125
  • Page 126 126
  • Page 127 127
  • Page 128 128
  • Page 129 129
  • Page 130 130
  • Page 131 131
  • Page 132 132
  • Page 133 133
  • Page 134 134
  • Page 135 135
  • Page 136 136
  • Page 137 137
  • Page 138 138
  • Page 139 139
  • Page 140 140
  • Page 141 141
  • Page 142 142
  • Page 143 143
  • Page 144 144
  • Page 145 145
  • Page 146 146
  • Page 147 147
  • Page 148 148
  • Page 149 149
  • Page 150 150
  • Page 151 151
  • Page 152 152
  • Page 153 153
  • Page 154 154
  • Page 155 155
  • Page 156 156
  • Page 157 157
  • Page 158 158
  • Page 159 159
  • Page 160 160
  • Page 161 161
  • Page 162 162
  • Page 163 163
  • Page 164 164
  • Page 165 165
  • Page 166 166
  • Page 167 167
  • Page 168 168
  • Page 169 169
  • Page 170 170
  • Page 171 171
  • Page 172 172
  • Page 173 173
  • Page 174 174
  • Page 175 175
  • Page 176 176
  • Page 177 177
  • Page 178 178
  • Page 179 179
  • Page 180 180
  • Page 181 181
  • Page 182 182
  • Page 183 183
  • Page 184 184
  • Page 185 185
  • Page 186 186
  • Page 187 187
  • Page 188 188
  • Page 189 189
  • Page 190 190
  • Page 191 191
  • Page 192 192
  • Page 193 193
  • Page 194 194
  • Page 195 195
  • Page 196 196
  • Page 197 197
  • Page 198 198
  • Page 199 199
  • Page 200 200
  • Page 201 201
  • Page 202 202
  • Page 203 203
  • Page 204 204
  • Page 205 205
  • Page 206 206
  • Page 207 207
  • Page 208 208
  • Page 209 209
  • Page 210 210
  • Page 211 211
  • Page 212 212
  • Page 213 213
  • Page 214 214
  • Page 215 215
  • Page 216 216
  • Page 217 217
  • Page 218 218
  • Page 219 219
  • Page 220 220
  • Page 221 221
  • Page 222 222
  • Page 223 223
  • Page 224 224
  • Page 225 225
  • Page 226 226
  • Page 227 227
  • Page 228 228
  • Page 229 229
  • Page 230 230
  • Page 231 231
  • Page 232 232
  • Page 233 233
  • Page 234 234
  • Page 235 235
  • Page 236 236
  • Page 237 237
  • Page 238 238
  • Page 239 239
  • Page 240 240
  • Page 241 241
  • Page 242 242
  • Page 243 243
  • Page 244 244
  • Page 245 245
  • Page 246 246
  • Page 247 247
  • Page 248 248
  • Page 249 249
  • Page 250 250
  • Page 251 251
  • Page 252 252
  • Page 253 253
  • Page 254 254
  • Page 255 255
  • Page 256 256
  • Page 257 257
  • Page 258 258
  • Page 259 259
  • Page 260 260
  • Page 261 261
  • Page 262 262
  • Page 263 263
  • Page 264 264
  • Page 265 265
  • Page 266 266
  • Page 267 267
  • Page 268 268
  • Page 269 269
  • Page 270 270
  • Page 271 271
  • Page 272 272
  • Page 273 273
  • Page 274 274
  • Page 275 275
  • Page 276 276
  • Page 277 277
  • Page 278 278

Philips PT870/16 Kasutusjuhend

Kategooria
Meeste pardlid
Tüüp
Kasutusjuhend
See käsiraamat sobib ka